- Redis常见集群技术
长期以来,Redis本身仅支持单实例,内存一般最多10到20GB。这无法支撑大型线上业务系统的需求。而且也造成资源的利用率过低——毕竟现在服务器内存动辄100~200GB。
为解决单机承载能力不足的问题,各大互联网企业纷纷出手,“自助式”地实现了集群机制。在这些非官方集群解决方案中,物理上把数据“分片”(sharding)存储在多个Redis实例,一般情况下,每一“片”是一个Redis实例。
包括官方近期推出的Redis Cluster,Redis集群有三种实现机制,分别介绍如下,希望对大家选型有所帮助。
1.1 客户端分片
这种方案将分片工作放在业务程序端,程序代码根据预先设置的路由规则,直接对多个Redis实例进行分布式访问。这样的好处是,不依赖于第三方分布式中间件,实现方法和代码都自己掌控,可随时调整,不用担心踩到坑。
这实际上是一种静态分片技术。Redis实例的增减,都得手工调整分片程序。基于此分片机制的开源产品,现在仍不多见。
这种分片机制的性能比代理式更好(少了一个中间分发环节)。但缺点是升级麻烦,对研发人员的个人依赖性强——需要有较强的程序开发能力做后盾。如果主力程序员离职,可能新的负责人,会选择重写一遍。
所以,这种方式下,可运维性较差。出现故障,定位和解决都得研发和运维配合着解决,故障时间变长。
这种方案,难以进行标准化运维,不太适合中小公司(除非有足够的DevOPS)。
1.2 代理分片
这种方案,将分片工作交给专门的代理程序来做。代理程序接收到来自业务程序的数据请求,根据路由规则,将这些请求分发给正确的Redis实例并返回给业务程序。
这种机制下,一般会选用第三方代理程序(而不是自己研发),因为后端有多个Redis实例,所以这类程序又称为分布式中间件。
这样的好处是,业务程序不用关心后端Redis实例,运维起来也方便。虽然会因此带来些性能损耗,但对于Redis这种内存读写型应用,相对而言是能容忍的。
这是我们推荐的集群实现方案。像基于该机制的开源产品Twemproxy,便是其中代表之一,应用非常广泛。
1.3 Redis Cluster
在这种机制下,没有中心节点(和代理模式的重要不同之处)。所以,一切开心和不开心的事情,都将基于此而展开。
Redis Cluster将所有Key映射到16384个Slot中,集群中每个Redis实例负责一部分,业务程序通过集成的Redis Cluster客户端进行操作。客户端可以向任一实例发出请求,如果所需数据不在该实例中,则该实例引导客户端自动去对应实例读写数据。
Redis Cluster的成员管理(节点名称、IP、端口、状态、角色)等,都通过节点之间两两通讯,定期交换并更新。
由此可见,这是一种非常“重”的方案。已经不是Redis单实例的“简单、可依赖”了。可能这也是延期多年之后,才近期发布的原因之一。
这令人想起一段历史。因为Memcache不支持持久化,所以有人写了一个Membase,后来改名叫Couchbase,说是支持Auto Rebalance,好几年了,至今都没多少家公司在使用。
这是个令人忧心忡忡的方案。为解决仲裁等集群管理的问题,Oracle RAC还会使用存储设备的一块空间。而Redis Cluster,是一种完全的去中心化……
- Codis实践
Codis由豌豆荚于2014年11月开源,基于Go和C开发,是近期涌现的、国人开发的优秀开源软件之一。现已广泛用于豌豆荚的各种Redis业务场景(已得到豌豆荚@刘奇同学的确认,呵呵)。
从3个月的各种压力测试来看,稳定性符合高效运维的要求。性能更是改善很多,最初比Twemproxy慢20%;现在比Twemproxy快近100%(条件:多实例,一般Value长度)。
3.1 体系架构
Codis引入了Group的概念,每个Group包括1个Redis Master及至少1个Redis Slave,这是和Twemproxy的区别之一。这样做的好处是,如果当前Master有问题,则运维人员可通过Dashboard“自助式”切换到Slave,而不需要小心翼翼地修改程序配置文件。
为支持数据热迁移(Auto Rebalance),出品方修改了Redis Server源码,并称之为Codis Server。
Codis采用预先分片(Pre-Sharding)机制,事先规定好了,分成1024个slots(也就是说,最多能支持后端1024个Codis Server),这些路由信息保存在ZooKeeper中。ZooKeeper还维护Codis Server Group信息,并提供分布式锁等服务。
Codis 由四部分组成:
Codis Proxy (codis-proxy)
codis-proxy 是客户端连接的 Redis 代理服务, codis-proxy 本身实现了 Redis 协议, 表现得和一个原生的 Redis 没什么区别 (就像 Twemproxy), 对于一个业务来说, 可以部署多个 codis-proxy, codis-proxy 本身是无状态的.
Codis Manager (codis-config)
codis-config 是 Codis 的管理工具, 支持包括, 添加/删除 Redis 节点, 添加/删除 Proxy 节点, 发起数据迁移等操作. codis-config 本身还自带了一个 http server, 会启动一个 dashboard, 用户可以直接在浏览器上观察 Codis 集群的运行状态.
Codis Redis (codis-server)
codis-server 是 Codis 项目维护的一个 Redis 分支, 基于 2.8.13 开发, 加入了 slot 的支持和原子的数据迁移指令. Codis 上层的 codis-proxy 和 codis-config 只能和这个版本的 Redis 交互才能正常运行.
ZooKeeper
Codis 依赖 ZooKeeper 来存放数据路由表和 codis-proxy 节点的元信息, codis-config 发起的命令都会通过 ZooKeeper 同步到各个存活的 codis-proxy.
如果希望有更简单的访问方式和更高的稳定性:可以使用搭建HAProxy,但是会进一步增加延迟。

实验环境:
centos7.3 主机一台
软件:go1.7rc3.linux-amd64.tar codis-release3.2 zookeeper-3.4.6.tar jdk-8u131-linux-x64.tar
步骤1:安装golang ,codis是基于golang语言开发。
codis-proxy相当于redis,即连接codis-proxy和连接redis是没有任何区别的,codis-proxy无状态,不负责记录是否在哪保存,数据在zookeeper记录,即codis proxy向zookeeper查询key的记录位置,proxy 将请求转发到一个组进行处理,一个组里面有一个master和一个或者多个slave组成,默认有1024个槽位,redis cluster 默认有16384个槽位,其把不同的槽位的内容放在不通的group。
部署环境:3台服务器
[root@localhost ~]#yum install -y gcc glibc gcc-c++ make git #安装需要的依赖包
[root@localhost ~]#tar xvf go1.7rc3.linux-amd64.tar
[root@localhost ~]#mv  go1.7rc3.linux-amd64.tar.gz /root/
[root@localhost ~]#mv go/ /usr/local/
[root@localhost ~]#mkdir /usr/local/go/work
[root@localhost ~]#vim /etc/profile.d/env.sh
export PATH=$PATH:/usr/local/go/bin
export GOROOT=/usr/local/go
export GOPATH=/usr/local/go/work
path=$PATH:$HOME/bin:$GOROOT/bin:$GOPATH/bin
[root@localhost ~]#. /etc/profile.d/env.sh #生效环境变量
[root@localhost ~]# echo $GOPATH
/usr/local/go/work
[root@localhost ~]# go version
go version go1.7rc3 linux/amd64
codis的环境已搭建好
每台服务器安装java环境和zookeeper,zookeeper集群最少需要3台服务器,推荐5台,因为zookeeper是基于java开发的:
[root@localhost ~]#tar zxf jdk-8u131-linux-x64.tar.gz
[root@localhost ~]#mv jdk1.8.0_131/ /usr/local/
[root@localhost ~]#vim /etc/profile.d/jdk.sh
export JAVA_HOME=/usr/local/jdk1.8.0_131
export PATH=$JAVA_HOME/bin:$PATH
[root@localhost ~]#./etc/profile.d/jdk.sh
[root@localhost ~]# java -version
java version "1.8.0_131"
Java(TM) SE Runtime Environment (build 1.8.0_131-b11)
Java HotSpot(TM) 64-Bit Server VM (build 25.131-b11, mixed mode)
[root@localhost ~]# echo $JAVA_HOME
/usr/local/jdk1.8.0_131
[root@localhost ~]# tar zxf zookeeper-3.4.6.tar.gz
[root@localhost ~]# mv zookeeper-3.4.6 /usr/local/
[root@localhost ~]#ln -sv /usr/local/zookeeper-3.4.6/ /usr/local/zookeeper
‘/usr/local/zookeeper’ -> ‘/usr/local/zookeeper-3.4.6/’

[root@localhost ~]#cp /opt/
[root@localhost ~]#mkdir zk1 zk2 zk3
#准备zookeeper 服务ID,每个服务器的ID是不同的
[root@localhost opt]# ll
total 20
drwxr-xr-x. 3 root root    78 Sep 17 22:21 zk1
drwxr-xr-x. 3 root root    78 Sep 17 22:23 zk2
drwxr-xr-x. 3 root root    78 Sep 17 22:24 zk3
[root@localhost opt]#echo 1 > zk1/myid
[root@localhost opt]#echo 2 > zk2/myid
[root@localhost opt]#echo 3 > zk3/myid
[root@localhost opt]#cp /usr/local/zookeeper-3.4.6/conf/zoo_sample.cfg /opt/zk1/zk1.cfg
步骤二:
配置三个zookeeper节点的配置文件,一下为节点1
[root@localhost opt]#cat /opt/zk1/zk1.cfg
# The number of milliseconds of each tick
tickTime=6000
# The number of ticks that the initial
# synchronization phase can take
initLimit=10
# The number of ticks that can pass between
# sending a request and getting an acknowledgement
syncLimit=10
# the directory where the snapshot is stored.
# do not use /tmp for storage, /tmp here is just
# example sakes.
dataDir=/opt/zk1
# the port at which the clients will connect
clientPort=2181
# the maximum number of client connections.
# increase this if you need to handle more clients
#maxClientCnxns=60
server.1=192.168.100.201:2887:3887
server.2=192.168.100.201:2888:3888
server.3=192.168.100.201:2889:3889
#
# Be sure to read the maintenance section of the
# administrator guide before turning on autopurge.
#
# http://zookeeper.apache.org/doc/current/zookeeperAdmin.html#sc_maintenance
#
# The number of snapshots to retain in dataDir
#autopurge.snapRetainCount=3
# Purge task interval in hours
# Set to "0" to disable auto purge feature
#autopurge.purgeInterval=1
节点2:
[root@localhost opt]#cat /opt/zk2/zk2.cfg
# The number of milliseconds of each tick
tickTime=6000
# The number of ticks that the initial
# synchronization phase can take
initLimit=20
# The number of ticks that can pass between
# sending a request and getting an acknowledgement
syncLimit=10
# the directory where the snapshot is stored.
# do not use /tmp for storage, /tmp here is just
# example sakes.
dataDir=/opt/zk2
# the port at which the clients will connect
clientPort=2182
# the maximum number of client connections.
# increase this if you need to handle more clients
#maxClientCnxns=60
server.1=192.168.100.201:2887:3887
server.2=192.168.100.201:2888:3888
server.3=192.168.100.201:2889:3889
#
# Be sure to read the maintenance section of the
# administrator guide before turning on autopurge.
#
# http://zookeeper.apache.org/doc/current/zookeeperAdmin.html#sc_maintenance
#
# The number of snapshots to retain in dataDir
#autopurge.snapRetainCount=3
# Purge task interval in hours
# Set to "0" to disable auto purge feature
#autopurge.purgeInterval=1
节点3
[root@localhost opt]#cat /opt/zk3/zk3.cfg
# The number of milliseconds of each tick
tickTime=6000
# The number of ticks that the initial
# synchronization phase can take
initLimit=20
# The number of ticks that can pass between
# sending a request and getting an acknowledgement
syncLimit=10
# the directory where the snapshot is stored.
# do not use /tmp for storage, /tmp here is just
# example sakes.
dataDir=/opt/zk3
# the port at which the clients will connect
clientPort=2183
# the maximum number of client connections.
# increase this if you need to handle more clients
#maxClientCnxns=60
server.1=192.168.100.201:2887:3887
server.2=192.168.100.201:2888:3888
server.3=192.168.100.201:2889:3889
#
# Be sure to read the maintenance section of the
# administrator guide before turning on autopurge.
#
# http://zookeeper.apache.org/doc/current/zookeeperAdmin.html#sc_maintenance
#
# The number of snapshots to retain in dataDir
#autopurge.snapRetainCount=3
# Purge task interval in hours
# Set to "0" to disable auto purge feature
#autopurge.purgeInterval=1
参数解析
tickTime:这个时间是作为 Zookeeper 服务器之间或客户端与服务器之间维持心跳的时间间隔,也就是每个 tickTime 时间就会发送一个心跳。
dataDir:顾名思义就是 Zookeeper 保存数据的目录,默认情况下,Zookeeper 将写数据的日志文件也保存在这个目录里。
clientPort:这个端口就是客户端连接 Zookeeper 服务器的端口,Zookeeper 会监听这个端口,接受客户端的访问请求。
initLimit:这个配置项是用来配置 Zookeeper 接受客户端(这里所说的客户端不是用户连接 Zookeeper 服务器的客户端,而是 Zookeeper 服务器集群中连接到 Leader 的 Follower 服务器)初始化连接时最长能忍受多少个心跳时间间隔数。当已经超过 5个心跳的时间(也就是 tickTime)长度后 Zookeeper 服务器还没有收到客户端的返回信息,那么表明这个客户端连接失败。总的时间长度就是 10*6000=60 秒
syncLimit:这个配置项标识 Leader 与 Follower 之间发送消息,请求和应答时间长度,最长不能超过多少个 tickTime 的时间长度,总的时间长度就是 5*6000=30 秒
server.A=B:C:D:其中 A 是一个数字,表示这个是第几号服务器;B 是这个服务器的 ip 地址;C 表示的是这个服务器与集群中的 Leader 服务器交换信息的端口;D 表示的是万一集群中的 Leader 服务器挂了,需要一个端口来重新进行选举,选出一个新的 Leader,而这个端口就是用来执行选举时服务器相互通信的端口。如果是伪集群的配置方式,由于 B 都是一样,所以不同的 Zookeeper 实例通信端口号不能一样,所以要给它们分配不同的端口号。
[root@localhost ~]# /usr/local/zookeeper/bin/zkServer.sh start /opt/zk1/zk1.cfg
/usr/local/zookeeper/bin/zkServer.sh start /opt/zk2/zk2.cfg
/usr/local/zookeeper/bin/zkServer.sh start /opt/zk3/zk3.cfg
[root@localhost opt]# ss -tnlp|grep 218*
LISTEN     0      128         :::18080                   :::*                   users:(("codis-dashboard",pid=9721,fd=6))
LISTEN     0      50          :::2181                    :::*                   users:(("java",pid=2267,fd=23))
LISTEN     0      50          :::2182                    :::*                   users:(("java",pid=2552,fd=23))
LISTEN     0      50          :::2183                    :::*                   users:(("java",pid=2594,fd=23))
查看各节点的zookeeper的状态信息
[root@localhost ~]# /usr/local/zookeeper/bin/zkServer.sh status /opt/zk1/zk1.cfg
JMX enabled by default
Using config: /opt/zk1/zk1.cfg
Mode: follower
[root@localhost ~]# /usr/local/zookeeper/bin/zkServer.sh status /opt/zk2/zk2.cfg
JMX enabled by default
Using config: /opt/zk2/zk2.cfg
Mode: leader
[root@localhost ~]# /usr/local/zookeeper/bin/zkServer.sh status /opt/zk3/zk3.cfg
JMX enabled by default
Using config: /opt/zk3/zk3.cfg
Mode: follower
步骤三:
安装codis3.2
[root@localhost ~]# mkdir -p $GOPATH/src/github.com/CodisLabs
[root@localhost ~]#cd /usr/local/go/work/src/github.com/CodisLabs
[root@localhost codis]#  yum install autoconf automake libtool -y #安装编译过程中依赖的包,否则会编译失败。
[root@localhost CodisLabs]# unzip codis-release3.2.zip
[root@localhost CodisLabs]#mv unzip codis-release3.2.zip  codis
[root@localhost CodisLabs]#cd codis
[root@localhost codis]#make
[root@localhost codis]#make gotest # 测试是否成功
go test ./cmd/... ./pkg/...
? github.com/CodisLabs/codis/cmd/admin    [no test files]
? github.com/CodisLabs/codis/cmd/dashboard    [no test files]
? github.com/CodisLabs/codis/cmd/fe    [no test files]
? github.com/CodisLabs/codis/cmd/proxy    [no test files]
? github.com/CodisLabs/codis/pkg/models    [no test files]
? github.com/CodisLabs/codis/pkg/models/etcd    [no test files]
? github.com/CodisLabs/codis/pkg/models/fs    [no test files]
? github.com/CodisLabs/codis/pkg/models/zk    [no test files]
ok github.com/CodisLabs/codis/pkg/proxy    2.525s
ok github.com/CodisLabs/codis/pkg/proxy/redis    0.530s
ok github.com/CodisLabs/codis/pkg/topom    6.560s
ok github.com/CodisLabs/codis/pkg/utils    0.009s
? github.com/CodisLabs/codis/pkg/utils/assert    [no test files]
ok github.com/CodisLabs/codis/pkg/utils/bufio2    0.006s
ok github.com/CodisLabs/codis/pkg/utils/bytesize    0.004s
? github.com/CodisLabs/codis/pkg/utils/errors    [no test files]
? github.com/CodisLabs/codis/pkg/utils/log    [no test files]
ok github.com/CodisLabs/codis/pkg/utils/math2    0.002s
? github.com/CodisLabs/codis/pkg/utils/redis    [no test files]
? github.com/CodisLabs/codis/pkg/utils/rpc    [no test files]
? github.com/CodisLabs/codis/pkg/utils/sync2    [no test files]
? github.com/CodisLabs/codis/pkg/utils/sync2/atomic2    [no test files]
ok github.com/CodisLabs/codis/pkg/utils/timesize    0.009s
? github.com/CodisLabs/codis/pkg/utils/trace    [no test files]
ok github.com/CodisLabs/codis/pkg/utils/unsafe2    0.003s
默认启动的会读取config目录的dashboard.toml文件,编辑如下:vim /usr/local/go/work/src/github.com/CodisLabs/codis/config/dashboard.toml
[root@localhost config]#vim dashboard.toml

##################################################
#                                                #
#                  Codis-Dashboard               #
#                                                #
##################################################

# Set Coordinator, only accept "zookeeper" & "etcd" & "filesystem".
# Quick Start
coordinator_name = "zookeeper"
coordinator_addr = "192.168.100.201:2181,192.168.100.201:2182,192.168.100.201:2183"
#coordinator_name = "zookeeper"
#coordinator_addr = "127.0.0.1:2181"

# Set Codis Product Name/Auth.
product_name = "codis-demo"
product_auth = ""

# Set bind address for admin(rpc), tcp only.
admin_addr = "0.0.0.0:18080"

# Set arguments for data migration (only accept 'sync' & 'semi-async').
migration_method = "semi-async"
migration_parallel_slots = 100
migration_async_maxbulks = 200
migration_async_maxbytes = "32mb"
migration_async_numkeys = 500
migration_timeout = "30s"

# Set configs for redis sentinel.
sentinel_client_timeout = "10s"
sentinel_quorum = 2
sentinel_parallel_syncs = 1
sentinel_down_after = "30s"
sentinel_failover_timeout = "5m"
sentinel_notification_script = ""
sentinel_client_reconfig_script = ""
启动dashboard:
[root@localhost codis]# nohup ./bin/codis-dashboard --ncpu=1 --config=config/dashboard.toml --log=dashboard.log --log-level=WARN >> /var/log/codis_dashboard.log &
默认配置文件获取方式:./bin/codis-dashboard --default-config | tee dashboard.toml
启动代理
[root@localhost codis]#nohup ./bin/codis-proxy --ncpu=1 --config=config/proxy.toml --log=proxy.log --log-level=WARN >> /var/log/codis_proxy.log &
[root@localhost config]# vim proxy.toml

##################################################
#                                                #
#                  Codis-Proxy                   #
#                                                #
##################################################

# Set Codis Product Name/Auth.
product_name = "codis-demo" #管理界面的名称
product_auth = "123456" #认证密码

# Set auth for client session
#   1. product_auth is used for auth validation among codis-dashboard,
#      codis-proxy and codis-server.
#   2. session_auth is different from product_auth, it requires clients
#      to issue AUTH  before processing any other commands.
session_auth = ""

# Set bind address for admin(rpc), tcp only.
admin_addr = "0.0.0.0:11080"

# Set bind address for proxy, proto_type can be "tcp", "tcp4", "tcp6", "unix" or "unixpacket".
proto_type = "tcp4"
proxy_addr = "0.0.0.0:19000"

# Set jodis address & session timeout
#   1. jodis_name is short for jodis_coordinator_name, only accept "zookeeper" & "etcd".
#   2. jodis_addr is short for jodis_coordinator_addr
#   3. proxy will be registered as node:
#        if jodis_compatible = true (not suggested):
#          /zk/codis/db_{PRODUCT_NAME}/proxy-{HASHID} (compatible with Codis2.0)
#        or else
#          /jodis/{PRODUCT_NAME}/proxy-{HASHID}
jodis_name = "zookeeper"
jodis_addr = "192.168.100.201:2181,192.168.100.201:2182,192.168.100.201:2183" #zookeeper的地址
jodis_timeout = "20s"
jodis_compatible = true #false改成trun

# Set datacenter of proxy.
proxy_datacenter = ""

# Set max number of alive sessions.
proxy_max_clients = 1000

# Set max offheap memory size. (0 to disable)
proxy_max_offheap_size = "1024mb"

# Set heap placeholder to reduce GC frequency.
proxy_heap_placeholder = "256mb"

# Proxy will ping backend redis (and clear 'MASTERDOWN' state) in a predefined interval. (0 to disable)
backend_ping_period = "5s"

# Set backend recv buffer size & timeout.
backend_recv_bufsize = "128kb"
backend_recv_timeout = "30s"

# Set backend send buffer & timeout.
backend_send_bufsize = "128kb"
backend_send_timeout = "30s"

# Set backend pipeline buffer size.
backend_max_pipeline = 20480

# Set backend never read replica groups, default is false
backend_primary_only = false

# Set backend parallel connections per server
backend_primary_parallel = 1
backend_replica_parallel = 1

# Set backend tcp keepalive period. (0 to disable)
backend_keepalive_period = "75s"

# Set number of databases of backend.
backend_number_databases = 16

# If there is no request from client for a long time, the connection will be closed. (0 to disable)
# Set session recv buffer size & timeout.
session_recv_bufsize = "128kb"
session_recv_timeout = "30m"

# Set session send buffer size & timeout.
session_send_bufsize = "64kb"
session_send_timeout = "30s"

# Make sure this is higher than the max number of requests for each pipeline request, or your client may be blocked.
# Set session pipeline buffer size.
session_max_pipeline = 10000

# Set session tcp keepalive period. (0 to disable)
session_keepalive_period = "75s"

# Set session to be sensitive to failures. Default is false, instead of closing socket, proxy will send an error response to client.
session_break_on_failure = false

# Set metrics server (such as http://localhost:28000), proxy will report json formatted metrics to specified server in a predefined period.
metrics_report_server = ""
metrics_report_period = "1s"

# Set influxdb server (such as http://localhost:8086), proxy will report metrics to influxdb.
metrics_report_influxdb_server = ""
metrics_report_influxdb_period = "1s"
metrics_report_influxdb_username = ""
metrics_report_influxdb_password = ""
metrics_report_influxdb_database = ""

# Set statsd server (such as localhost:8125), proxy will report metrics to statsd.
metrics_report_statsd_server = ""
metrics_report_statsd_period = "1s"
metrics_report_statsd_prefix = ""
添加管理接口:
./bin/codis-admin --dashboard=192.168.100.201:18080 --create-proxy -x 192.168.100.201:11080
步骤四:启动codis-server,即创建redis实例(此处我们创建4个redis实例,给予codis修改过的redis-3.2.8非原生redis)
[root@localhost~]#  mkdir -pv /var/lib/redis_638{1..4}
mkdir: created directory ‘/var/lib/redis_6381’
mkdir: created directory ‘/var/lib/redis_6382’
mkdir: created directory ‘/var/lib/redis_6383’
mkdir: created directory ‘/var/lib/redis_6384’
[root@localhost ~]# pwd
/usr/local/go/work/src/github.com/CodisLabs/codis/extern/redis-3.2.8
[root@localhost ~ redis-3.2.8]# cp redis.conf /usr/local/go/work/src/github.com/CodisLabs/codis/
[root@localhost ~ redis-3.2.8]## cd /usr/local/go/work/src/github.com/CodisLabs/codis/
修改redis.conf
pidfile /var/run/redis_6381.pid
port 6381
dbfilename dump_6381.rdb
dir /var/lib/redis_6381
logfile "/tmp/redis_6381.log"
maxmemory 1g #一定要设置最大内存,否则后面的codis无法使用
[root@node1 codis]# cp redis.conf redis_6381.conf
[root@localhost codis]# cp redis_6381.conf redis_6382.conf
[root@localhost codis]# cp redis_6381.conf redis_6383.conf
[root@localhost codis]# cp redis_6381.conf redis_6384.conf
[root@localhost codis]# sed -i 's/6381/6382/g' redis_6382.conf
[root@localhost codis]# sed -i 's/6381/6383/g' redis_6383.conf
[root@localhost codis]# sed -i 's/6381/6384/g' redis_6384.conf
通过codis-server指定redis.conf文件启动redis服务,不能通过redis命令启动redis服务,通过redis启动的redis 服务加到codis集群无法正常使用:
[root@localhost codis]# ./bin/codis-server ./redis_6381.conf
[root@localhost codis]# ./bin/codis-server ./redis_6382.conf
[root@localhost codis]# ./bin/codis-server ./redis_6383.conf
[root@localhost codis]# ./bin/codis-server ./redis_6384.conf
验证是否成功
[root@localhost codis]# ss -tnlp|grep 638*
LISTEN     0      128          *:6381                     *:*                   users:(("codis-server",pid=9850,fd=4))
LISTEN     0      128          *:6382                     *:*                   users:(("codis-server",pid=9855,fd=4))
LISTEN     0      128          *:6383                     *:*                   users:(("codis-server",pid=9861,fd=4))
LISTEN     0      128          *:6384                     *:*                   users:(("codis-server",pid=9866,fd=4))
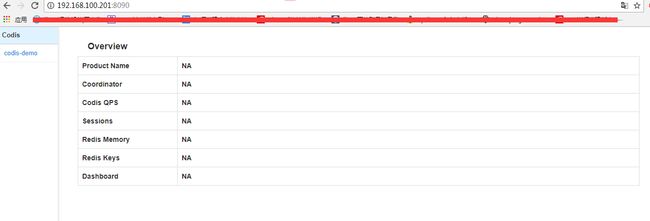
启动codis-fe,Listen监听端口不要为8080,指定8090
[root@localhost codis]#nohup ./bin/codis-fe --ncpu=1 --log=fe.log --log-level=WARN --zookeeper=192.168.3.198:2181 --listen=192.168.3.198:8090 &
通过网页访问:http://192.168.100.201:8090 可以看到codis的管理页面