自动布局就要进行约束,约束就是为了适配不同尺寸大小的屏幕而对视图添加一定的条件,约束分手写和StoryBoard进行约束,当然也可以混合使用,在StoryBoard里面不容易进行约束的可以把相关的控件关联到代码中作为属性在进行约束
StoryBoard版约束
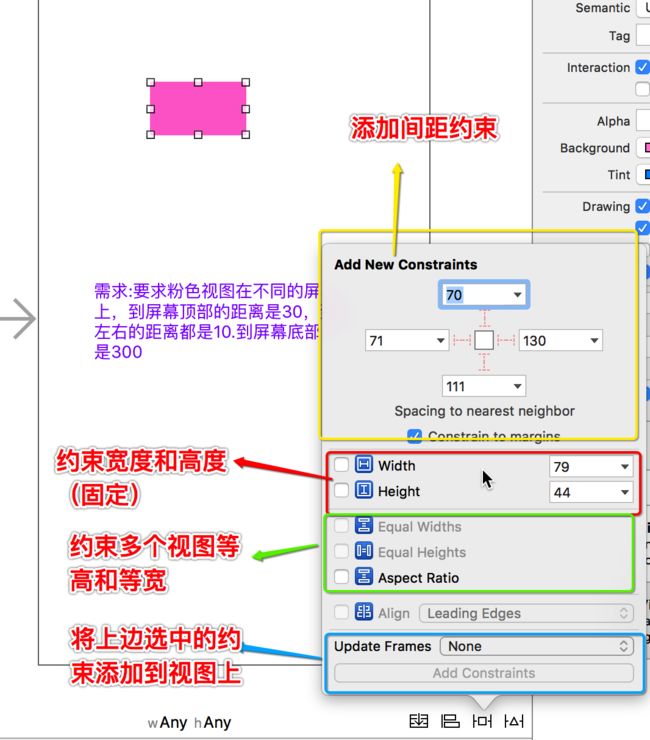
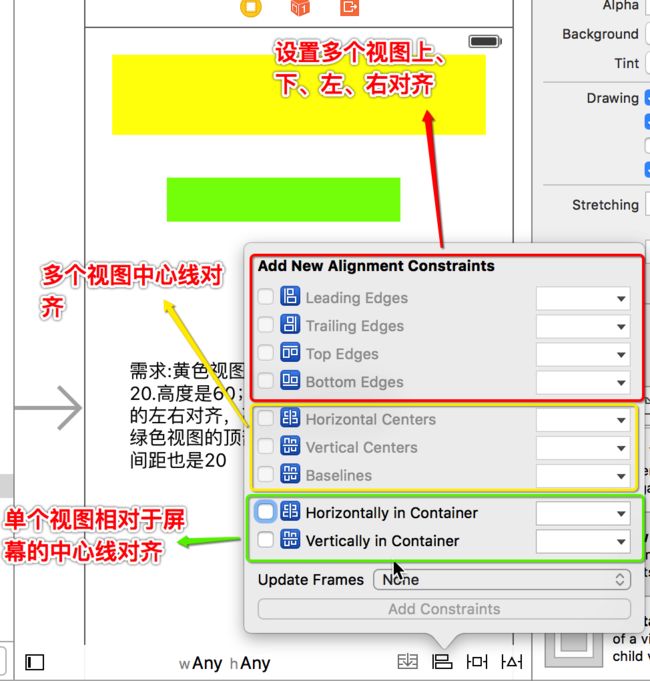
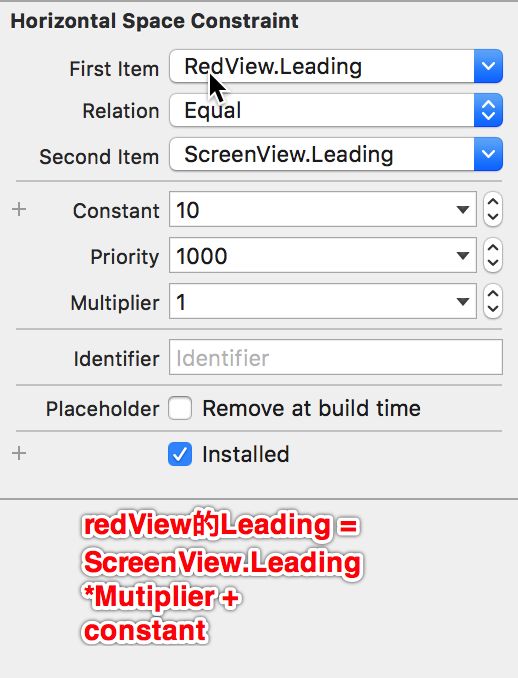
StoryBoard版约束是看不了代码的,所以就用几张图片说明可视化操作中某些区域的功能
当然还有其他的区域,比如合并和清除或者更新约束等,不多讲
给StoryBoard版约束添加动画
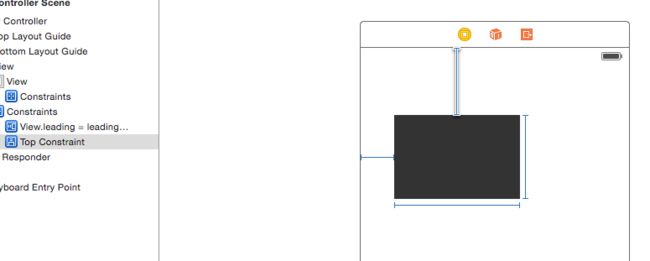
给StoryBoard版约束添加动画实质是动态改变约束的值,将约束条件关联代码成为属性,再用动画的方式动态改变约束值,下面的例子是在点击屏幕的时候,黑色视图到顶部的距离和自己的宽度动态增加,我们看到的效果是黑色视图向右下方移动并且宽度增加
手写约束
原生的手写约束有点繁杂,所以一般会利用第三方库进行手写约束
原生手写约束
import UIKit

class ViewController: UIViewController {

    override func viewDidLoad() {
        super.viewDidLoad()
        //手写约束步骤:必须按步骤手写
        //1.创建视图对象,不需要设置frame
        let redView = UIView()
        redView.backgroundColor = UIColor.redColor()
        //2.将视图添加到界面
        self.view.addSubview(redView)
        //3.关闭Autoresizing
        redView.translatesAutoresizingMaskIntoConstraints = false
        //4.创建约束对象
        //a.top
        //参数1的参数2
        //参数3
        //(参数4的参数5)* 参数6 + 参数7
        //redView.top = (self.view.top) * 1 + 50
        let topConstraint = NSLayoutConstraint(item: redView, attribute: .Top, relatedBy: .Equal, toItem: self.view, attribute: .Top, multiplier: 1, constant: 50)
        //b.left
        let leftConstraint = NSLayoutConstraint(item: redView, attribute: .Left, relatedBy: .Equal, toItem: self.view, attribute: .Left, multiplier: 1, constant: 50)
        //c.right
        let rightConstraint = NSLayoutConstraint(item: redView, attribute: .Right, relatedBy: .Equal, toItem: self.view, attribute: .Right, multiplier: 1, constant: -50)
        //d.bottom
        let bottomConstraint = NSLayoutConstraint(item: redView, attribute: .Bottom, relatedBy: .Equal, toItem: self.view, attribute: .Bottom, multiplier: 1, constant: -200)
        //5.添加约束(注意添加的约束的对象)
        self.view.addConstraints([topConstraint,leftConstraint,rightConstraint,bottomConstraint])

        //再添加一个绿色视图
        //1.创建视图对象
        let greenView = UIView()
        greenView.backgroundColor = UIColor.greenColor()
        //2.添加到界面
        self.view.addSubview(greenView)
        //3.关闭Autoresizing
        greenView.translatesAutoresizingMaskIntoConstraints = false
        //4.创建约束
        //a.left
        //left与redView相等
        let left = NSLayoutConstraint(item: greenView, attribute: .Left, relatedBy: .Equal, toItem: redView, attribute: .Left, multiplier: 1, constant: 0)
        //b.top
        //top与RedView的底部间距30
        let top = NSLayoutConstraint(item: greenView, attribute: .Top, relatedBy: .Equal, toItem: redView, attribute: .Bottom, multiplier: 1, constant: 30)
        //c.width
        //是Redview的width的一半
        let width = NSLayoutConstraint(item: greenView, attribute: .Width, relatedBy: .Equal, toItem: redView, attribute: .Width, multiplier: 0.5, constant: 0)
        //d.height
        //高度设置为固定60
        let height = NSLayoutConstraint(item: greenView, attribute: .Height, relatedBy: .Equal, toItem: nil, attribute: .Height, multiplier: 0, constant: 60)
        //5.添加约束
        self.view.addConstraints([left,top,width])
        greenView.addConstraint(height)

        //注意:通过添加的约束必须能够确定视图的坐标和大小
    }
}
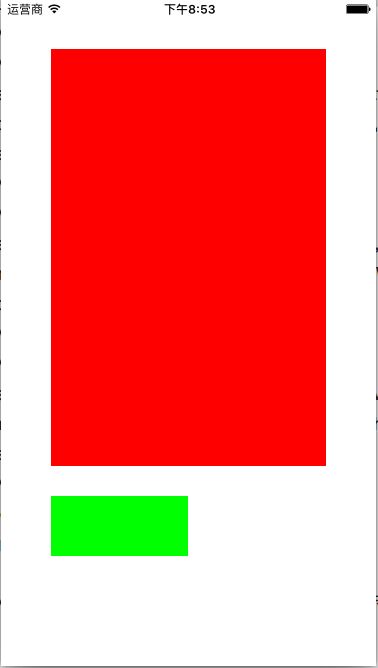
效果:
利用Swift第三方库snapKit手写约束
- 示例1
import UIKit
//将第三方库文件包含
//SnapKit能够简便的通过代码添加约束,用法和Masonry相同
import SnapKit

class ViewController: UIViewController {

    override func viewDidLoad() {
        super.viewDidLoad()
        //1.创建对象
        let redView = UIView()
        redView.backgroundColor = UIColor.redColor()
        //2.添加到界面
        self.view.addSubview(redView)
        //3.添加约束
        //参数:make指的就是当前的视图(redView)
        redView.snp_makeConstraints { (make) in
            //left
            //redView的left等于self的view的left偏移20
            make.left.equalTo(self.view.snp_left).offset(20)
            //top
            make.top.equalTo(self.view.snp_top).offset(20)
            //right
            make.right.equalTo(self.view.snp_right).offset(-20)
            //bottom
            make.bottom.equalTo(self.view.snp_bottom).offset(-250)
        }

        //创建另一个greenView对象
        let greenView = UIView()
        greenView.backgroundColor = UIColor.greenColor()
        self.view.addSubview(greenView)
        greenView.snp_makeConstraints { (make) in
            //greenView的left等于redView的left
            //如果前后属性是一样的,那么后面的属性名可以省略
            make.left.equalTo(redView)
            make.top.equalTo(redView.snp_bottom).offset(20)
            //greenView的宽度是redView宽度*0.5
            make.width.equalTo(redView).multipliedBy(0.5)
            //greenView的高度固定60
            make.height.equalTo(60)
        }
    }
}
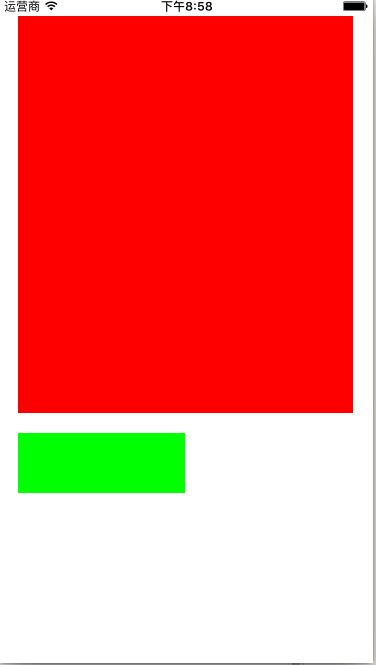
效果:
- 示例2
import UIKit
import SnapKit

class ViewController: UIViewController {

    override func viewDidLoad() {
        super.viewDidLoad()

        //1.创建视图
        let redView = UIView()
        let greenView  = UIView()
        let blueView = UIView()

        //2.设置背景颜色
        redView.backgroundColor = UIColor.redColor()
        greenView.backgroundColor = UIColor.greenColor()
        blueView.backgroundColor = UIColor.blueColor()

        //3.添加到界面上
        self.view.addSubview(redView)
        self.view.addSubview(greenView)
        self.view.addSubview(blueView)

        let margin: CGFloat = 20

        //4.添加约束
        //a.绿色视图
        greenView.snp_makeConstraints { (make) in
            make.left.equalTo(self.view).offset(margin)
            make.top.equalTo(self.view).offset(margin)
            make.right.equalTo(redView.snp_left).offset(-margin)
            make.bottom.equalTo(blueView.snp_top).offset(-margin)
            make.height.equalTo(redView)
            make.height.equalTo(blueView)
            make.width.equalTo(redView)
        }

        //b.红色视图
        redView.snp_makeConstraints { (make) in
            make.left.equalTo(greenView.snp_right).offset(margin)
            make.top.equalTo(self.view).offset(margin)
            make.right.equalTo(self.view).offset(-margin)
            make.bottom.equalTo(blueView.snp_top).offset(-margin)
            make.height.equalTo(greenView)
            make.height.equalTo(blueView)
            make.width.equalTo(greenView)
        }

        //c.蓝色视图
        blueView.snp_makeConstraints { (make) in
            make.left.equalTo(greenView)
            make.right.equalTo(redView)
            make.top.equalTo(greenView.snp_bottom).offset(margin)
            make.bottom.equalTo(self.view).offset(-margin)
            make.height.equalTo(greenView)
        }
    }
}
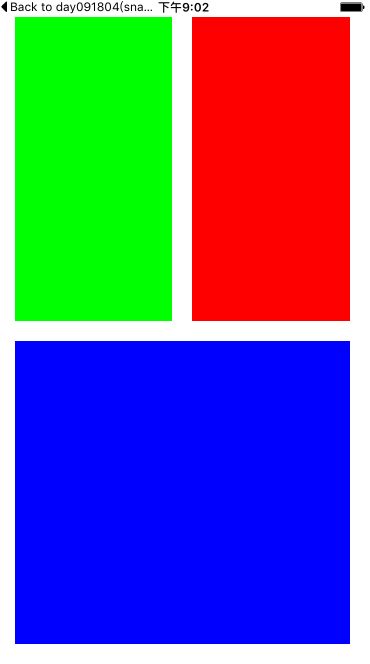
效果:
