一. gogs集成包下载:
1.下载gogs 安装包;
2.上传gogs_**.tar.gz文件到linux服务器上
scp /path/filename username@servername: /path/
3. 解压文件
tar zxvf gogs_**.tar.gz.tar.gz
二.配置app.ini文件
创建 custom/conf/app.ini文件 详情参考配置手册
liunx 移动文件操作
Linux下移动命令是mv(move的缩写),可以用来移动文件或者将文件改名。
命令格式:
mv [选项] 源文件或目录 目标文件或目录
命令参数:
-b :若需覆盖文件,则覆盖前先行备份;
-f :force 强制的意思,如果目标文件已经存在,不会询问而直接覆盖;
-i :若目标文件 (destination) 已经存在时,就会询问是否覆盖;
-u :若目标文件已经存在,且 source 比较新,才会更新(update)。
命令实例:
将文件log1.txt,log2.txt,log3.txt移动到目录test3中
[root@localhost test]# mv log1.txt log2.txt log3.txt test3
[root@localhost test]# cd test3/
[root@localhost test3]# ll
三.安装git
1. 下载 git
使用默认配置进行安装,如果想修改配置,可以使用 ./configure --help 来获取帮助
$ ./configure
$ make
$ make install
2、初始化配置
GIT默认安装在 /usr/local/bin ,安装之后可以验证一下是否安装好
$ whereis git
git: /usr/local/bin/git
$ git --version
git version 1.7.6
$ git --help
首先需要指定用户名和电子邮件地址
$ git config --global user.name “GIT Admin”
$ git config --global user.emal [email protected]
再验证一下配置信息
www.2cto.com
$ git config --list
user.name=GIT Admin
core.repositoryformatversion=0
core.filemode=true
core.bare=false
core.logallrefupdates=true
其实这些配置是存放在个人主目录下的 .gitconfig 文件中的
$ cat ~/.gitconfig
[user]
name = GIT Admin
email = [email protected]
四.搭建mysql服务器
1、显示数据库
show databases;2、选择数据库 use数据库名;
3、显示数据库中的表show tables;
4、显示数据表的结构describe 表名;
5、显示表中记录SELECT*FROM表名
6、建库createdatabse 库名;
7、建表 createtable表名 (字段设定列表);
mysql>createtablename(->idintauto_incrementnotnullprimarykey,->unamechar(8),->genderchar(2),->birthday date );
Query OK,0rows affected (0.03sec)
mysql>show tables;+------------------+|Tables_in_userdb|+------------------+|name|+------------------+1rowinset(0.00sec)
mysql>describe name;+----------+---------+------+-----+---------+----------------+|Field|Type|Null|Key|Default|Extra|+----------+---------+------+-----+---------+----------------+|id|int(11)|NO|PRI|NULL|auto_increment||uname|char(8)|YES||NULL|||gender|char(2)|YES||NULL|||birthday|date|YES||NULL||+----------+---------+------+-----+---------+----------------+4rowsinset(0.00sec)
注: auto_increment 自增primarykey主键
8、增加记录insertintoname(uname,gender,birthday)values('张三','男','1971-10-01');
9、修改记录updatenamesetbirthday='1971-01-10'whereuname='张三';
10、删除记录deletefromnamewhereuname='张三';
11、删除表droptable表名
12、删除库dropdatabase库名;
13、备份数据库mysqldump-u root-p--opt 数据库名>备份名; //进入到库目录
14、恢复mysql-u root-p 数据库名<备份名;//恢复时数据库必须存在,可以为空数据库
15、数据库授权 格式:grant select on 数据库.* to 用户名@登录主机 identified by "密码"
例1、增加一个用户user001密码为123456,让他可以在任何主机上登录,并对所有数据库有查询、插入、修改、删除的权限。首先用以root用户连入MySQL,然后键入以下命令:
mysql>grantselect,insert,update,deleteon*.*touser001@"%" Identifiedby"123456";
例2、增加一个用户user002密码为123456,让此用户只可以在localhost上登录,也可以设置指定IP,并可以对数据库test进行查询、插入、修改、删除的操作 (localhost指本地主机,即MySQL数据库所在的那台主机)
//这样用户即使用知道user_2的密码,他也无法从网上直接访问数据库,只能通过MYSQL主机来操作test库。
//首先用以root用户连入MySQL,然后键入以下命令:
mysql>grantselect,insert,update,deleteontest.*touser002@localhostidentifiedby"123456";
2.开启服务器功能
启动mysql的命令:server mysqlad start
/ect/init.d/mysql start (前面为mysql的安装路径)
重启mysql的命令 service mysqld restart;
/ect/init.d/mysql restart (前面为mysql的安装路径)
关闭mysql的命令: service mysqld stop;
/ect/init.d/mysql shutdown (前面为mysql的安装路径)
3.遇到Access denied for user'root'@'localhost'(using password:YES)问题
# /etc/init.d/mysql stop
# mysqld_safe --user=mysql --skip-grant-tables --skip-networking &
# mysql -u root mysql
mysql> UPDATE user SET Password=PASSWORD(’newpassword’) where USER=’root’;
mysql> FLUSH PRIVILEGES;
mysql> quit
# /etc/init.d/mysql restart
# mysql -uroot -p
Enter password: <输入新设的密码newpassword>
5.遇到Host 'XXX' is not allowed to connect to this MySQL问题
创建远程登陆用户并授权
>grant all PRIVILEGES on discuz.*to ted@'123.123.123.123'identified by'123456';
上面的语句表示将 discuz 数据库的所有权限授权给 ted 这个用户,允许 ted 用户在 123.123.123.123 这个 IP 进行远程登陆,并设置 ted 用户的密码为 123456 。
下面逐一分析所有的参数:
all PRIVILEGES 表示赋予所有的权限给指定用户,这里也可以替换为赋予某一具体的权限,例如:select,
insert ,update ,delete ,create,drop 等,具体权限间用“,”半角逗号分隔。discuz.*
表示上面的权限是针对于哪个的,discuz 指的是数据库,后面的 *
表示对于所有的表,由此可以推理出:对于全部数据库的全部表授权为“*.*”,对于某一数据库的全部表授权为“数据库名.*”,对于某一数据库的某一表授
权为“数据库名.表名”。
ted 表示你要给哪个用户授权,这个用户可以是存在的用户,也可以是不存在的用户。
123.123.123.123 表示允许远程连接的 IP 地址,如果想不限制链接的 IP 则设置为“%”即可。
123456 为用户的密码。
执行了上面的语句后,再执行下面的语句,方可立即生效。
>flush privileges;
6安装sequel pro
1.sequel pro 下载
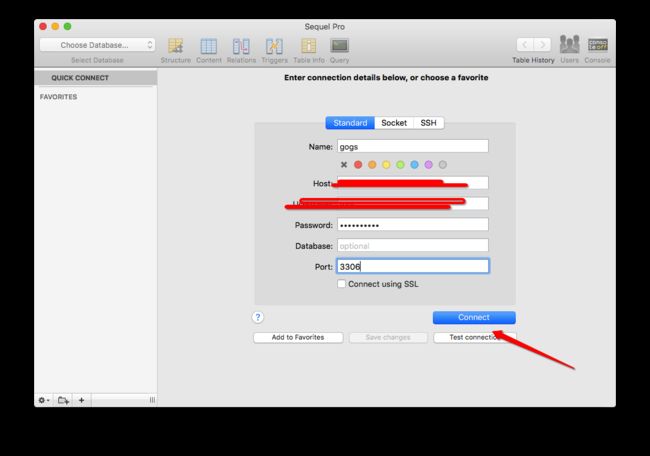
2.连接mysql
六.启动 gogs服务
1.第一次启动 设置app.ini 中的字段为 INSTALL_LOCK = false
./gogs web
nohup ./gogs web &
2.在浏览器 中设置启动配置http://host/install
使用同github
