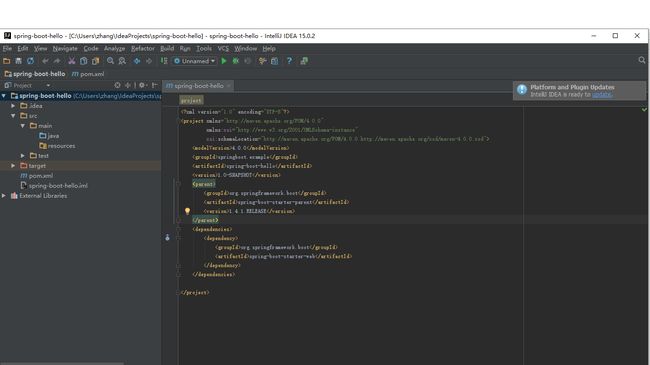
IDE软件:IntelliJ IDEA 15.0.2
操作系统:Win10
Spring boot版本:1.4.1 Release
Maven版本:apache-maven-3.5.2
一、Maven工程创建
使用Maven新建一个项目主要有以下三个步骤:
1.选择项目类型 在Project SDK下拉列表框中选择前面安装的Java 1.8,如果下拉列表框中不存在Java 1.8,可以单击New按钮,找到安装Java的位置,选择它。然后在左面侧边栏的项目类型中,选择Maven项目,即可使用Maven作为项目的管理工具。至于Maven中的archetype,因为我们并不打算使用其中任何一种类型,所以不用勾选,然后单击Next进入下一步。
二、POM文件配置,添加spring boot支持
使用Maven,通过导入Spring Boot的starter模块,可以将许多程序依赖包自动导入工程中。使用Maven的parent POM,还可以更容易地管理依赖的版本和使用默认的配置,工程中的模块也可以很方便地继承它。修改pom.xml文件,为一个使用Spring Boot开发框架的Web项目开发提供所需的相关依赖。
三、Spring boot案例代码编写
Spring Boot的官方文档中提供了一个最简单的Web实例程序,实例只使用了几行代码,虽然简单,但实际上这已经可以算作是一个完整的Web项目。
package springboot.example;

import org.springframework.boot.SpringApplication;
import org.springframework.boot.autoconfigure.SpringBootApplication;
import org.springframework.web.bind.annotation.RequestMapping;
import org.springframework.web.bind.annotation.RestController;

 @SpringBootApplication @RestController
 public class Application {
     @RequestMapping("/")
     String home() {
         return "hello";
     }
    public static void main(String[] args) {
       SpringApplication.run(Application.class, args);
   }
 }
这个简单实例,首先是一个Spring Boot应用的程序入口,或者叫作主程序,其中使用了一个注解@SpringBootApplication来标注它是一个Spring Boot应用,main方法使它成为一个主程序,将在应用启动时首先被执行。其次,注解@RestController同时标注这个程序还是一个控制器,如果在浏览器中访问应用的根目录,它将调用home方法,并输出字符串:hello。
四、运行Spring boot工程
选择Run或Debug运行hello配置项目。如果启动成功,将在控制台中输出类似如下信息:
  .   ____          _            __ _ _
 /\\ / ___'_ __ _ _(_)_ __  __ _ \ \ \ \
( ( )\___ | '_ | '_| | '_ \/ _` | \ \ \ \
 \\/  ___)| |_)| | | | | || (_| |  ) ) ) )
  '  |____| .__|_| |_|_| |_\__, | / / / /
 =========|_|==============|___/=/_/_/_/
 :: Spring Boot ::        (v1.4.1.RELEASE)

2018-02-09 11:13:14.367  INFO 11580 --- [           main] springboot.example.Application           : Starting Application on DESKTOP-9DOM5PD with PID 11580 (C:\Users\zhang\IdeaProjects\spring-boot-hello\target\classes started by zhang in C:\Users\zhang\IdeaProjects\spring-boot-hello)
2018-02-09 11:13:14.371  INFO 11580 --- [           main] springboot.example.Application           : No active profile set, falling back to default profiles: default
2018-02-09 11:13:14.501  INFO 11580 --- [           main] ationConfigEmbeddedWebApplicationContext : Refreshing org.springframework.boot.context.embedded.AnnotationConfigEmbeddedWebApplicationContext@21de60b4: startup date [Fri Feb 09 11:13:14 CST 2018]; root of context hierarchy
2018-02-09 11:13:16.674  INFO 11580 --- [           main] s.b.c.e.t.TomcatEmbeddedServletContainer : Tomcat initialized with port(s): 8080 (http)
2018-02-09 11:13:16.692  INFO 11580 --- [           main] o.apache.catalina.core.StandardService   : Starting service Tomcat
2018-02-09 11:13:16.693  INFO 11580 --- [           main] org.apache.catalina.core.StandardEngine  : Starting Servlet Engine: Apache Tomcat/8.5.5
2018-02-09 11:13:16.849  INFO 11580 --- [ost-startStop-1] o.a.c.c.C.[Tomcat].[localhost].[/]       : Initializing Spring embedded WebApplicationContext
2018-02-09 11:13:16.849  INFO 11580 --- [ost-startStop-1] o.s.web.context.ContextLoader            : Root WebApplicationContext: initialization completed in 2353 ms
2018-02-09 11:13:17.043  INFO 11580 --- [ost-startStop-1] o.s.b.w.servlet.ServletRegistrationBean  : Mapping servlet: 'dispatcherServlet' to [/]
2018-02-09 11:13:17.048  INFO 11580 --- [ost-startStop-1] o.s.b.w.servlet.FilterRegistrationBean   : Mapping filter: 'characterEncodingFilter' to: [/*]
2018-02-09 11:13:17.048  INFO 11580 --- [ost-startStop-1] o.s.b.w.servlet.FilterRegistrationBean   : Mapping filter: 'hiddenHttpMethodFilter' to: [/*]
2018-02-09 11:13:17.048  INFO 11580 --- [ost-startStop-1] o.s.b.w.servlet.FilterRegistrationBean   : Mapping filter: 'httpPutFormContentFilter' to: [/*]
2018-02-09 11:13:17.048  INFO 11580 --- [ost-startStop-1] o.s.b.w.servlet.FilterRegistrationBean   : Mapping filter: 'requestContextFilter' to: [/*]
2018-02-09 11:13:17.402  INFO 11580 --- [           main] s.w.s.m.m.a.RequestMappingHandlerAdapter : Looking for @ControllerAdvice: org.springframework.boot.context.embedded.AnnotationConfigEmbeddedWebApplicationContext@21de60b4: startup date [Fri Feb 09 11:13:14 CST 2018]; root of context hierarchy
2018-02-09 11:13:17.527  INFO 11580 --- [           main] s.w.s.m.m.a.RequestMappingHandlerMapping : Mapped "{[/]}" onto java.lang.String springboot.example.Application.home()
2018-02-09 11:13:17.532  INFO 11580 --- [           main] s.w.s.m.m.a.RequestMappingHandlerMapping : Mapped "{[/error]}" onto public org.springframework.http.ResponseEntity> org.springframework.boot.autoconfigure.web.BasicErrorController.error(javax.servlet.http.HttpServletRequest)
2018-02-09 11:13:17.532  INFO 11580 --- [           main] s.w.s.m.m.a.RequestMappingHandlerMapping : Mapped "{[/error],produces=[text/html]}" onto public org.springframework.web.servlet.ModelAndView org.springframework.boot.autoconfigure.web.BasicErrorController.errorHtml(javax.servlet.http.HttpServletRequest,javax.servlet.http.HttpServletResponse)
2018-02-09 11:13:17.566  INFO 11580 --- [           main] o.s.w.s.handler.SimpleUrlHandlerMapping  : Mapped URL path [/webjars/**] onto handler of type [class org.springframework.web.servlet.resource.ResourceHttpRequestHandler]
2018-02-09 11:13:17.566  INFO 11580 --- [           main] o.s.w.s.handler.SimpleUrlHandlerMapping  : Mapped URL path [/**] onto handler of type [class org.springframework.web.servlet.resource.ResourceHttpRequestHandler]
2018-02-09 11:13:17.653  INFO 11580 --- [           main] o.s.w.s.handler.SimpleUrlHandlerMapping  : Mapped URL path [/**/favicon.ico] onto handler of type [class org.springframework.web.servlet.resource.ResourceHttpRequestHandler]
2018-02-09 11:13:17.916  INFO 11580 --- [           main] o.s.j.e.a.AnnotationMBeanExporter        : Registering beans for JMX exposure on startup
2018-02-09 11:13:17.974  INFO 11580 --- [           main] s.b.c.e.t.TomcatEmbeddedServletContainer : Tomcat started on port(s): 8080 (http)
2018-02-09 11:13:17.979  INFO 11580 --- [           main] springboot.example.Application           : Started Application in 4.59 seconds (JVM running for 5.223)
2018-02-09 11:13:45.405  INFO 11580 --- [nio-8080-exec-1] o.a.c.c.C.[Tomcat].[localhost].[/]       : Initializing Spring FrameworkServlet 'dispatcherServlet'
2018-02-09 11:13:45.405  INFO 11580 --- [nio-8080-exec-1] o.s.web.servlet.DispatcherServlet        : FrameworkServlet 'dispatcherServlet': initialization started
2018-02-09 11:13:45.429  INFO 11580 --- [nio-8080-exec-1] o.s.web.servlet.DispatcherServlet        : FrameworkServlet 'dispatcherServlet': initialization completed in 24 ms
从上面的输出中可以看出,Tomcat默认开启了8080端口。要访问这个应用提供的服务,可以在浏览器的地址栏中输入http://localhost:8080/ 。这样就可以看到我们期望的输出字符:hello。
五、项目发布
上面操作演示了在IDEA环境中如何运行一个应用。如果我们想把应用发布出去,可以将Maven配置增加一个发布插件来实现。如代码所示,增加了一个打包插件:spring-boot-maven-plugin,并增加了一行打包的配置:
jar ,这行配置指定将应用工程打包成jar文件。
        4.0.0
        springboot.example
        spring-boot-hello
        1.0-SNAPSHOT
        jar

         org.springframework.boot
         spring-boot-starter-parent
         1.3.2.RELEASE


             org.springframework.boot
             spring-boot-starter-web


               org.springframework.boot
                 spring-boot-maven-plugin


                             repackage
这样就可以在IDEA中增加一个打包的配置,打开Run/Debug Configurations对话框,选择增加配置一个Maven打包项目,在工作目录中选择工程所在根目录,在命令行中输入package,并将配置保存为mvn,如图所示。
运行mvn打包项目,就可以将实例工程打包,打包的文件将输出在工程的target目录中。 如图:
控制台提示如下:
"C:\Program Files\Java\jdk1.8.0_144\bin\java" "-Dmaven.home=C:\Program Files (x86)\JetBrains\IntelliJ IDEA 15.0.2\plugins\maven\lib\maven3" "-Dclassworlds.conf=C:\Program Files (x86)\JetBrains\IntelliJ IDEA 15.0.2\plugins\maven\lib\maven3\bin\m2.conf" -Didea.launcher.port=7534 "-Didea.launcher.bin.path=C:\Program Files (x86)\JetBrains\IntelliJ IDEA 15.0.2\bin" -Dfile.encoding=UTF-8 -classpath "C:\Program Files (x86)\JetBrains\IntelliJ IDEA 15.0.2\plugins\maven\lib\maven3\boot\plexus-classworlds-2.4.jar;C:\Program Files (x86)\JetBrains\IntelliJ IDEA 15.0.2\lib\idea_rt.jar" com.intellij.rt.execution.application.AppMain org.codehaus.classworlds.Launcher -Didea.version=15.0.2 package
[INFO] Scanning for projects...
[INFO]
[INFO] ------------------------------------------------------------------------
[INFO] Building spring-boot-hello 1.0-SNAPSHOT
[INFO] ------------------------------------------------------------------------
[INFO]
[INFO] --- maven-resources-plugin:2.6:resources (default-resources) @ spring-boot-hello ---
[INFO] Using 'UTF-8' encoding to copy filtered resources.
[INFO] Copying 0 resource
[INFO] Copying 0 resource
[INFO]
[INFO] --- maven-compiler-plugin:3.1:compile (default-compile) @ spring-boot-hello ---
[INFO] Nothing to compile - all classes are up to date
[INFO]
[INFO] --- maven-resources-plugin:2.6:testResources (default-testResources) @ spring-boot-hello ---
[INFO] Using 'UTF-8' encoding to copy filtered resources.
[INFO] skip non existing resourceDirectory C:\Users\zhang\IdeaProjects\spring-boot-hello\src\test\resources
[INFO]
[INFO] --- maven-compiler-plugin:3.1:testCompile (default-testCompile) @ spring-boot-hello ---
[INFO] Nothing to compile - all classes are up to date
[INFO]
[INFO] --- maven-surefire-plugin:2.18.1:test (default-test) @ spring-boot-hello ---
[INFO] No tests to run.
[INFO]
[INFO] --- maven-jar-plugin:2.6:jar (default-jar) @ spring-boot-hello ---
[INFO]
[INFO] --- spring-boot-maven-plugin:1.4.1.RELEASE:repackage (default) @ spring-boot-hello ---
[INFO] ------------------------------------------------------------------------
[INFO] BUILD SUCCESS
[INFO] ------------------------------------------------------------------------
[INFO] Total time: 6.150s
[INFO] Finished at: Fri Feb 09 12:19:37 CST 2018
[INFO] Final Memory: 14M/157M
[INFO] ------------------------------------------------------------------------

Process finished with exit code 0
如果希望将工程发布成war文件,应当将pom.xml的Maven配置
jar 改成war ,这样就可以打包成war文件。打包完成后将war文件放置在Tomcat的webapp路径中,启动Tomcat就能自动运行程序。 这里需要注意的是,如果使用自己配置的Tomcat运行应用,在安装JDK时必须配置JAVA_HOME环境变量,同时JDK要求1.8以上的版本,Tomcat必须是8.0以上的版本。
六、关于spring boot配置
关于Spring Boot配置,可以在工程的resources文件夹中创建一个application.properties或application.yml文件,这个文件会被发布在classpath中,并且被Spring Boot自动读取。这里推荐使用application.yml文件,因为它提供了结构化及其嵌套的格式,例如,可以按如下所示配置上面的工程,将默认端口改为80,并且将Tomcat的字符集定义为UTF-8。
 server:
       port: 80
       tomcat:
            uri-encoding: UTF-8
如果要使用application.properties文件,上面的配置就要改成如下所示的样子,其结果完全相同。
 server.port = 80
 server.tomcat.uri-enconding = UTF-8
使用这个配置文件可以直接使用Spring Boot预定义的一些配置参数,关于其他配置参数的详细说明和描述可以查看官方的文档说明:https://docs.spring.io/spring-boot/docs/current/reference/html/common-application-properties.html 。
七、总结
Spring Boot开发框架是一个非常轻量级的开发框架,所以也有人把它叫作微框架,使用Spring Boot框架开发应用不但入门容易,而且其蕴藏的无比强大的功能,使开发过程也变得更加容易。


