LAMP+extmail+postfix+dovecot
postfix的模块化设计中的四种队列,正常发送的队列incoming(处于等待阶段) active(正在处理) deferred(由于某种原因而推迟发送队列)和courrupt (邮件有故障)队列,在众多的模块中都是由master进行主管的,其配置文件在/etc/postfix/master.conf中,而postfix本身的配置文件在/etc/postfix/main.cf中描述
Dovecot是一个开源的 IMAP 和 POP3 邮件服务器,支持 Linux/Unix 系统。
POP / IMAP 是 MUA 从邮件服务器中读取邮件时使用的协议。其中,与 POP3 是从邮件服务器中下载邮件存起来,IMAP4 则是将邮件留在服务器端直接对邮件进行管理、操作。而Dovecot 是一个比较新的软件,由 Timo Sirainen 开发,最初发布于 2002年7月。作者将安全性考虑在第一,所以 Dovecot 在安全性方面比较出众。另外,Dovecot 支持多种认证方式,所以在功能方面也比较符合一般的应用
经典搭配
postfix(作为发送邮件服务器)+dovecot(作为接收邮件服务器)+mysql(作为数据库)
2、MUA(MAIL USER AGENT): 电子邮件系统的构成之一,接受用户输入的各种指令,将用户的邮件发送至MTA或者通过POP3、IMAP协议将邮件从MTA取到本机。常见的MUA有Foxmail,Outlook Express等邮件客户端程序。
电子邮件的协议标准是TCP/IP协议族的一部分。它规定了电子邮件的格式和在邮局间交换电子邮件的协议。
每个电子邮件都分为两部分:邮件头和邮件内容。TCP/IP对电子邮件的邮件头的格式作了确切的规定,而将邮件内容的格式让用户自定义。在邮件头中最重要的两个组成部分就是发送者和接收者的电子邮件地址。电子邮件地址的格式如下:
而电子邮件的传输协议(也就是在邮局间交换电子邮件的协议)主要有SMTP(简单邮件传输协议)、POP(电子邮局协议),以及新兴的IMAP(互联网邮件应用协议)。
邮件客户端分很多种,比如 pop客户端
浏览器端的主要优点
支持虚拟域。
支持虚拟账号(安全性高)
网盘
配额
防范垃圾
outlook 实现身份验证靠的是Cyrus-SASL函数库来实现的,而Cyrus-SASL默认是实现本地账号验证的,要实现与数据库之间的用户连接验证就需要用到Courier-authlib来实现身份的验证,这只是发送的时候,而在收的时候靠dovecot的pop3或imap4通过MySQL driver进行收信认证
在浏览器端实现注册靠的是extman ,靠extmail来实现邮件的收发,extman和extmail 属于CGI组件;
整个系统的关系图,可以用下图表示:
安装编译环境
Development tools
[root@mail ~]# yum --disablerepo=\* --enablerepo=c6-media groupinstall "Development tools"
[root@mail ~]# yum --disablerepo=\* --enablerepo=c6-media groupinstall "Server Platform Development"
所需要各种资源
[root@mail ~]# yum --disablerepo=\* --enablerepo=c6-media install httpd mysql mysql-server mysql-devel openssl-devel dovecot perl-DBD-MySQL tcl tcl-devel libart_lgpl libart_lgpl-devel libtool-ltdl libtool-ltdl-devel expect
启动MySQL并用root创建管理员,密码123,并加入chkconfig管理
chkconfig mysqld on
源代码安装postfix前先卸载自带的postfix,为了操作方便,保留脚本
[root@mail ~]# rpm -qa|grep postfix
postfix-2.6.6-2.2.el6_1.i686
[root@mail ~]# cd /etc/init.d/
[root@mail init.d]# cp postfix postfix.bak
[root@mail init.d]# yum --disablerepo=\* --enablerepo=c6-media remove postfix
[root@mail extmail]# tar -zxvf postfix-2.8.2.tar.gz -C /usr/local/src
[root@mail extmail]# id postfix
uid=89(postfix) gid=89(postfix) groups=89(postfix),12(mail)
[root@mail extmail]# userdel -r postfix #-r表示连同用户文件一并删除
userdel: /var/spool/postfix not owned by postfix, not removing
[root@mail extmail]# groupdel postfix
groupdel: group 'postfix' does not exist
[root@mail extmail]# groupadd -g 2525 -r postfix
[root@mail extmail]# useradd -g postfix -u 2525 -s /sbin/nologin -M postfix
postdrop 队列转移
[root@mail extmail]# groupadd -g 2526 postdrop # postdrop 队列转移
groupadd: group 'postdrop' already exists
[root@mail extmail]# groupdel postdrop
[root@mail extmail]# groupadd -g 2526 postdrop
[root@mail extmail]# useradd -g postdrop -u 2526 -s /sbin/nologin -M postdrop
# -M 不创建用户家目录 -s 指定用户shell
注意建立组与用户的顺序
[root@mail extmail]# id postfix
uid=2525(postfix) gid=2525(postfix) groups=2525(postfix)
[root@mail extmail]# id postdrop
uid=2526(postdrop) gid=2526(postdrop) groups=2526(postdrop)
# make makefiles 'CCARGS=-DHAS_MYSQL -I/usr/include/mysql -DUSE_SASL_AUTH -DUSE_CYRUS_SASL -I/usr/include/sasl -DUSE_TLS ' 'AUXLIBS=-L/usr/lib/mysql -lmysqlclient -lz -lm -L/usr/lib/sasl2 -lsasl2 -lssl -lcrypto'
CCARGS=-DHAS_MYSQL表明用MySQL进行连接 -I表示包含的头文件目录(rpm包路径)
-DUSE_SASL_AUTH 表明支持sasl验证
我们的目的是利用以上参数从新改写已经生成的makefile 文件(没有./configure),来实现所需功能
[root@mail postfix-2.8.2]# make makefiles 'CCARGS=-DHAS_MYSQL -I/usr/include/mysql -DUSE_SASL_AUTH -DUSE_CYRUS_SASL -I/usr/include/sasl -DUSE_TLS ' 'AUXLIBS=-L/usr/lib/mysql -lmysqlclient -lz -lm -L/usr/lib/sasl2 -lsasl2 -lssl -lcrypto'
[root@mail postfix-2.8.2]# make
[root@mail postfix-2.8.2]# make install
在此我们要指明一些东西
具体的步骤如下一系列图所示,[ ]内为默认选项
然后执行newaliases
[root@mail postfix-2.8.2]# newaliases
还原脚本
[root@mail postfix-2.8.2]# cd /etc/init.d
[root@mail init.d]# mv postfix.bak postfix
[root@mail init.d]# service postfix start
Starting postfix: [ OK ]
[root@mail init.d]# netstat -tupln |grep 25
会发现此时虽然启动,但是端口是没有的,是有问题的,我们可以通过邮件的日志信息进行问题解决
如图
[root@mail init.d]# ll -d /var/lib/postfix
drwx------. 2 89 root 4096 Jan 21 02:04 /var/lib/postfix
[root@mail init.d]# chown -R postfix /var/lib/postfix
此时重启发现日志依然是有问题的
[root@mail init.d]# ll /var/spool/postfix/
total 56
drwx------. 2 postfix root 4096 Mar 6 05:11 active
drwx------. 2 postfix root 4096 Mar 6 05:11 bounce
drwx------. 2 postfix root 4096 Mar 6 05:11 corrupt
drwx------. 2 postfix root 4096 Mar 6 05:11 defer
drwx------. 2 postfix root 4096 Mar 6 05:11 deferred
drwx------. 2 postfix root 4096 Mar 6 05:11 flush
drwx------. 2 postfix root 4096 Mar 6 05:11 hold
drwx------. 2 postfix root 4096 Mar 6 05:11 incoming
drwx-wx---. 2 postfix postdrop 4096 Mar 6 05:11 maildrop
drwxr-xr-x. 2 root root 4096 Mar 6 05:17 pid
drwx------. 2 89 root 4096 Mar 5 18:34 private
drwx--x---. 2 89 90 4096 Mar 5 18:34 public
drwx------. 2 postfix root 4096 Mar 6 05:11 saved
drwx------. 2 postfix root 4096 Mar 6 05:11 trace
[root@mail init.d]# chown -R postfix /var/spool/postfix/public
[root@mail init.d]# chown -R postfix /var/spool/postfix/private
[root@mail ~]# service postfix restart
Shutting down postfix: [ OK ]
Starting postfix: [ OK ]
[root@mail ~]# netstat -tupln |grep 25
tcp 0 0 0.0.0.0:21 0.0.0.0:* LISTEN 2257/pure-ftpd (SER
tcp 0 0 0.0.0.0:25 0.0.0.0:* LISTEN 2651/master
tcp 0 0 :::80 :::* LISTEN 2250/httpd
tcp 0 0 :::21 :::* LISTEN 2257/pure-ftpd (SER
[root@mail ~]# chkconfig --add postfix
[root@mail ~]# chkconfig postfix on
对postfix的配置文件的修改主要有以下几项;
[root@mail ~]# vim /etc/postfix/main.cf
mynetworks选项用于指定那些可以向外中继
说明:
myorigin参数用来指明发件人所在的域名;
mydestination参数指定postfix接收邮件时收件人的域名,即您的postfix系统要接收到哪个域名的邮件;
myhostname 参数指定运行postfix邮件系统的主机的主机名,默认情况下,其值被设定为本地机器名;
mydomain参数指定您的域名,默认情况下,postfix将myhostname的第一部分删除而作为mydomain的值;
mynetworks 参数指定你所在的网络的网络地址,postfix系统根据其值来区别用户是远程的还是本地的,如果是本地网络用户则允许其访问;
inet_interfaces 参数指定postfix系统监听的网络接口;
注意:
1、在postfix的配置文件中,参数行和注释行是不能处在同一行中的;
2、任何一个参数的值都不需要加引号,否则,引号将会被当作参数值的一部分来使用;
3、每修改参数及其值后执行 postfix reload 即可令其生效;但若修改了inet_interfaces,则需重新启动postfix;
4、如果一个参数的值有多个,可以将它们放在不同的行中,只需要在其后的每个行前多置一个空格即可;postfix会把第一个字符为空格或tab的文本行视为上一行的延续;
[root@mail ~]# service postfix restart
Shutting down postfix: [ OK ]
Starting postfix: [ OK ]
本地测试:
[root@mail ~]# telnet 127.0.0.1 25
Trying 127.0.0.1...
Connected to 127.0.0.1.
Escape character is '^]'.
220 mail.beijing.com ESMTP Postfix
mail from:asd@cc.com
250 2.1.0 Ok
rcpt to:user1@beijing.com
550 5.1.1
rcpt to:vvv@beijing.com
250 2.1.5 Ok
data # data 后跟要编辑的内容
354 End data with
subject:1
11111111111111111
.
250 2.0.0 Ok: queued as B28CD3FEE4
quit
221 2.0.0 Bye
Connection closed by foreign host.
切换到vvv用户进行查看:
[root@mail ~]# su - vvv
[vvv@mail ~]$ mail
Heirloom Mail version 12.4 7/29/08. Type ? for help.
"/var/spool/mail/vvv": 1 message 1 new
>N 1 asd@cc.com Thu Mar 6 17:41 14/443 "1"
& 1
Message 1:
From asd@cc.com Thu Mar 6 17:41:01 2014
Return-Path:
X-Original-To: vvv@beijing.com
Delivered-To: vvv@beijing.com
subject:1
Date: Thu, 6 Mar 2014 17:35:04 -0800 (PST)
From: asd@cc.com
Status: R
11111111111111111
& quit
为postfix开启基于cyrus-sasl的认证功能
[root@mail ~]# rpm -qa |grep cyrus-sasl #先查询已安装的cyrus-sasl有关包
cyrus-sasl-lib-2.1.23-13.el6_3.1.i686
cyrus-sasl-plain-2.1.23-13.el6_3.1.i686
cyrus-sasl-devel-2.1.23-13.el6_3.1.i686
cyrus-sasl-md5-2.1.23-13.el6_3.1.i686
cyrus-sasl-2.1.23-13.el6_3.1.i686
postfix与sasl的结合所用到的库文件就是到/usr/local/lib下去找的,但此时去查看时没有内容的
[root@mail ~]# cd /usr/local/lib
[root@mail lib]# ls
[root@mail lib]# ll
total 0
[root@mail lib]# mkdir sasl2
[root@mail lib]# cd sasl2/
[root@mail sasl2]# vim smtpd.conf
在这个文件中我们要点明验证的类型服务器,加入以下内容:
pwcheck_method: authdaemond
log_level: 3
mech_list:PLAIN LOGIN
authdaemond_path:/usr/local/courier-authlib/var/spool/authdaemon/socket
[root@mail sasl2]# service postfix restart
Shutting down postfix: [ OK ]
Starting postfix: [ OK ]
[root@mail sasl2]# service saslauthd start
Starting saslauthd: [ OK ]
[root@mail sasl2]# chkconfig saslauthd on
此时我们的系统依旧是没有验证的,需要在配置文件中再加入以下内容
############################CYRUS-SASL############################
broken_sasl_auth_clients = yessmtpd_recipient_restrictions=permit_mynetworks,permit_sasl_authenticated,reject_invalid_hostname,reject_non_fqdn_hostname,reject_unknown_sender_domain,reject_non_fqdn_sender,reject_non_fqdn_recipient,reject_unknown_recipient_domain,reject_unauth_pipelining,reject_unauth_destination
smtpd_sasl_auth_enable = yes
smtpd_sasl_local_domain = $myhostname
smtpd_sasl_security_options = noanonymous
smtpd_banner = Welcome to our $myhostname ESMTP,Warning: Version not Available!
[root@mail sasl2]# vim /etc/postfix/main.cf
[root@mail sasl2]# service postfix restart
Shutting down postfix: [ OK ]
Starting postfix: [ OK ]
此时就会出现验证类型字段了
[root@mail sasl2]# telnet 127.0.0.1 25
Trying 127.0.0.1...
Connected to 127.0.0.1.
Escape character is '^]'.
220 Welcome to our mail.beijing.com ESMTP,Warning: Version not Available!
EHLO 127.0.0.1
250-mail.beijing.com
250-PIPELINING
250-SIZE 10240000
250-VRFY
250-ETRN
250-AUTH DIGEST-MD5 LOGIN CRAM-MD5 PLAIN
250-AUTH=DIGEST-MD5 LOGIN CRAM-MD5 PLAIN
250-ENHANCEDSTATUSCODES
250-8BITMIME
250 DSN
安装courier-authlib源代码
[root@mail ~]# cd ./extmail/
[root@mail extmail]# tar -jxvf courier-authlib-0.63.0.tar.bz2 -C /usr/local/src
[root@mail courier-authlib-0.63.0]# ./configure --prefix=/usr/local/courier-authlib --sysconfdir=/etc --with-authmysql --with-mysql-libs=/usr/lib/mysql --with-mysql-includes=/usr/include/mysql --with-redhat --with-authmysqlrc=/etc/authmysqlrc --with-authdaemonrc=/etc/authdaemonrc
[root@mail courier-authlib-0.63.0]# make
[root@mail courier-authlib-0.63.0]# make install
[root@mail courier-authlib-0.63.0]# cd /usr/local/courier-authlib/
[root@mail courier-authlib]# ls
bin include lib libexec sbin share var
[root@mail courier-authlib]# ll lib
total 4
drwxr-xr-x. 2 root root 4096 Mar 7 00:59 courier-authlib # 将目录的库加入系统路径中
[root@mail courier-authlib]# vim /etc/ld.so.conf.d/courier-authlib.conf
[root@mail courier-authlib]# ldconfig
[root@mail courier-authlib]# ldconfig -pv |grep courier
libcourierauthsaslclient.so (libc6) => /usr/local/courier-authlib/lib/courier-authlib/libcourierauthsaslclient.so
libcourierauthsasl.so (libc6) => /usr/local/courier-authlib/lib/courier-authlib/libcourierauthsasl.so
libcourierauthcommon.so (libc6) => /usr/local/courier-authlib/lib/courier-authlib/libcourierauthcommon.so
libcourierauth.so (libc6) => /usr/local/courier-authlib/lib/courier-authlib/libcourierauth.so
libauthuserdb.so (libc6) => /usr/local/courier-authlib/lib/courier-authlib/libauthuserdb.so
libauthpipe.so (libc6) => /usr/local/courier-authlib/lib/courier-authlib/libauthpipe.so
libauthpam.so (libc6) => /usr/local/courier-authlib/lib/courier-authlib/libauthpam.so
libauthmysql.so (libc6) => /usr/local/courier-authlib/lib/courier-authlib/libauthmysql.so
libauthldap.so (libc6) => /usr/local/courier-authlib/lib/courier-authlib/libauthldap.so
libauthcustom.so (libc6) => /usr/local/courier-authlib/lib/courier-authlib/libauthcustom.so
[root@mail courier-authlib]# ln -s /usr/local/courier-authlib/include/ /usr/include/courier-authlib
[root@mail courier-authlib]# cd /usr/local/src/courier-authlib-0.63.0/
[root@mail courier-authlib-0.63.0]# ll |grep init
-rw-r--r--. 1 root root 943 Mar 7 00:32 courier-authlib.sysvinit
-rw-rw-r--. 1 vvv vvv 892 May 12 2005 courier-authlib.sysvinit.in
[root@mail courier-authlib-0.63.0]# cp courier-authlib.sysvinit /etc/init.d/courier-authlib
[root@mail courier-authlib-0.63.0]# chmod a+x /etc/init.d/courier-authlib
[root@mail courier-authlib-0.63.0]# cd /usr/local/courier-authlib/var/spool/
[root@mail spool]# ll
total 4
drwxr-x---. 2 daemon daemon 4096 Mar 7 00:59 authdaemon
[root@mail spool]# chmod 755 authdaemon/ #该目录只有在courier-authlib运行才会有信息出现,类似于sock文件
在此时启动的话是会报错的,因为在我们的编译参数中还指明了authmysqlrc和authdaemonr的路径,所以我们要先创建这些问件
[root@mail spool]# cp /etc/authmysqlrc.dist /etc/authmysqlrc
[root@mail spool]# cp /etc/authdaemonrc.dist /etc/authdaemonrc
[root@mail spool]# vim /etc/authdaemonrc
[root@mail spool]# vim /etc/authmysqlrc
在user表中homedir的值是域名domain加name字段,(指下图中的homedir)
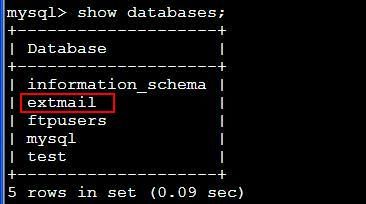
由以上文件可知因为要用到MySQL数据库,所以我们将会有一个extmail的库,至于创建这些库中表的语句我们要用一个文件导进去,而这库的管理者信息则放在名为MySQL这个库的user表中
MYSQL_HOME_FIELD 指的是在/var/mailbox这样一个基目录下与homedir的组合从而形成虚拟用户的家目录
在数据库字段中maildir指的是homedir加上maildir,再合并上基目录就构成了整个用户邮件目录
[root@mail spool]# service courier-authlib start
Starting Courier authentication services: authdaemond
[root@mail spool]# netstat -tupln |grep -i courier
[root@mail spool]# cd /usr/local/courier-authlib/var/spool/authdaemon/
[root@mail authdaemon]# ll
total 4
-rw-r--r--. 1 root root 6 Mar 7 03:27 pid
-rw-------. 1 root root 0 Mar 7 03:27 pid.lock
srwxrwxrwx. 1 root root 0 Mar 7 03:27 socket
在刚启动时courier-authlib是没有端口的,但我们依然可以在authdaemon下找到它的sock文件
[root@mail authdaemon]# chkconfig --add courier-authlib
[root@mail authdaemon]# chkconfig courier-authlib on
在刚才的配置文件中我们将虚拟用户的基目录指定在/var/mailbox,所以现在要新建这么个目录
[root@mail authdaemon]# mkdir /var/mailbox
[root@mail authdaemon]# ll -d /var/mailbox
drwxr-xr-x. 2 root root 4096 Mar 7 03:39 /var/mailbox
[root@mail authdaemon]# chown -R postfix /var/mailbox
接下来重新配置SMTP 认证,编辑 /usr/local/lib/sasl2/smtpd.conf ,确保其为以下内容:
[root@mail authdaemon]# vim /usr/local/lib/sasl2/smtpd.conf
pwcheck_method: authdaemond
log_level: 3
mech_list:PLAIN LOGIN
authdaemond_path:/usr/local/courier-authlib/var/spool/authdaemon/socket
[root@mail authdaemon]# service saslauthd restart
Stopping saslauthd: [ OK ]
Starting saslauthd: [ OK ]
[root@mail authdaemon]# service courier-authlib restart
Stopping Courier authentication services: authdaemond
Starting Courier authentication services: authdaemond
[root@mail authdaemon]# vim /etc/postfix/main.cf
########################Virtual Mailbox Settings########################
virtual_mailbox_base = /var/mailbox
virtual_mailbox_maps = mysql:/etc/postfix/mysql_virtual_mailbox_maps.cf
virtual_mailbox_domains = mysql:/etc/postfix/mysql_virtual_domains_maps.cf
virtual_alias_domains =
virtual_alias_maps = mysql:/etc/postfix/mysql_virtual_alias_maps.cf
virtual_uid_maps = static:2525
virtual_gid_maps = static:2525
virtual_transport = virtual
maildrop_destination_recipient_limit = 1
maildrop_destination_concurrency_limit = 1
##########################QUOTA Settings########################
message_size_limit = 14336000
virtual_mailbox_limit = 20971520
virtual_create_maildirsize = yes
virtual_mailbox_extended = yes
使用extman源码目录下docs目录中的extmail.sql和init.sql建立数据库:
[root@mail extmail]# tar -zxvf extman-1.1.tar.gz
[root@mail extmail]# cd ./extman-1.1/docs/
[root@mail docs]# mysql -u root -p
Enter password:
[root@mail docs]# mysql -u root -p
Enter password:
建库建表结果:
授予用户extmail访问extmail数据库的权限
mysql> GRANT all privileges on extmail.* TO extmail@localhost IDENTIFIED BY 'extmail';
mysql> GRANT all privileges on extmail.* TO extmail@127.0.0.1 IDENTIFIED BY 'extmail';
mysql>FLUSH PRIVILEGES;
[root@mail docs]# cp mysql_virtual_* /etc/postfix/
[root@mail docs]# pwd
/root/extmail/extman-1.1/docs
[root@mail docs]# service postfix restart
Shutting down postfix: [ OK ]
Starting postfix: [ OK ]
配置dovecot
[root@mail conf.d]# vim 10-mail.conf
[root@mail conf.d]# pwd
/etc/dovecot/conf.d
修改其中的mail目录项,并用%d%n来指明虚拟路径的位置
![]()
在连接MySQL所用的验证文件中要指明验证文件所放置的位置
[root@mail conf.d]# vim auth-sql.conf.ext
[root@mail conf.d]# vim /etc/dovecot/dovecot-sql.conf
driver = mysql
connect = host=localhost dbname=extmail user=extmail password=extmail
default_pass_scheme = CRYPT
password_query = SELECT username AS user,password AS password FROM mailbox WHERE username = '%u'
user_query = SELECT maildir, uidnumber AS uid, gidnumber AS gid FROM mailbox WHERE username = '%u'
[root@mail conf.d]# service dovecot restart
Stopping Dovecot Imap: [ OK ]
Starting Dovecot Imap: [ OK ]
安装Extmail-1.2 (先安装httpd)
[root@mail conf.d]# chkconfig dovecot on
[root@mail ~]# cd ./extmail/
[root@mail extmail]# mkdir /var/www/extsuite
[root@mail extmail]# tar -zxvf extmail-1.2.tar.gz -C /var/www/extsuite/
[root@mail extmail]# mv extman-1.1 /var/www/extsuite/
[root@mail extmail]# cd /var/www/extsuite/
[root@mail extsuite]# mv extmail-1.2 extmail
[root@mail extsuite]# mv extman-1.1 extman
[root@mail extsuite]# ll
total 8
drwxr-xr-x. 7 vvv vvv 4096 Dec 25 2009 extmail
drwxr-xr-x. 11 vvv vvv 4096 Dec 24 2009 extman
[root@mail extsuite]# cd extmail/
[root@mail extmail]# cp webmail.cf.default webmail.cf
[root@mail extmail]# vim webmail.cf
![]()
[root@mail extmail]# cd ./cgi
[root@mail cgi]# chown -R postfix.postfix /var/www/extsuite/extmail/cgi/
[root@mail cgi]# vim /etc/httpd/conf/httpd.conf
ServerName mail.test.com
DocumentRoot /var/www/extsuite/extmail/html/
ScriptAlias /extmail/cgi /var/www/extsuite/extmail/cgi
Alias /extmail /var/www/extsuite/extmail/html
SuexecUserGroup postfix postfix # 该选项可有可无
[root@mail cgi]# service httpd restart
Stopping httpd: [ OK ]
Starting httpd: [ OK ]
[root@mail cgi]# setenforce 0
[root@mail cgi]# service iptables stop
[root@mail cgi]# yum --disablerepo=\* --enablerepo=c6-media install perl-CGI per-CGI-
Session # 该选项只是排除可能出现的CGI故障,因为extmail也属一种CGI
[root@mail cgi]# chgrp postfix /usr/sbin/suexec
[root@mail cgi]# service httpd restart
Stopping httpd: [ OK ]
Starting httpd: Warning: SuexecUserGroup directive requires SUEXEC wrapper.
[ OK ]
浏览器测试
[root@mail extmail]# tar -zxvf Unix-Syslog-0.100.tar.gz -C /usr/local/src
[root@mail html]# cd /usr/local/src/Unix-Syslog-0.100/
[root@mail Unix-Syslog-0.100]# ll
total 52
-rw-r--r--. 1 1001 1001 6111 Feb 21 1999 Artistic
-rw-r--r--. 1 1001 1001 3187 Aug 28 2002 Changes
-rw-r--r--. 1 1001 1001 417 Aug 28 2002 Makefile.PL
-rw-r--r--. 1 1001 1001 73 Feb 21 1999 MANIFEST
-rw-r--r--. 1 1001 1001 5322 Aug 14 2002 README
-rw-r--r--. 1 1001 1001 9289 Aug 28 2002 Syslog.pm
-rw-r--r--. 1 1001 1001 3873 Aug 14 2002 Syslog.xs
-rw-r--r--. 1 1001 1001 6971 Aug 28 2002 test.pl
[root@mail Unix-Syslog-0.100]# perl Makefile.PL
Can't locate ExtUtils/MakeMaker.pm in @INC (@INC contains: /usr/local/lib/perl5 /usr/local/share/perl5 /usr/lib/perl5/vendor_perl /usr/share/perl5/vendor_perl /usr/lib/perl5 /usr/share/perl5 .) at Makefile.PL line 1.
BEGIN failed--compilation aborted at Makefile.PL line 1.
[root@mail Unix-Syslog-0.100]# rpm -qa |grep perl
[root@mail Unix-Syslog-0.100]# yum --disablerepo=\* --enablerepo=c6-media install perl-devel
[root@mail Unix-Syslog-0.100]# perl Makefile.PL
Checking if your kit is complete...
Looks good
Writing Makefile for Unix::Syslog
[root@mail Unix-Syslog-0.100]# make
[root@mail Unix-Syslog-0.100]# make install
[root@mail Unix-Syslog-0.100]# service httpd restart
Stopping httpd: [ OK ]
Starting httpd: Warning: SuexecUserGroup directive requires SUEXEC wrapper.
[ OK ]
浏览器测试,可以看到登录界面,但此时注册功能是没有的,因为extman 还没有安装
[root@mail Unix-Syslog-0.100]# cd /var/www/extsuite/extman/
[root@mail extman]# cp webman.cf.default webman.cf
[root@mail extman]# vim webman.cf
安装完之后主要是修改配置文件中的基目录和语言两个字段
[root@mail extman]# vim /etc/postfix/main.cf
打开其中的home_mailbox字段
[root@mail extman]# service postfix restart
Shutting down postfix: [ OK ]
Starting postfix: [ OK ]
[root@mail extman]# chown -R postfix.postfix /var/www/extsuite/extman/cgi
[root@mail extman]# vim /etc/httpd/conf/httpd.conf 加入如下字段
ScriptAlias /extman/cgi /var/www/extsuite/extman/cgi
Alias /extman /var/www/extsuite/extman/html
[root@mail extman]# service httpd restart
Stopping httpd: [ OK ]
Starting httpd: [ OK ]
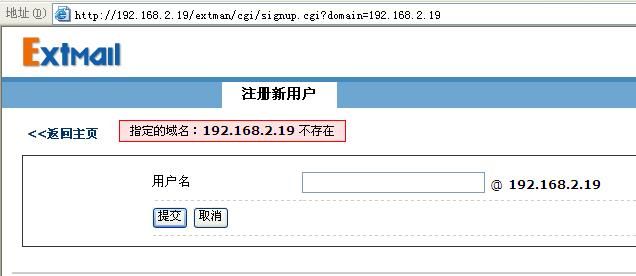
在此我们会发现要注册新用户需要先新建(虚拟)域
域的新建需要登录邮箱管理,而邮箱管理需要管理员,而默认有一个默认的管理账号(如数据库中默认用户)
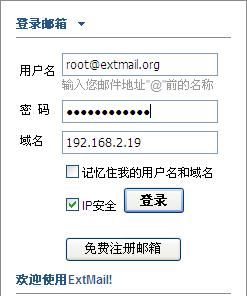
选择管理即可登入extman进行后台管理了。默认管理帐号为:root@extmail.org 密码为:extmail*123*
登录后仍会提示错误(因为以前配置文件中指定的一个目录没有建)
[root@mail extman]# mkdir /tmp/extman
[root@mail extman]# chown postfix.postfix /tmp/extman/
重新访问我们就可以进入,并在域列表中新添加域
新注册测试用户
数据库中的结果
建两个测试域,并分别建测试用户
注意在添加域时虽然已经勾选自由注册,但并不生效,需要在域列表中重新勾选
新注册用户,然后发送邮件测试,
发现是发不出去的,原因如下图
说明:启用虚拟域以后,需要取消中心域,即注释掉myhostname, mydestination, mydomain, myorigin几个指令;当然,你也可以把mydestionation的值改为你自己需要的。
[root@mail extman]# vim /etc/postfix/main.cf
[root@mail extman]# service postfix restart
Shutting down postfix: [ OK ]
Starting postfix: [ OK ]
另一个域的收发测试
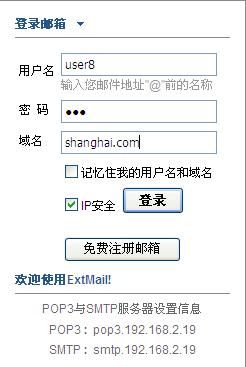
shanghai.com域向beijing.com 域发件测试
系统的邮件目录如图所示
功能正常测试正常.


