spring 简单集成 shiro

1.加入spring jar 包并配置 web.xml

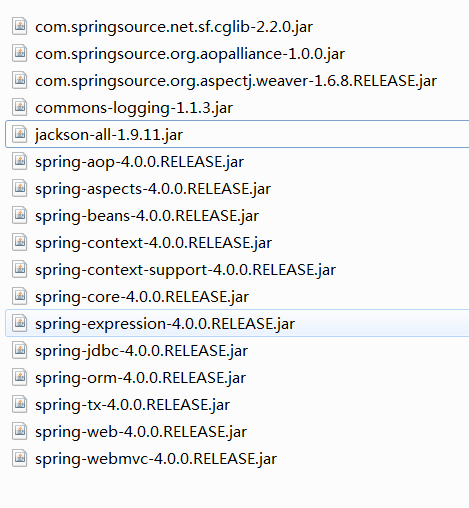
spring 简单集成 shiro_第1张图片
spring依赖ja包

web.xml:

spring 简单集成 shiro_第2张图片

application.xml:


spring配置文件,空的

2.配置 springmvc


spring 简单集成 shiro_第3张图片
web.xml配置springmvc
spring 简单集成 shiro_第4张图片
springmvc配置文件

测试配置是否正确,新建jsp页面并访问验证

3.开始整合 shiro(添加 shiro jar包)


spring 简单集成 shiro_第5张图片
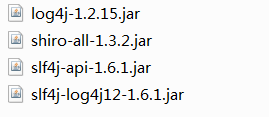
shiro依赖 jar

4.配置 shiro(参考shiro源码包)

参考 :shiro-root-1.3.2\samples\spring\src\main\webapp\WEB-INF目录下的

applicationContext.xml 和 web.xml两个文件

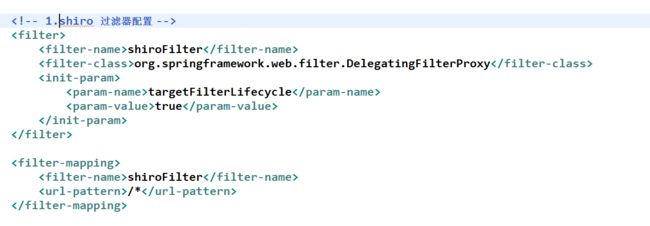
web.xml下添加(在参考代码里边找):

spring 简单集成 shiro_第6张图片

1.在 spring 中配置 shiro

spring 简单集成 shiro_第7张图片

2. 配置 CacheManager.  2.1 需要加入 ehcache 的 jar 包及配置文件.

spring 简单集成 shiro_第8张图片
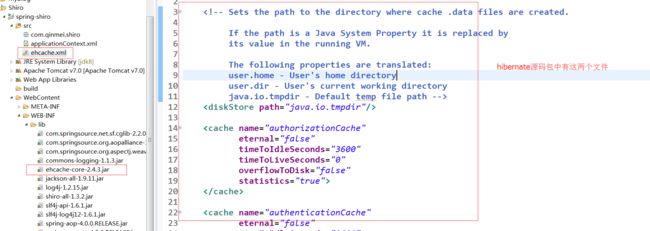
2.配置 cacheManager(需要导入 jar和配置文件hibernate有ehcache-core.jar与ehcache.xml配置文件)


spring 简单集成 shiro_第9张图片
配置 ehcache

3. 配置 Realm   3.1 直接配置实现了 org.apache.shiro.realm.Realm 接口的 bean

spring 简单集成 shiro_第10张图片
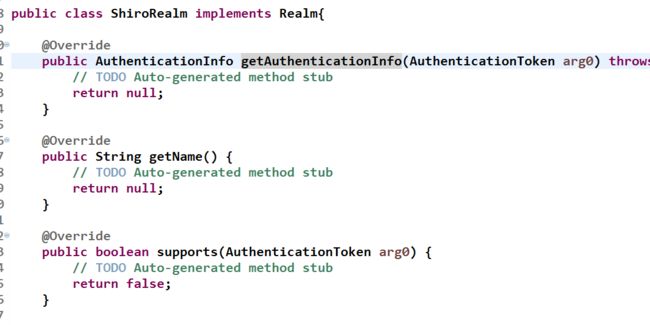
创建ShiroRealm.java


spring 简单集成 shiro_第11张图片

4.配置 LifecycleBeanPostProcessor


5.启用 IOC 容器中使用 shiro 的注解


spring 简单集成 shiro_第12张图片
启用 IOC 容器中使用 shiro 的注解

6.配置 ShiroFilter(创建login.jsp等页面测试)
spring 简单集成 shiro_第13张图片

你可能感兴趣的:(spring 简单集成 shiro)