最近在做打印文档的模板,其中需要显示不同格式的文字,行间距,字体颜色等等,还有如果文字内容无法在一页中显示,就需要对其进行分页,下面对这些功能以及API使用做一些总结,包括 NSAttributedString 的使用,以及如何通过CoreText来处理文字分页的显示
NSMutableAttributedString
NSMutableAttributedString 是一种可以带有属性的字符串,也可以说是富文本,并且可以很轻松的通过属性来改变字符串的字体、颜色、阴影、段落格式。
属性可以通过构造方法直接将样式初始化在在基本字符串上
let attr = NSMutableAttributedString(string: "你们这是自寻死路!", attributes: [NSFontAttributeName: UIFont.systemFontOfSize(17), NSForegroundColorAttributeName: UIColor.whiteColor()])

也可以给指定字符串动态添加样式

attr.addAttribute(NSForegroundColorAttributeName, value: UIColor.redColor(), range: NSRange(location: 4, length: 4))
我们可以通过 Xcode 的 Playground 直接查看添加样式后的效果,可以很方便的进行样式的调试。

其他属性也不一一举例,到目前为止NSAttributedString提供了一共21个属性可以设置。
 NSFontAttributeName                设置字体属性,默认值:字体:Helvetica(Neue) 字号:12
 NSParagraphStyleAttributeName      设置文本段落排版格式,取值为 NSParagraphStyle 对象
 NSForegroundColorAttributeName      设置字体颜色,取值为 UIColor对象,默认值为黑色
 NSBackgroundColorAttributeName     设置字体所在区域背景颜色,取值为 UIColor对象,默认值为nil, 透明色
 NSLigatureAttributeName            设置连体属性,取值为NSNumber 对象(整数),0 表示没有连体字符,1 表示使用默认的连体字符
 NSKernAttributeName                设定字符间距,取值为 NSNumber 对象(整数),正值间距加宽,负值间距变窄
 NSStrikethroughStyleAttributeName  设置删除线,取值为 NSNumber 对象(整数)
 NSStrikethroughColorAttributeName  设置删除线颜色,取值为 UIColor 对象,默认值为黑色
 NSUnderlineStyleAttributeName      设置下划线,取值为 NSNumber 对象(整数),枚举常量 NSUnderlineStyle中的值,与删除线类似
 NSUnderlineColorAttributeName      设置下划线颜色,取值为 UIColor 对象,默认值为黑色
 NSStrokeWidthAttributeName         设置笔画宽度,取值为 NSNumber 对象(整数),负值填充效果,正值中空效果
 NSStrokeColorAttributeName         填充部分颜色,不是字体颜色,取值为 UIColor 对象
 NSShadowAttributeName              设置阴影属性,取值为 NSShadow 对象
 NSTextEffectAttributeName          设置文本特殊效果,取值为 NSString 对象,目前只有图版印刷效果可用:
 NSBaselineOffsetAttributeName      设置基线偏移值,取值为 NSNumber (float),正值上偏,负值下偏
 NSObliquenessAttributeName         设置字形倾斜度,取值为 NSNumber (float),正值右倾,负值左倾
 NSExpansionAttributeName           设置文本横向拉伸属性,取值为 NSNumber (float),正值横向拉伸文本,负值横向压缩文本
 NSWritingDirectionAttributeName    设置文字书写方向,从左向右书写或者从右向左书写
 NSVerticalGlyphFormAttributeName   设置文字排版方向,取值为 NSNumber 对象(整数),0 表示横排文本,1 表示竖排文本
 NSLinkAttributeName                设置链接属性,点击后调用浏览器打开指定URL地址
 NSAttachmentAttributeName          设置文本附件, 取值为NSTextAttachment对象,常用于文字图片混排
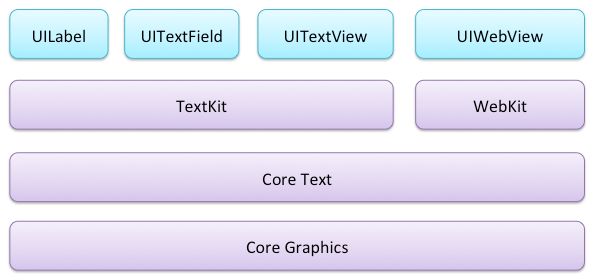
CoreText
可以先了解一下框架图。
可以通过
NSAttributedString的属性完成绝大多数的富文本显示需求,但是当文字内容在指定大小的区域显示不下的时候,就需要对文字进行截取分页,我们可以通过
NSAttributedString的
boundingRectWithSize来确定显示文字需要的空间(Size),然后计算指定区域内能显示的文字范围,做截取,然后进行分页。
下面的代码可以计算出在指定宽度内显示所有文字需要的高度。
let rect = (text as NSString).boundingRectWithSize(CGSize(width: width, height: CGFloat.max), options: [.UsesLineFragmentOrigin, .UsesFontLeading], attributes: attributes, context: nil)
但是如果文字中带有Emoji表情,使用默认的纯文字排版,根据字体的高度和宽度来计算文本的高度就行不通了,因为带有Emoji表情的行将一行文字的高度撑高,而且行高也不统一,也影响美观,所以就需要给定行高,然后一行一行的来进行绘制。
通过CTFramesetter计算文字所占的高度
添加 NSAttributedString 的扩展方法来计算文字显示需要的高度
extension NSAttributedString {
   func heightForSize(size: CGSize) -> CGFloat {
        let frameSetter = CTFramesetterCreateWithAttributedString(self)
        let restrictSize = CGSize(width: size.width, height: CGFloat.max)
        let coreTextSize = CTFramesetterSuggestFrameSizeWithConstraints(frameSetter, CFRangeMake(0, 0), nil, restrictSize, nil)
        return coreTextSize.height
    }
}
通过CTFrame计算区域内能显示的文字范围
下面通过 CTFramesetterCreateFrame 方法就能计算出文字Size大小的区域内能显示的范围
extension NSAttributedString {
    func rangeforVisibleText(size: CGSize) -> NSRange {
        let bezierPath = UIBezierPath(rect: CGRect(origin: CGPoint(x: 0, y: 0), size: size))
        let framesetter = CTFramesetterCreateWithAttributedString(self)
        let frame = CTFramesetterCreateFrame(framesetter, CFRange(location: 0, length: 0), bezierPath.CGPath, nil)
        let range = CTFrameGetVisibleStringRange(frame)
        return NSRange(location: range.location, length: range.length)
    }
}
通过CTLineDraw一行一行的绘制
获得准确的高度和能显示出的文字后,就可以将文字完整的绘制到指定的区域中,然后计算出每行的高度,一行一行的绘制出来。
extension NSAttributedString {
    func drawRect(rect: CGRect) {
        let context = UIGraphicsGetCurrentContext()!
        CGContextSetTextMatrix(context, CGAffineTransformIdentity)
        CGContextTranslateCTM(context, 0, rect.size.height)
        CGContextScaleCTM(context, 1.0, -1.0)

        let path = UIBezierPath(rect: rect)
        let framesetter = CTFramesetterCreateWithAttributedString(self)
        let frame = CTFramesetterCreateFrame(framesetter, CFRangeMake(0, self.length), path.CGPath, nil)
        let lines = CTFrameGetLines(frame)
        let lineCount = CFArrayGetCount(lines)
        var lineOrigins: [CGPoint] = Array(count:lineCount, repeatedValue: CGPoint(x: 0, y: 0))

        CTFrameGetLineOrigins(frame, CFRange(location: 0, length: 0), &lineOrigins)
        let height = CGRectGetHeight(rect)
        let font = self.attribute(NSFontAttributeName, atIndex: 0, effectiveRange: nil)
        var frameY: CGFloat = 0

        // 计算每行的高度
        let lineHeight = height/CGFloat(lineCount)
        for i in 0..
获取所有的CTLine,拿到CTLine后再计算总高度。根据总高度计算每行高度,然后循环CTLine,获取每个Line计算Y指标的值,逐行设置位置然后Draw上去。
TextKit
我们还可以通过TextKit 中的 NSLayoutManager 和 NSTextContainer来完成文字的布局或者分页,这里不展开介绍。