* 重装 VPS
--重新连通ssh(删除原来的host-known关系)
--重新新建一个tester账户--(并给tester用户 在 /etc/sudoers/ 下 的权限)
*安装软件 ---这次一定注意 顺序 (更加谨慎)
--先安装apache2 ,用root 帐号安装 !!!
目前的软件安装顺序:目前 从000,到--> 004 了,
000, 基本升级
sudo apt-get update
sudo apt-get upgarde
001 安装apache2 (版本2.4)
sudo apt-get install apache2 (提示 y/n ,yes的话64m 即将安装到VPS)
sudo apt-get install apache2-dev (提示 y/n ,yes的话170m 即将安装到VPS)
002, 完整安装python3.6,安装python-dev:
sudo add-apt-repository ppa:jonathonf/python-3.6# (only for 16.04 LTS)
sudo apt update
sudo apt install python3.6sudo apt install python3.6-dev
sudo apt install python3.6-venv
wget https://bootstrap.pypa.io/get-pip.py
sudo python3.6get-pip.py
20171217 最新更新: 折腾半天,其实 还是执行不了,2行,我都 不 执行了;应该不会对flask部署有影响。
注意下面的区别: 非常重要 !!!
sudo ln -s /usr/bin/python3.6 /usr/local/bin/python3 --//这一行 ,我按这个 命令参考 ,去100% 复制执行了
sudo ln -s /usr/local/bin/pip /usr/local/bin/pip3 --// 但这一行 ,我按自己 查询后的 理解 执行了新的 symlink 名称(因为可以看出 和上一行一致, 它要超链接 和表达的都是, 但用python3 或 pip3 时 ,都其实指定的是 3。6)
备注: 查询后的显示:
[ tester@ubuntu:/usr/local/bin$ ls
easy_install easy_install-3.6 pip pip3 pip3.6 wheel ] --发现其实 根本没有第一行的/usr/local/bin/python3,看了它是新建的symlink
所以 第2行 ,我的新改法是 :
sudo ln -s /usr/local/bin/pip3.6 /usr/local/bin/pip3
# Do this only if you want python3 to be the default Python
# instead of python2 (may be dangerous, esp. before 2020):
# sudo ln -s /usr/bin/python3.6 /usr/local/bin/python
When you have completed all of the above, each of the following shell commands should indicatePython 3.6.1(or a more recent version of Python 3.6):
python--version # (this will reflect your choice, see above)
python3--version
$(head-1`which pip`|tail-c+3)--version
$(head-1`which pip3`|tail-c+3)--version
003, 安装mod-wsgi (py3 版,if using high python)
显示如下:
里面最重要的一句话是 ,当安装接近完成的时候:
显示了 倒数第一行:
apache2_invoke: Enable module wsgi (注意 ,这已经代表enable这个mod-wsgi模块: The mod should be enabled automatically for you but if it isn’t just type the command:
sudo a2enmod mod-wsgi)
tester@ubuntu:~$

通过读 mod_wsgi 4.5.15 在python --》index中的文档,我们知道:
requirement for mod_wsgi 4.5.15:
System Requirements:
With either installation method for mod_wsgi, you must have Apache installed. This must be a complete Apache installation. It is not enough to have only the runtime packages for Apache installed. You must have the corresponding development package for Apache installed, which contains the Apache header files, as these are required to be able compile and install third party Apache modules.
Similarly with Python, you must have a complete Python installation which includes the corresponding development package, which contains the header files for the Python library.
上面的这2句话,非常关键:
点破了 wsgi安装的3个关键要素:
*) 要支持python3 就要安装mod-wsgi-py3
*)安装mod-wsgi 模块前 ,要保证 apache2是完整安装,就是 apache2-dev 也要安装上--apache2-dev
*) 安装mod-wsgi 模块前 ,要保证 python (3)是完整安装,就是 python(3)-dev 也要安装上--python3-dev
--见的另一个帖子,《如何在 ubuntu16.04不自带 python3.6的情况下, 自己安装ptyhon3.6 在其上面》。
http://www.jianshu.com/writer#/notebooks/19655835/notes/21287517
004: 重启一下apache2 restart
Finally we just have to restart the server:
sudo service apache2 restart
005, 准备在/var/www/ 下 创建新文件
After 004, So now we have our Apache server installed with the mod enabled.
在 /etc/apache2/下 创建新 文件
cd /var/www
git clone
sudo chown -R tester /var/www
cd firstapp
ls
nano hello.wsgi
---------------------------------
cd /etc/apache2/sites-available
sudo chown –R tester /etc/apache2
nano hello.conf
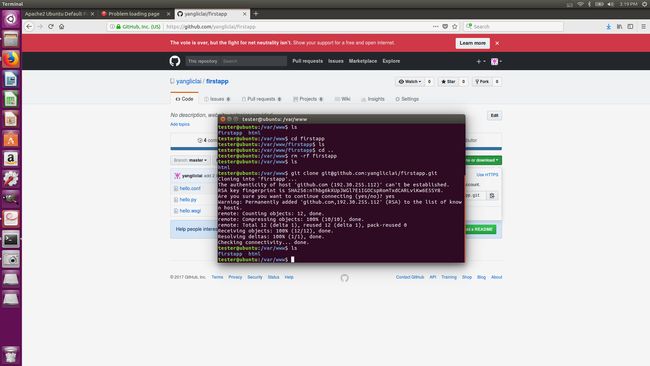
006 , 通过ssh-keygen 命令,搞定了VPS(176.122...) 与github之间的ssh 对 关系
然后在VPS的/var/www/ 下 ,注意是是从远端的github来clone ,而不是用本地的新建,来产生firstapp 这个文件夹,
如下所示:
007测试apache2 的status ,是否已经在运行中,如果没有在运行,那么就start 启动它
如下所示:

008在VPS的普通环境下 (即 非虚拟环境下) ,安装 python3。6 的pip flask --user 和 测试 对/var/www/flaskapp/hello.py 是否能够连接通
如下所示

009 根据提示 ,重新改写hello.conf 文件(使其支持apache2.4 规范) , 然后 增加 /etc/apache2 权限,从github传VPS,在cp到目标目录
如下所示:

010 ,这时下一步是 要替换 conf了,注意提前 看一看 目前的176.122.189.45 还是apache的初始页面不,?看看后继换conf后变不变?
这一步的参考命令 如下:-- // (因为这一步 涉及到 对apache2服务的重启,需要root权限,所以干脆下面的三条命令前就换root登陆)
sudo a2dissite 000-default
sudo a2ensiteflask.conf
sudo service apache2 restart
011, 第 1次 这么折腾 ,但还是 失败! 不气馁,积极 调bug
通过下面的排查 ,发现疑似的解决点在 mod-wsgi-py3,其实是只能与python3.5 配合,我之前000-010都是假设是py3.6 ,超出了mod-wsgi的能力范围了。
cat /var/log/apache2/error.log
接下来就是 怎么 给ubuntu自带的py3。5 ,安装完整了,--安装 apt-get python3-dev ,安装pip ,
sudo apt-get install python3-dev
sudo apt-get install python3-pip
------
当我完成 对 python3-dev 安装,对python3-pip安装后,也更改了hello.py的头一行的注释!/usr/bin/ pyton3.5 (从原来的3.6)
继续报错 ,但--这次有好消息也有坏消息

好消息是 开始识别hello.wsgi的内容,坏消息是 说还是找不到 flask 模块
这时 我发现 apache2 和mod-wsgi 可能比我想的要简单 ,
它们俩 其实不找py3.5 (我这次尽 忙乎 python3.5 -m pip 了) 或3。6,
其实 它们俩 要的是 py3 ,3 是个大版本好,其它 3。5 或3。6的子版本不在apahe的具体管理范围之内 。
所以说 ,我联想起来,当时 在pythoneverywhere 哪儿 ,进行 bash 和wsgi的设置时 ,其实那首pythoneverywhere上 是用的python3.5,固定的 只有 ,3。5和2。7 2个大版本可选 (其实他们代表的是更改简洁的py2 和py3)
所以 我这次再进一步改的话 ,
应该是
更改了hello.py的头一行的注释!/usr/bin/ pyton3 (从原来的3.5)
完成 对 python3-dev 安装,对python3-pip安装后,
是python3 -m pip list 和 pip install flask
哈哈!!
python3?