在第12章『速度的曲率』我们学习如何用Instruments来诊断Core Animation性能问题。在构建一个iOS app的时候会遇到很多潜在的性能陷阱,但是在本章我们将 着眼于有关绘制的性能问题。
软件绘图
术语绘图通常在Core Animation的上下文中指代软件绘图(意即:不由GPU协助 的绘图)。在iOS中,软件绘图通常是由Core Graphics框架完成来完成。但是,在一些必要的情况下,相比Core Animation和OpenGL,Core Graphics要慢了不少。
软件绘图不仅效率低,还会消耗可观的内存。CALayer只需要一些与自己相关 的内存:只有它的寄宿图会消耗一定的内存空间。即使直接赋给 contents属性一 张图片,也不需要增加额外的照片存储大小。如果相同的一张图片被多个图层作为 contents 属性,那么他们将会共用同一块内存,而不是复制内存块。
但是一旦你实现了CALayerDelegate 协议中的 -drawLayer:inContext:方 法或者 UIView 中的- drawRect: 方法(其实就是前者的包装方法),图层就创 建了一个绘制上下文,这个上下文需要的大小的内存可从这个算式得出:图层宽*图 层高*4字节,宽高的单位均为像素。对于一个在Retina iPad上的全屏图层来说,这 个内存量就是 2048*1526*4字节,相当于12MB内存,图层每次重绘的时候都需要 重新抹掉内存然后重新分配。
软件绘图的代价昂贵,除非绝对必要,你应该避免重绘你的视图。提高绘制性能的秘诀就在于尽量避免去绘制。
矢量图形
我们用Core Graphics来绘图的一个通常原因就是只是用图片或是图层效果不能 轻易地绘制出矢量图形。矢量绘图包含一下这些:
- 任意多边形(不仅仅是一个矩形)
- 斜线或曲线
- 文本
- 渐变
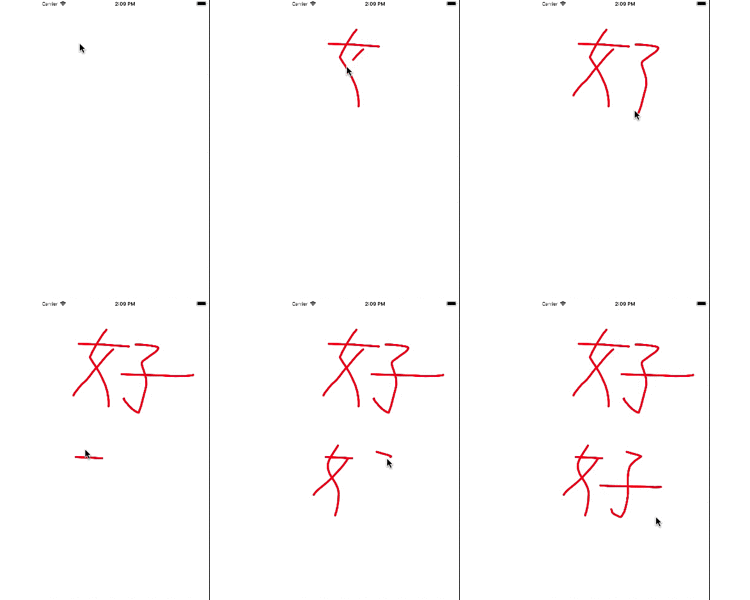
举个例子,一个基本的画线应用。这个应用将用户的触摸手势转换成一个UIBezierPath上的点,然后绘制成视图。我们在一个 UIView子类DrawingView中实现了所有的绘制逻辑,这个情况下我们没有用上view controller。但是如果你喜欢你可以在view controller中实现触摸事件处理。
#import "DrawingView.h"

@interface DrawingView()
@property (nonatomic, strong) UIBezierPath *path;
@end


@implementation DrawingView

- (void)awakeFromNib{
    [super awakeFromNib];
    self.path = [[UIBezierPath alloc]init];
    self.path.lineJoinStyle = kCGLineJoinRound;
    self.path.lineCapStyle = kCGLineCapRound;
    self.path.lineWidth = 5.0f;
}

- (void)touchesBegan:(NSSet *)touches withEvent:(UIEvent *)event{
    CGPoint point = [[touches anyObject] locationInView:self];
    [self.path moveToPoint:point];
}

- (void)touchesMoved:(NSSet *)touches withEvent:(UIEvent *)event{
    CGPoint point  = [[touches anyObject] locationInView:self];
    [self.path addLineToPoint:point];
    [self setNeedsDisplay];

}

- (void)drawRect:(CGRect)rect{
    [[UIColor clearColor] setFill];
    [[UIColor redColor] setStroke];
    [self.path stroke];
}
@end
这样实现的问题在于,我们画得越多,程序就会越慢。因为每次移动手指的时候 都会重绘整个贝塞尔路径(UIBezierPath),随着路径越来越复杂,每次重绘 的工作就会增加,直接导致了帧数的下降。看来我们需要一个更好的方法了。
Core Animation为这些图形类型的绘制提供了专门的类,并给他们提供硬件支持 (第六章『专有图层』有详细提到)。CAShapeLayer可以绘制多边形,直线和 曲线。 CATextLayer 可以绘制文本。CAGradientLayer 用来绘制渐变。这些总体上都比Core Graphics更快,同时他们也避免了创造一个寄宿图。
如果稍微将之前的代码变动一下,用 CAShapeLayer替代Core Graphics,性能 就会得到提高.虽然随着路径复杂性的增加,绘制性能依然会下降, 但是只有当非常非常浮躁的绘制时才会感到明显的帧率差异。
#import "DrawingView.h"

@interface DrawingView()
@property (nonatomic, strong) UIBezierPath *path;
@end


@implementation DrawingView

+ (Class)layerClass{

    return [CAShapeLayer class];
}

- (void)awakeFromNib{
    [super awakeFromNib];
    self.path = [[UIBezierPath alloc]init];

    CAShapeLayer *shapeLayer = (CAShapeLayer *)self.layer;
    shapeLayer.strokeColor = [UIColor redColor].CGColor;
    shapeLayer.fillColor = [UIColor clearColor].CGColor;
    shapeLayer.lineJoin = kCALineJoinRound;
    shapeLayer.lineCap = kCALineCapRound;
    shapeLayer.lineWidth = 5.0f;
}
- (void)touchesBegan:(NSSet *)touches withEvent:(UIEvent *)event{
    CGPoint point = [[touches anyObject] locationInView:self];
    [self.path moveToPoint:point];
}
- (void)touchesMoved:(NSSet *)touches withEvent:(UIEvent *)event{
    CGPoint point  = [[touches anyObject] locationInView:self];
    [self.path addLineToPoint:point];
    ((CAShapeLayer *)self.layer).path = self.path.CGPath;

}
@end
脏矩形
有时候用 CAShapeLayer 或者其他矢量图形图层替代Core Graphics并不是那么 切实可行。比如我们的绘图应用:我们用线条完美地完成了矢量绘制。但是设想一 下如果我们能进一步提高应用的性能,让它就像一个黑板一样工作,然后用『粉 笔』来绘制线条。模拟粉笔最简单的方法就是用一个『线刷』图片然后将它粘贴到 用户手指碰触的地方,但是这个方法用 CAShapeLayer没办法实现。
我们可以给每个『线刷』创建一个独立的图层,但是实现起来有很大的问题。屏 幕上允许同时出现图层上线数量大约是几百,那样我们很快就会超出的。这种情况 下我们没什么办法,就用Core Graphics吧(除非你想用OpenGL做一些更复杂的事 情)。
我们的『黑板』应用的最初实现如上面代码,我们更改了之前版本的DrawingView ,用一个画刷位置的数组代替 UIBezierPath。
#import "DrawingView.h"

#define BRUSH_SIZE 32
@interface DrawingView()


@property (nonatomic, strong) NSMutableArray *strokes;
@end


@implementation DrawingView

- (void)awakeFromNib{
    [super awakeFromNib];
    self.strokes = [NSMutableArray array];

}
- (void)touchesBegan:(NSSet *)touches withEvent:(UIEvent *)event{
    CGPoint point = [[touches anyObject] locationInView: self];
    [self addBrushStrokeAtPoint:point];
}

- (void)touchesMoved:(NSSet *)touches withEvent:(UIEvent *)event{
    CGPoint point = [[touches anyObject] locationInView: self];
    [self addBrushStrokeAtPoint:point];
}

- (void)addBrushStrokeAtPoint:(CGPoint)point{
    [self.strokes addObject:[NSValue valueWithCGPoint:point]];
    [self setNeedsDisplay];
}

- (void)drawRect:(CGRect)rect {
    for (NSValue *value in self.strokes) {
        CGPoint point = [value CGPointValue];
        CGRect brushRect = CGRectMake(point.x / BRUSH_SIZE, point.y / BRUSH_SIZE, BRUSH_SIZE - 10, BUFSIZ - 10);
        [[UIImage imageNamed:@"ball"] drawInRect:brushRect];
    }
}
@end
这个实现在模拟器上表现还不错,但是在真实设备上就没那么好了。问题在于每 次手指移动的时候我们就会重绘之前的线刷,即使场景的大部分并没有改变。我们 绘制地越多,就会越慢。随着时间的增加每次重绘需要更多的时间,帧数也会下降 ,如何提高性能呢?
为了减少不必要的绘制,Mac OS和iOS设备将会把屏幕区分为需要重绘的区域和 不需要重绘的区域。那些需要重绘的部分被称作『脏区域』。在实际应用中,鉴于 非矩形区域边界裁剪和混合的复杂性,通常会区分出包含指定视图的矩形位置,而 这个位置就是『脏矩形』。
当一个视图被改动过了,TA可能需要重绘。但是很多情况下,只是这个视图的一 部分被改变了,所以重绘整个寄宿图就太浪费了。但是Core Animation通常并不了 解你的自定义绘图代码,它也不能自己计算出脏区域的位置。然而,你的确可以提供这些信息。
当你检测到指定视图或图层的指定部分需要被重绘,你直接调用 - setNeedsDisplayInRect:来标记它,然后将影响到的矩形作为参数传入。这样就 会在一次视图刷新时调用视图的-drawRect: (或图层代理的- drawLayer:inContext:方法)。
传入-drawLayer:inContext:的 CGContext参数会自动被裁切以适应对应的 矩形。为了确定矩形的尺寸大小,你可以用CGContextGetClipBoundlingBox() 方法来从上下文获得大小。调用 - drawRect()会更简单,因为CGRect会作为参数直接传入。
你应该将你的绘制工作限制在这个矩形中。任何在此区域之外的绘制都将被自动 无视,但是这样CPU花在计算和抛弃上的时间就浪费了,实在是太不值得了。
相比依赖于Core Graphics为你重绘,裁剪出自己的绘制区域可能会让你避免不 必要的操作。那就是说,如果你的裁剪逻辑相当复杂,那还是让Core Graphics来代劳吧,记住:当你能高效完成的时候才这样做。
下面代码:展示了一个-addBrushStrokeAtPoint:方法的升级版,它只重绘当前线刷的附近区域。另外也会刷新之前线刷的附近区域,我们也可以用 CGRectIntersectsRect() 来避免重绘任何旧的线刷以不至于覆盖已更新过的区域。这样做会显著地提高绘制效率
#import "DrawingView.h"

#define BRUSH_SIZE 32
@interface DrawingView()


@property (nonatomic, strong) NSMutableArray *strokes;
@end
@implementation DrawingView

- (void)awakeFromNib{
    [super awakeFromNib];
    self.strokes = [NSMutableArray array];

}
- (void)touchesBegan:(NSSet *)touches withEvent:(UIEvent *)event{
    CGPoint point = [[touches anyObject] locationInView: self];
    [self addBrushStrokeAtPoint:point];
}

- (void)touchesMoved:(NSSet *)touches withEvent:(UIEvent *)event{
    CGPoint point = [[touches anyObject] locationInView: self];
    [self addBrushStrokeAtPoint:point];
}

- (void)addBrushStrokeAtPoint:(CGPoint)point{
    [self.strokes addObject:[NSValue valueWithCGPoint:point]];
    [self setNeedsDisplayInRect:[self burshRectForPoint:point]];
}

- (CGRect)burshRectForPoint:(CGPoint)point{
    return CGRectMake(point.x / BRUSH_SIZE / 2, point.y / BRUSH_SIZE / 2, BUFSIZ, BUFSIZ);

}

- (void)drawRect:(CGRect)rect {
    for (NSValue *value in self.strokes) {

        CGPoint point = [value CGPointValue];
        CGRect brushRect = [self burshRectForPoint:point];
        if (CGRectIntersectsRect(rect, brushRect)) {
            [[UIImage imageNamed:@"ball"] drawInRect:brushRect];
        }
    }
}
@end
异步绘制
UIKit的单线程天性意味着寄宿图通畅要在主线程上更新,这意味着绘制会打断用 户交互,甚至让整个app看起来处于无响应状态。我们对此无能为力,但是如果能 避免用户等待绘制完成就好多了。
针对这个问题,有一些方法可以用到:一些情况下,我们可以推测性地提前在另外一个线程上绘制内容,然后将由此绘出的图片直接设置为图层的内容。这实现起 来可能不是很方便,但是在特定情况下是可行的。Core Animation提供了一些选 择: CATiledLayer和 drawsAsynchronously属性。
CATiledLayer
我们在第六章简单探索了一下CATiledLayer. 除了将图层再次分割成独立更新的小块(类似于脏矩形自动更新的概念),CATiledlayer还有一个有趣的特性:在多个线程中为每个小块同时调用- drawLayer: inContext:方法. 这就避免了阻塞用户交互而且能够利用多核心芯片来更快地绘制。只有一个小块 的 CATiledLayer是实现异步更新图片视图的简单方法。
drawsAsynchronously
iOS 6中,苹果为CALayer引入了这个令人好奇的属性,drawsAsynchronously 属性对传入-drawLayer:inContext: 的 CGContext进行改动,允许CGContext延缓绘制命令的执行以至于不阻塞用户交互。
它与CATiledLayer使用的异步绘制并不相同。它自己的- drawLayer: inContext:方法只会在主线程调用,但是CGContext并不等待每个绘制命令的结束。相反地,它会将命令加入队列,当方法返回时,在后台线程逐个执行真正的绘制。
根据苹果的说法。这个特性在需要频繁重绘的视图上效果最好(比如我们的绘图 应用,或者诸如 UITableViewCell 之类的),对那些只绘制一次或很少重绘的图 层内容来说没什么太大的帮助。
总结
本章我们主要围绕用Core Graphics软件绘制讨论了一些性能挑战,然后探索了一 些改进方法:比如提高绘制性能或者减少需要绘制的数量。
iOS核心动画高级技巧--目录
