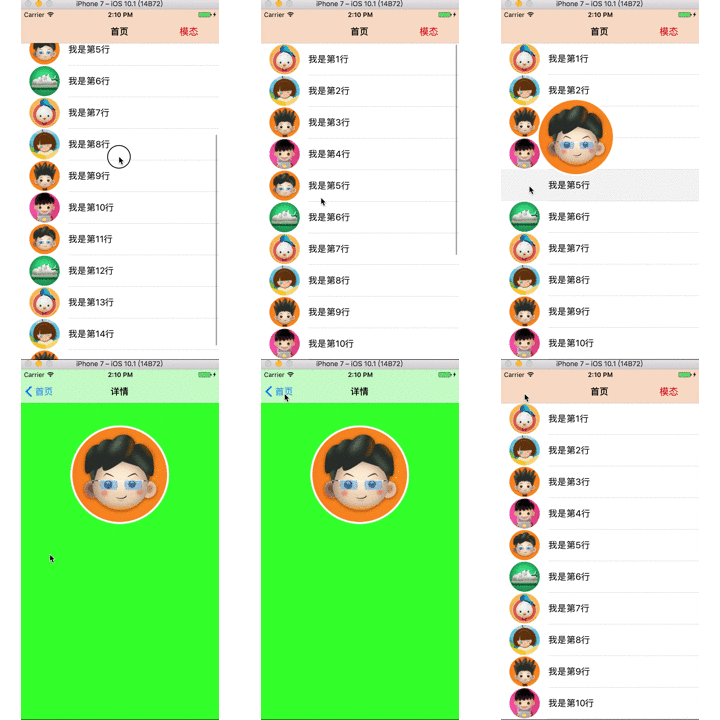
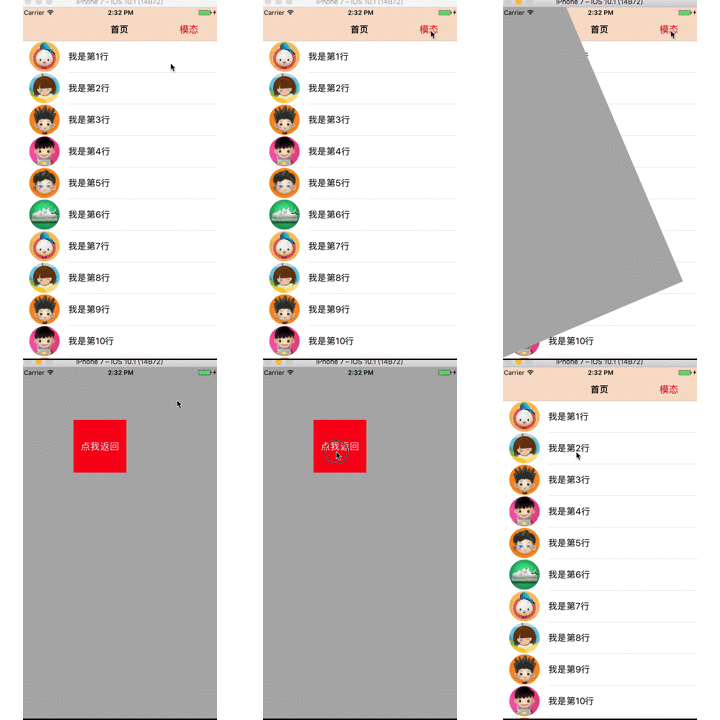
最近项目刚迭代,正好闲下来捣鼓了一下iOS的自定义转场的效果。闲话不多说,直接开始上代码吧。(ps:请忽略实际的转场效果,关注技术本身呢哦。pps:主要是转场的动画做的比较low啦!)
1、首先定义一个转场动画的类
第一步,咱们先定义一个管理转场动画的类。首先创建一个继承自NSObject的类,这里叫JTAnimatedTransition,并且让其遵循UIViewControllerAnimatedTransitioning这个协议。
这个是.h文件代码。 我在这里定义了一个枚举,用来表示转场的类型。并且还遵循的CAAnimationDelegate协议,这个后面会说到。 再有呢,就是一个类方法了,这个是在使用的控制器中会用到的方法,具体的用法后续代码中会有体现。
#import
#import
typedef enum {
    JTAnimatedTransitionTypePush,
    JTAnimatedTransitionTypePop,
    JTAnimatedTransitionTypePresent,
    JTAnimatedTransitionTypeDismiss
}JTAnimatedTransitionType;

@interface JTAnimatedTransition : NSObject
@property (assign, nonatomic) JTAnimatedTransitionType type;
@property (strong, nonatomic) id transitionContext;
+ (JTAnimatedTransition *)animatedTransitionWithType:(JTAnimatedTransitionType)type;
@end
接下来是.m中的代码了。 具体说明在代码中都有详细注释。
#import "JTAnimatedTransition.h"
@implementation JTAnimatedTransition

+ (JTAnimatedTransition *)animatedTransitionWithType:(JTAnimatedTransitionType)type
{
    JTAnimatedTransition *animatedTransition = [[JTAnimatedTransition alloc] init];
    animatedTransition.type = type;
    return animatedTransition;
}


#pragma mark - UIViewControllerAnimatedTransitioning
- (NSTimeInterval)transitionDuration:(nullable id )transitionContext
{
    //返回动画执行的时间
    return 0.5;
}

- (void)animateTransition:(id )transitionContext
{
    //在这里设置自己想要的动画效果
    self.transitionContext = transitionContext;

    if (self.type == JTAnimatedTransitionTypePush) {

        // 获得即将消失的vc的v
        UIView *fromeView = [transitionContext viewForKey:UITransitionContextFromViewKey];
        // 获得即将出现的vc的v
        UIView *toView = [transitionContext viewForKey:UITransitionContextToViewKey];
        // 获得容器view
        UIView *containerView = [transitionContext containerView];

        [containerView addSubview:fromeView];
        [containerView addSubview:toView];

        UIBezierPath *startBP = [UIBezierPath bezierPathWithOvalInRect:CGRectMake((containerView.frame.size.width-100)/2, 100, 100, 100)];
        CGFloat radius = 1000;
        UIBezierPath *finalBP = [UIBezierPath bezierPathWithOvalInRect:CGRectMake(150 - radius, 150 -radius, radius*2, radius*2)];

        CAShapeLayer *maskLayer = [CAShapeLayer layer];
        maskLayer.path = finalBP.CGPath;
        toView.layer.mask = maskLayer;

        //执行动画
        CABasicAnimation *animation = [CABasicAnimation animationWithKeyPath:@"path"];
        animation.delegate = self;
        animation.fromValue = (__bridge id _Nullable)(startBP.CGPath);
        animation.toValue = (__bridge id _Nullable)(finalBP.CGPath);
        animation.duration = [self transitionDuration:transitionContext];
        animation.timingFunction = [CAMediaTimingFunction functionWithName:kCAMediaTimingFunctionEaseInEaseOut];
        [maskLayer addAnimation:animation forKey:@"path"];

    } else if (self.type == JTAnimatedTransitionTypePresent) {

        UIView *fromeView = [transitionContext viewForKey:UITransitionContextFromViewKey];
        UIView *toView = [transitionContext viewForKey:UITransitionContextToViewKey];
        UIView *containerView = [transitionContext containerView];

        [containerView addSubview:fromeView];
        [containerView addSubview:toView];

        fromeView.frame = containerView.frame;
        toView.frame = containerView.frame;

        toView.layer.anchorPoint = CGPointMake(0.0f, 1.0f);
        toView.frame = containerView.frame;
        toView.transform = CGAffineTransformMakeRotation(-M_PI/2);

        [UIView animateWithDuration:[self transitionDuration:transitionContext] animations:^{
            toView.transform = CGAffineTransformIdentity;
        } completion:^(BOOL finished) {
            [self.transitionContext completeTransition:YES];
        }];

    } else if (self.type == JTAnimatedTransitionTypeDismiss) {

        UIView *fromeView = [transitionContext viewForKey:UITransitionContextFromViewKey];
        UIView *toView = [transitionContext viewForKey:UITransitionContextToViewKey];
        UIView *containerView = [transitionContext containerView];

        [containerView addSubview:fromeView];
        [containerView addSubview:toView];

        fromeView.frame = containerView.frame;
        toView.frame = CGRectMake(containerView.frame.size.width, containerView.frame.origin.y, 0, containerView.frame.size.height);

        [UIView animateWithDuration:[self transitionDuration:transitionContext] animations:^{
            fromeView.frame = CGRectMake(containerView.frame.origin.x, containerView.frame.origin.y, 0, containerView.frame.size.height);
            toView.frame = containerView.frame;
        } completion:^(BOOL finished) {
            [self.transitionContext completeTransition:YES];
        }];

    } else {
    }
}

#pragma mark - CAAnimationDelegate
-(void)animationDidStop:(CAAnimation *)anim finished:(BOOL)flag
{
    //告诉系统转场动画完成
    [self.transitionContext completeTransition:YES];

    //清除相应控制器视图的mask
    [self.transitionContext viewForKey:UITransitionContextFromViewKey].layer.mask = nil;
    [self.transitionContext viewForKey:UITransitionContextToViewKey].layer.mask = nil;
}

@end
到这里转场动画管理者就写好了,后面我们只需要关注使用者的情况了。
2、怎么使用转场动画
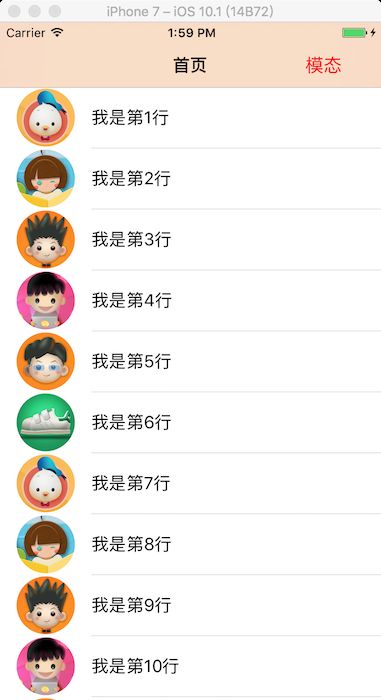
现在我们创建一个使用者类。我这里就直接使用了ViewController了。下面是创建好之后的效果图。
下面就是.m的具体实现代码了,一些简单的界面搭建代码就不贴出来了。下面的代码只是一些跟转场动画有关的代码哦。
这是点击cell之后的逻辑
-(void)tableView:(UITableView *)tableView didSelectRowAtIndexPath:(NSIndexPath *)indexPath
{
    [tableView deselectRowAtIndexPath:indexPath animated:YES];

    ViewControllerTwo *vc = [[ViewControllerTwo alloc]init];

    UITableViewCell *cell = [tableView cellForRowAtIndexPath:indexPath];
    CGRect rectInTableView = [tableView rectForRowAtIndexPath:indexPath];
    CGRect rect = [tableView convertRect:rectInTableView toView:[tableView superview]];
    cell.imageView.hidden = YES;
    self.selectImageView.image = cell.imageView.image;
    self.selectImageView.frame = CGRectMake(cell.imageView.frame.origin.x, rect.origin.y, cell.imageView.frame.size.width, cell.imageView.frame.size.height);

    vc.img = self.selectImageView.image;
    vc.row = indexPath.row;
    [UIView animateWithDuration:0.5 animations:^{
        self.selectImageView.frame = CGRectMake(0, 2, self.view.bounds.size.width/2, self.view.bounds.size.width/2);
        self.selectImageView.center = CGPointMake(self.view.bounds.size.width/2, 200);
    } completion:^(BOOL finished) {
    [self.navigationController pushViewController:vc animated:YES];
        }];
}
要实现自定义的转场,还需要使用者必须遵循UINavigationControllerDelegate协议或者, UIViewControllerTransitioningDelegate协议。根据需要的专场类型,实现自己的协议方法。
#pragma mark - pop / push
- (id)navigationController:(UINavigationController *)navigationController animationControllerForOperation:(UINavigationControllerOperation)operation fromViewController:(UIViewController *)fromVC toViewController:(UIViewController *)toVC{

    if (operation == UINavigationControllerOperationPush) {
        JTAnimatedTransition *animatedTransition = [JTAnimatedTransition animatedTransitionWithType:JTAnimatedTransitionTypePush];
        return animatedTransition;
    }
    return nil;
}

- (void)navigationController:(UINavigationController *)navigationController didShowViewController:(UIViewController *)viewController animated:(BOOL)animated
{
    if (viewController != self) {
        self.selectImageView.frame = CGRectNull;
    }
}

#pragma mark - present / dismiss
-(id)animationControllerForPresentedController:(UIViewController *)presented presentingController:(UIViewController *)presenting sourceController:(UIViewController *)source
{
    return [JTAnimatedTransition animatedTransitionWithType:JTAnimatedTransitionTypePresent];
}

- (id)animationControllerForDismissedController:(UIViewController *)dismissed
{
    return [JTAnimatedTransition animatedTransitionWithType:JTAnimatedTransitionTypeDismiss];
}
3、模态跳转
调用跳转的代码
-(void)click:(UIButton *)sender
{
    ViewControllerThree *vc = [[ViewControllerThree alloc]init];

    [self presentViewController:vc animated:YES completion:^{

    }];
}

调用者 ViewController 内实现了协议方法
在返回时 在 ViewControllerThree 内需要遵循 UIViewControllerTransitioningDelegate 并实现其协议方法
#import "ViewControllerThree.h"
#import "JTAnimatedTransition.h"
@interface ViewControllerThree ()

@end

@implementation ViewControllerThree

- (void)viewDidLoad {
    [super viewDidLoad];

    self.transitioningDelegate = self;

    self.title = @"模态";
    self.view.backgroundColor = [UIColor lightGrayColor];

    UIButton *btn = [[UIButton alloc]initWithFrame:CGRectMake(100, 100, 100, 100)];
    btn.backgroundColor = [UIColor redColor];
    [btn setTitle:@"点我返回" forState:UIControlStateNormal];
    [btn addTarget:self action:@selector(back) forControlEvents:UIControlEventTouchUpInside];
    [self.view addSubview:btn];
}
-(void)back
{
    [self dismissViewControllerAnimated:YES completion:^{

    }];
}

#pragma mark - UIViewControllerTransitioningDelegate

- (id)animationControllerForPresentedController:(UIViewController *)presented presentingController:(UIViewController *)presenting sourceController:(UIViewController *)source
{
    return [JTAnimatedTransition animatedTransitionWithType:JTAnimatedTransitionTypePresent];
}

- (id)animationControllerForDismissedController:(UIViewController *)dismissed
{
    return [JTAnimatedTransition animatedTransitionWithType:JTAnimatedTransitionTypeDismiss];
}

@end
结束语
写到这转场动画就自定义完成了。其实转场动画主要就是两个协议:1、在动画管理类内遵循UIViewControllerAnimatedTransitioning 2、在动画使用的类内遵循, UIViewControllerTransitioningDelegate以及UINavigationControllerDelegate协议,并实现其协议方法。
如果你有什么更加炫酷的动画,只需要在JTAnimatedTransition内设置动画的位置写上自己想要的动画即可。


