我理解的blockstorage

block Storage是对虚拟主机的扩展数据存储,总体分为对硬盘的扩展,和数据的存储。cinder是对扩展数据使用的服务,cinderAPI处理浏览器扩充硬盘的请求,cinder-sheduler将请求发送到消息队列中。cinder-volume根据scsi技术同步所有的请求到volume节点,volume通过lvm架构选举出一个cinder-volume节点创建扩展的硬盘。对扩展的硬盘进行格式化,并绑定到虚拟机的目录下。所有扩展的文件都将存储在这个目录下,扩展文件通过scsi技术返回到浏览器。
首先介绍lvm
scsi的介绍是做数据传输和同步的技术
启动一台云主机gaga:

查看主机开启的服务:[root@localhost ~]# nova-manage service list
打开gaga云主机的控制台:

• cinder-api: Accepts API requests and routes them to cinder-volume for action.
cinder-api处理从浏览器发出的扩展云盘的请求
• cinder-volume: Responds to requests to read from and write to the Block Storage database to maintain state, interacting with other processes (like cinder-scheduler) through a message queue and directly upon block storage providing hardware or software. It can interact with a variety of storage providers through a driver architecture.
cinder-volume创建具体的云盘,将创建完成的云盘返回到浏览器
• cinder-scheduler daemon: Like the nova-scheduler, picks the optimal block storage provider node on which to create the volume.
cinder-scheduler统一调度可以创建云盘的cinder-volume
• Messaging queue: Routes information between the Block Storage service processes.
安装cinder框架
[root@localhost ~]# yum install openstack-cindew
创建mysql数据库:
# mysql -u root -p
mysql> CREATE DATABASE cinder;
mysql> GRANT ALL PRIVILEGES ON cinder.* TO 'cinder'@'localhost' \
IDENTIFIED BY 'CINDER_DBPASS';
mysql> GRANT ALL PRIVILEGES ON cinder.* TO 'cinder'@'%' \
IDENTIFIED BY 'CINDER_DBPASS';
[root@localhost ~]# vi cinderconf.sh

penstack-config --set /etc/cinder/cinder.conf \
database connection mysql://cinder:CINDER_DBPASS@controller/cinder

[root@localhost ~]# sh cinderconf.sh
[root@localhost ~]# vi /etc/cinder/cinder.conf


database connection mysql://cinder:CINDER_DBPASS@controller/cinder
# mysql -u root -p
mysql> CREATE DATABASE cinder;
mysql> GRANT ALL PRIVILEGES ON cinder.* TO 'cinder'@'localhost' \
IDENTIFIED BY 'CINDER_DBPASS';
mysql> GRANT ALL PRIVILEGES ON cinder.* TO 'cinder'@'%' \
IDENTIFIED BY 'CINDER_DBPASS';
 $ keystone user-create --name=cinder --pass=CINDER_PASS -- email=cinder@


4. Create the database tables for the Block Storage service:
# su -s /bin/sh -c "cinder-manage db sync" cinder
5. Create a cinder user.
The Block Storage service uses this user to authenticate with the Identity service. Use the service tenant and give the user the admin role:
6. Edit the /etc/cinder/cinder.conf configuration file:

 # openstack-config --set /etc/cinder/cinder.conf \
创建cinder数据库并为cinder数据库授权,这样当每次操作 cinder的时候,都会在cinder数据库中保留操作信息
创建cinder服务,并对外显示接口
$ keystone service-create --name=cinder --type=volume --description= "OpenStack Block Storage"
$ keystone endpoint-create \
--service-id=$(keystone service-list | awk '/ volume / {print $2}') \ --publicurl=http://controller:8776/v1/%\(tenant_id\)s \ --internalurl=http://controller:8776/v1/%\(tenant_id\)s \ --adminurl=http://controller:8776/v1/%\(tenant_id\)s
$ keystone service-create --name=cinderv2 --type=volumev2 --description= "OpenStack Block Storage v2"
$ keystone endpoint-create \
--service-id=$(keystone service-list | awk '/ volumev2 / {print $2}') \ --publicurl=http://controller:8776/v2/%\(tenant_id\)s \ --internalurl=http://controller:8776/v2/%\(tenant_id\)s \ --adminurl=http://controller:8776/v2/%\(tenant_id\)s

 openstack-config --set /etc/cinder/cinder.conf \ DEFAULT rpc_backend qpid
# openstack-config --set /etc/cinder/cinder.conf \ DEFAULT qpid_hostname controller
启动服务:
[root@localhost ~]# vi cinderservice.sh
service openstack-cinder-scheduler start
 service openstack-cinder-api start
 service openstack-cinder-scheduler start
 chkconfig openstack-cinder-api on
 chkconfig openstack-cinder-scheduler on

[root@localhost ~]# sh cinderservice.sh start
[root@localhost ~]# sh cinderservice.sh status
[root@localhost ~]# cinder service-list
安装cinder_volume节点
首先介绍lvm
为虚拟机添加一块50gb的新硬盘

[root@localhost ~]# fdisk -l
 pvcreate /dev/sdb
[root@localhost ~]# pas

 vgcreate cinder-volumes /dev/sdb
[root@localhost ~]# vgs
此时不配置filter,让所有的设备通过节点
yum install openstack-cinder scsi-target-utils
scsi的介绍是做数据传输和同步的技术
5. Copy the /etc/cinder/cinder.conf configuration file from the controller, or
perform the following steps to set the keystone credentials:
devices {
...
filter = [ "a/sda1/", "a/sdb/", "r/.*/"]
...
}
# openstack-config --set /etc/cinder/cinder.conf DEFAULT \ auth_strategy keystone
# openstack-config --set /etc/cinder/cinder.conf keystone_authtoken \ auth_uri http://controller:5000
# openstack-config --set /etc/cinder/cinder.conf keystone_authtoken \ auth_host controller
# openstack-config --set /etc/cinder/cinder.conf keystone_authtoken \ auth_protocol http
# openstack-config --set /etc/cinder/cinder.conf keystone_authtoken \ auth_port 35357
# openstack-config --set /etc/cinder/cinder.conf keystone_authtoken \ admin_user cinder
# openstack-config --set /etc/cinder/cinder.conf keystone_authtoken \ admin_tenant_name service
# openstack-config --set /etc/cinder/cinder.conf keystone_authtoken \ admin_password CINDER_PASS
6. Configure Block Storage to use the Qpid message broker:
7. Configure Block Storage to use your MySQL database. Edit the /etc/cinder/ cinder.conf file and add the following key to the [database] section. Replace CINDER_DBPASS with the password you chose for the Block Storage database:
# openstack-config --set /etc/cinder/cinder.conf \ DEFAULT rpc_backend qpid
# openstack-config --set /etc/cinder/cinder.conf \ DEFAULT qpid_hostname controller
# openstack-config --set /etc/cinder/cinder.conf \
database connection mysql://cinder:CINDER_DBPASS@controller/cinder
76
cehouse - Icehouse - Icehouse - Icehouse - Icehouse - Icehouse - Icehouse - Icehouse - Icehouse
OpenStack Installation Guide for November 20, 2014 icehouse Red Hat Enterprise Linux, CentOS,
and Fedora
8. In the [DEFAULT] section, configure the my_ip option:
Replace MANAGEMENT_INTERFACE_IP_ADDRESS with the IP address of the management network interface on your storage node, typically 10.0.0.41 for the first node in the example architecture.
9. Configure Block Storage to use the Image Service. Block Storage needs access to images to create bootable volumes. Edit the /etc/cinder/cinder.conf file and update the glance_host option in the [DEFAULT] section:
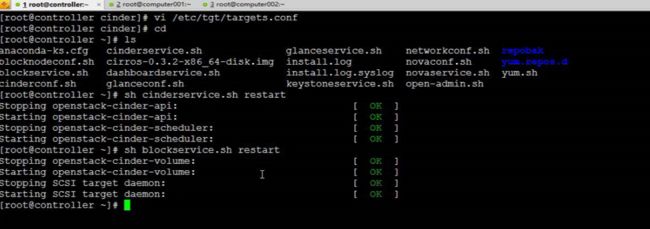
10. Configure Block Storage to use the tgtadm iSCSI service:
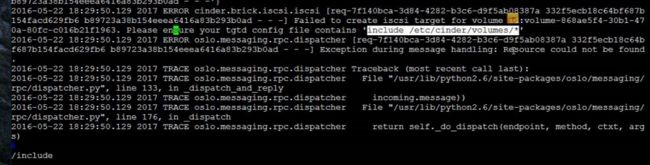
11. Configure the iSCSI target service to discover Block Storage volumes. Add the following line to the beginning of the /etc/tgt/targets.conf file, if it is not already present:
include /etc/cinder/volumes/*
12. Start and configure the Block Storage services to start when the system boots:
Verify the Block Storage installation
To verify that the Block Storage is installed and configured properly, create a new volume.
For more information about how to manage volumes, see the
节点的校验:
2. Use the cinder create command to create a new volume:
    # openstack-config --set /etc/cinder/cinder.conf \ DEFAULT my_ip MANAGEMENT_INTERFACE_IP_ADDRESS
 # openstack-config --set /etc/cinder/cinder.conf \ DEFAULT glance_host controller
 # openstack-config --set /etc/cinder/cinder.conf \ DEFAULT iscsi_helper tgtadm
 # service openstack-cinder-volume start # service tgtd start
# chkconfig openstack-cinder-volume on # chkconfig tgtd on
$ cinder create --display-name myVolume 1 +---------------------+--------------------------------------+ | Property | Value | +---------------------+--------------------------------------+
|     attachments     |
|  availability_zone  |
|       bootable      |
|      created_at     |
| display_description |
|     display_name    |
|      encrypted      |
|          id         | 5e691b7b-12e3-40b6-b714-7f17550db5d1 |
[root@localhost ~]# cinder list
[root@localhost ~]# cinder service-list
open stack使用创建的硬盘


排查不能绑定硬盘的故障:


把之前的硬盘删除,重新添加硬盘


对硬盘进行格式化


所有的文件最终将存储在/mnt/test目录下