cachecloud tag1.2
mysql5.7
maven3.6
jdk1.7+
redis4.0
cachecloud
cd /root/
git clone https://github.com/sohutv/cachecloud.git
mysql5.7.21
# wget http://dev.mysql.com/get/mysql57-community-release-el6-8.noarch.rpm
# yum install mysql-community-server mysql-community-client
# /etc/init.d/mysqld start
# grep 'temporary password' /var/log/mysqld.log

# mysql> ALTER USER 'root'@'localhost' IDENTIFIED BY 'tester';
# mysql> create database cachecloud default character set utf8 collate utf8_bin;
# mysql> use cachecloud;
# mysql> source /root/cachecloud/script/cachecloud.sql;
# mysql> show tables;

# grant all privileges on *.* to 'admin'@'localhost' identified by 'admin';
# grant all privileges on *.* to 'admin'@'127.0.0.1' identified by 'admin';
# flush privileges;
maven3.6
wget http://mirrors.shu.edu.cn/apache/maven/maven-3/3.6.0/binaries/apache-maven-3.6.0-bin.tar.gz
tar xf apache-maven-3.6.0-bin.tar.gz
mv apache-maven-3.6.0 /Data/apps/maven
ln -sv /Data/apps/maven/bin/mvn /sbin/mvn
jdk1.8
cd /opt/ && wget https://download.oracle.com/otn-pub/java/jdk/8u201-b09/42970487e3af4f5aa5bca3f542482c60/jdk-8u201-linux-x64.tar.gz
tar xf jdk-8u201-linux-x64.tar.gz
#vim /etc/profile
export JAVA_HOME=/opt/jdk1.8.0_111
export JRE_HOME=${JAVA_HOME}/jre
export CLASSPATH=.:${JAVA_HOME}/lib:${JRE_HOME}/lib
export PATH=${JAVA_HOME}/bin:$PATH
source /etc/profile
java -version
cachecloud配置
cachecloud配置文件properties修改
#用户生产使用
/root/cachecloud/cachecloud-open-web/src/main/swap/online.properties
#用户本地测试使用
/root/cachecloud/cachecloud-open-web/src/main/swap/local.properties
vim /root/cachecloud/cachecloud-open-web/src/main/swap/online.properties

cachecloud.db.url = jdbc:mysql://127.0.0.1:3306/cachecloud   #修改数据库的名字,注意空格
cachecloud.db.user = admin                                   #数据库访问的用户
cachecloud.db.password = admin                               #数据库访问的密码
cachecloud.maxPoolSize = 20

isClustered = true
isDebug = false
spring-file=classpath:spring/spring-online.xml
log_base=/opt/cachecloud-web/logs
web.port=8585
log.level=WARN
vim /root/cachecloud/cachecloud-open-web/src/main/swap/local.properties
cachecloud.db.url = jdbc:mysql://127.0.0.1:3306/cachecloud
cachecloud.db.user = admin
cachecloud.db.password = admin
cachecloud.maxPoolSize = 20

isClustered = true
isDebug = true
spring-file = classpath:spring/spring-local.xml
log_base = /opt/cachecloud-web/logs
web.port = 9999
log.level = INFO
cachecloud源码安装启动
本地测试配置
在/root/cachecloud/根目录下运行
cd /root/cachecloud/
mvn clean compile install -Plocal      #编译会等一段时间
在cachecloud-open-web模块下运行
cd /root/cachecloud/cachecloud-open-web
mvn spring-boot:run
生产环境配置
在cachecloud根目录下运行
cd /root/cachecloud/
mvn clean compile install -Ponline
# 新建cachecloud 安装服务目录
mkdir -p /opt/cachecloud-web
# 拷贝cachecloud 配置文件和cachecloud war包
cp /root/cachecloud/cachecloud-open-web/src/main/resources/cachecloud-web.conf /opt/cachecloud-web/
cp /root/cachecloud/cachecloud-open-web/target/cachecloud-open-web-1.0-SNAPSHOT.war /opt/cachecloud-web/
启动使用系统服务启动
ln -s /opt/cachecloud-web/cachecloud-open-web-1.0-SNAPSHOT.war /etc/init.d/cachecloud-web
/etc/init.d/cachecloud-web start
启动脚本服务启动
启动方法2(使用脚本启动,大部分操作系统都正常)
cp /root/cachecloud/script/start.sh /opt/cachecloud-web/
cp /root/cachecloud/script/stop.sh  /opt/cachecloud-web/
sh start.sh #如果机器内存不足,修改start.sh脚本,可以适当调小:-Xmx和-Xms(默认是4g)
sh stop.sh
访问cachecloud 界面
http://10.1.21.169/8585
用户名和密码都是 admin
新建redis集群
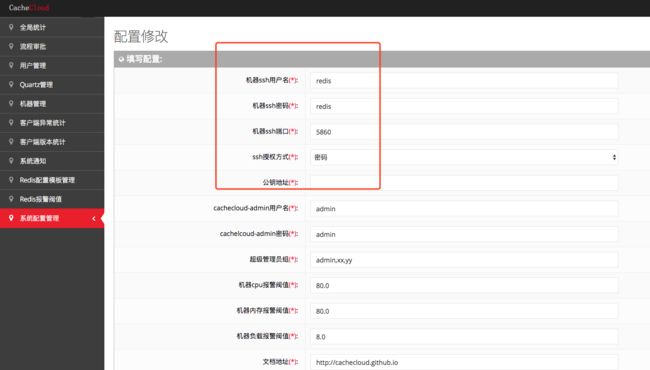
cachecloud 是使用ssh方式来管理主机机器的,所以我们这里通过用户名和密码的方式来管理机器
下面的脚本会自动安装redis服务,并且建立用户和给用户创建密码(根据提示需要自己手动输入密码)
redis4.0
cat /opt/cachecloud-init.sh  ### 这个脚本在cd /root/cachecloud/scripts/ 中
#!/bin/bash
############################################################################
# @desc:
#   - 1. create user;
#   - 2. create default directories and authorize;
#   - 3. @usage: sh cachecloud-init.sh [username]
# @author: leifu
# @time:
###########################################################################

set -o nounset
set -o errexit

readonly redisDir="/opt/cachecloud/redis"
#readonly redisTarGz="redis-3.0.7.tar.gz"
readonly redisTarGz="redis-4.0.12.tar.gz"    ###redis4.0

# check if the user exists
checkExist() {
    local num=`cat /etc/passwd | grep -w $1 | wc -l`

    #cat /etc/passwd | grep -q "$1"
    if [[ $num == 1 ]]; then
        echo "user $1 exists, overwrite user and *init all data*: [y/n]?"
        read replace
        if [[ ${replace} == "y" ]]; then
            echo "delete existed user: $1."
            userdel -r "$1"
            createUser "$1"
            init "$1"
            return 0
        fi
    else
        createUser "$1"
        init "$1"
    fi
    return 0
}


# create the user
createUser() {
    # create a user
    useradd -m -d /home/$1 -s /bin/bash $1

    # give the user a password
    passwd $1

    # add the user to sudoers
    #   echo "$1    ALL=(ALL)   ALL" >> /etc/sudoers

    #  Maximum number of days between password change
    chage -M 9999 $1
    echo "OK: create user: $1 done"

}

# create defautl dirs and authorize
init() {
    # create working dirs and a tmp dir
    mkdir -p /opt/cachecloud/data
    mkdir -p /opt/cachecloud/conf
    mkdir -p /opt/cachecloud/logs
    mkdir -p /opt/cachecloud/redis
    mkdir -p /tmp/cachecloud

    # change owner
    chown -R $1:$1 /opt/cachecloud
    chown -R $1:$1 /tmp/cachecloud
    echo "OK: init: $1 done"
}


# install redis
installRedis() {
    #which redis-server
    #if [[ $? == 0 ]]; then
    #   echo "WARN: redis is already installed, exit."
    #   return
    #fi

    yum install -y gcc
    mkdir -p ${redisDir} && cd ${redisDir}
    wget http://download.redis.io/releases/${redisTarGz} && mv ${redisTarGz} redis.tar.gz && tar zxvf redis.tar.gz --strip-component=1
    make && make install
    if [[ $? == 0 ]]; then
        echo "OK: redis is installed, exit."
        chown -R $1:$1 ${redisDir}
        export PATH=$PATH:${redisDir}/src
        return
    fi
    echo "ERROR: redis is NOT installed, exit."
}

username=$1
checkExist "${username}"
installRedis "${username}"
执行安装redis初始化脚本
sh /opt/cachecloud-init.sh redis #权限为redis 新建redis用户

