2018年5月15日
- btn.titleLabel.font = [UIFont systemFontOfSize:22];
2017年9月27日
1.xib按钮 图片背景颜色显示错误修改
image.png
2017年9月19日
1.图片和文字布局修改
- (void)layoutButtonWithEdgeInsetsStyle:(MKButtonEdgeInsetsStyle)style
                        imageTitleSpace:(CGFloat)space {
    // 1. 得到imageView和titleLabel的宽、高
    //    CGFloat imageWith = self.imageView.frame.size.width;
    //    CGFloat imageHeight = self.imageView.frame.size.height;
    CGFloat imageWith = self.currentImage.size.width;
    CGFloat imageHeight = self.currentImage.size.height;

    CGFloat labelWidth = 0.0;
    CGFloat labelHeight = 0.0;
    if ([UIDevice currentDevice].systemVersion.floatValue >= 8.0) {
        // 由于iOS8中titleLabel的size为0,用下面的这种设置
        labelWidth = self.titleLabel.intrinsicContentSize.width;
        labelHeight = self.titleLabel.intrinsicContentSize.height;
    } else {
        labelWidth = self.titleLabel.frame.size.width;
        labelHeight = self.titleLabel.frame.size.height;
    }

    // 2. 声明全局的imageEdgeInsets和labelEdgeInsets
    UIEdgeInsets imageEdgeInsets = UIEdgeInsetsZero;
    UIEdgeInsets labelEdgeInsets = UIEdgeInsetsZero;

    // 3. 根据style和space得到imageEdgeInsets和labelEdgeInsets的值
    switch (style) {
        case MKButtonEdgeInsetsStyleTop: {
            imageEdgeInsets = UIEdgeInsetsMake(-labelHeight-space, 0, 0, -labelWidth);
            labelEdgeInsets = UIEdgeInsetsMake(0, -imageWith, -imageHeight-space, 0);
        }
            break;
//图片在左
        case MKButtonEdgeInsetsStyleLeft: {
            imageEdgeInsets = UIEdgeInsetsMake(0, -space, 0, space);
            labelEdgeInsets = UIEdgeInsetsMake(0, space, 0, -space);
        }
            break;
        case MKButtonEdgeInsetsStyleBottom: {
            imageEdgeInsets = UIEdgeInsetsMake(0, 0, -labelHeight-space, -labelWidth);
            labelEdgeInsets = UIEdgeInsetsMake(-imageHeight-space, -imageWith, 0, 0);
        }
            break;
        case MKButtonEdgeInsetsStyleRight: {
            imageEdgeInsets = UIEdgeInsetsMake(0, labelWidth+space, 0, -labelWidth-space);
            labelEdgeInsets = UIEdgeInsetsMake(0, -imageWith-space, 0, imageWith+space);
        }
            break;
        default:
            break;
    }
    // 4. 赋值
    self.titleEdgeInsets = labelEdgeInsets;
    self.imageEdgeInsets = imageEdgeInsets;
}
2017年7月22日
1.获取按钮title
NSString *title = self.resendButton.currentTitle;
2017年5月27日
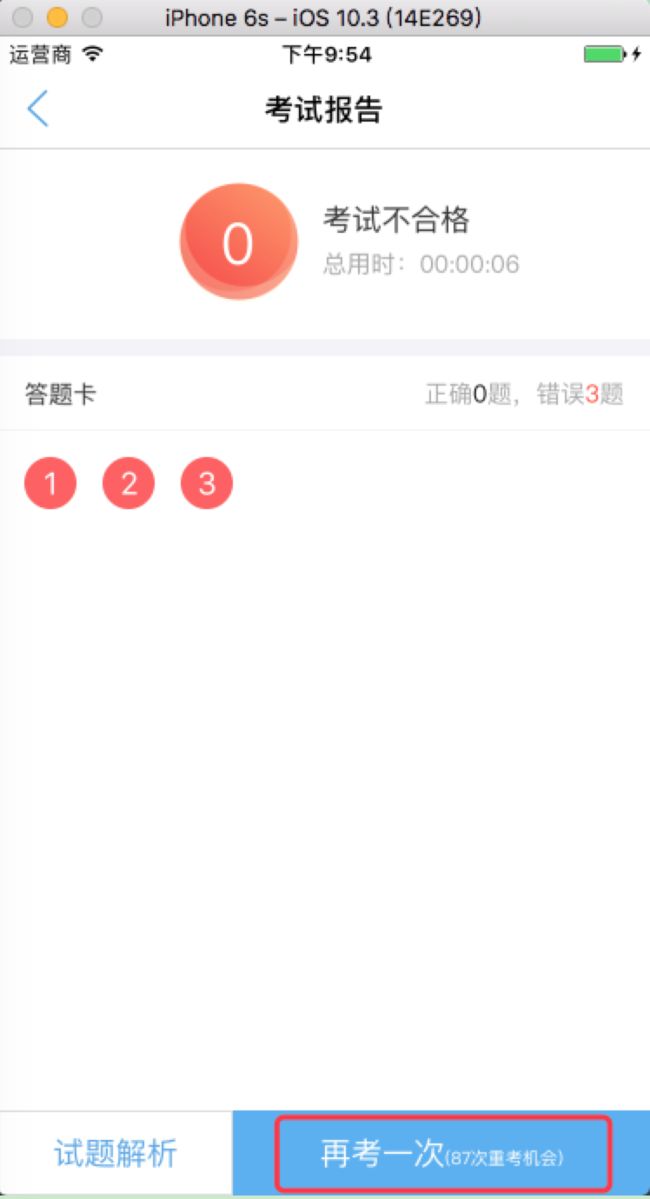
一.按钮设置富文本显示
效果:
2.实现
//实现字体不同大小效果
            NSMutableAttributedString *attributedStr = [self getOneMoreBtnChangeText:num];
            [_oneMoreB setAttributedTitle:attributedStr forState:UIControlStateNormal];
- (NSMutableAttributedString *)getOneMoreBtnChangeText:(NSInteger)num
{
    NSString *part1 = _oneMoreB.titleLabel.text;
    NSString *part2 = [NSString stringWithFormat:@"(%ld次重考机会)",num];
    NSInteger len1 = part1.length;
    NSInteger len2 = part2.length;
    NSString *str = [NSString stringWithFormat:@"%@%@",part1,part2];
    NSMutableAttributedString *attributedStr = nil;

    NSInteger length = len1;
    NSInteger index = 0;
    attributedStr = [[NSMutableAttributedString alloc] initWithString:str];
    [attributedStr addAttribute:NSFontAttributeName
                          value:fontsize_T1
                          range:NSMakeRange(index, length)];


    index = index + length;
    length = len2;
    [attributedStr addAttribute:NSFontAttributeName
                          value:fontsize_T5
                          range:NSMakeRange(index, length)];

    return attributedStr;
}
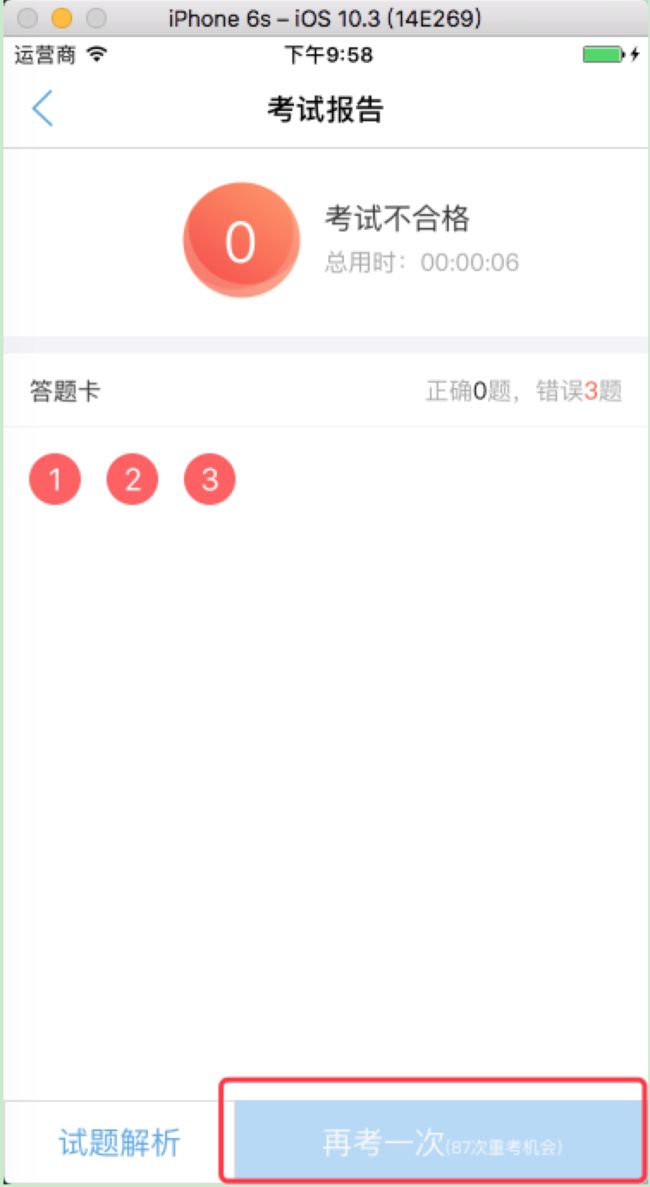
二.不可点击按钮变灰色
实现
if (num > 0) {
        _oneMoreB.enabled = YES;
        _oneMoreB.alpha = 1.0;
    }else{
        _oneMoreB.enabled = NO;
        _oneMoreB.alpha = 0.4;
    }
2017年4月18日
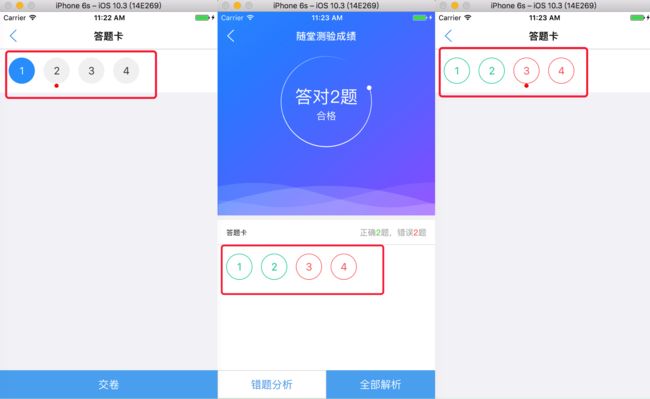
一.创建圆形按钮(答题卡)实现
1.效果
2.主要实现代码
2.1按钮控件
//题卡按钮类型
typedef NS_ENUM(NSInteger, HuExerciseCardBtnType){
    HuExerciseCardBtnTypeNoDone,//默认题卡样式没答题(答题)
    HuExerciseCardBtnTypeDone,//答过题(答题)
    HuExerciseCardBtnTypeWrong,//答错题
    HuExerciseCardBtnTypeRight,//答对题
};

+ (HuButton *)exerciseCardBtn:(HuExerciseCardBtnType)btnType
{
    HuButton *btn = [[HuButton alloc] init];
    //默认是错误的样式
    [btn setBackgroundColor:[UIColor clearColor]];
    [btn.layer setBorderWidth:list_borderLine_height];
    UIColor *color;
    if(btnType == HuExerciseCardBtnTypeRight)
    {
         color = [HuConfigration uiColorFromString:@"#0acd9f"];
    }
    else if(btnType == HuExerciseCardBtnTypeWrong)
    {
        color = [HuConfigration uiColorFromString:@"#ff6969"];
    }
    else if(btnType == HuExerciseCardBtnTypeNoDone)
    {
        //没有答过的样式
        [btn setBackgroundColor:eCard_undo_color];
        color = [HuConfigration uiColorFromString:@"#484848"];
        [btn.layer setBorderWidth:0];
    }
    else if (btnType == HuExerciseCardBtnTypeDone)
    {
        //答过题目样式
        [btn setBackgroundColor:eCard_do_color];
        color = fontcolor_C1;
        [btn.layer setBorderWidth:0];
    }

    btn.layer.borderColor = color.CGColor;
    [btn setTitleColor:color forState:UIControlStateNormal];

    return btn;
}
2.2创建各个样式答题卡
- (void)initContentView
{
    _scrollView = [[UIScrollView alloc]init];
    _scrollView.backgroundColor = fontcolor_C1;
    [self.view addSubview:_scrollView];

    //添加序号按钮
    UIButton *lastBtn = nil;
    NSInteger row = 0;
    CGRect frame;


    for(int i = 0; i < [_allExerciseShowIdArr count]; i++)
    {
        //设置答过题目按钮的样式
        NSString *curID = _allExerciseShowIdArr[i];
        HuExerciseCardBtnType btnType = HuExerciseCardBtnTypeNoDone;
        if ([_allUserAnswerExerciseShowIdArr containsObject:curID]) {
            btnType = HuExerciseCardBtnTypeDone;
        }

        if(_pageType == HuTestPracticePageTypeAnalyse)
        {
            if (i < _resExercises.count) {
                btnType = _resExercises[i].result ? HuExerciseCardBtnTypeRight : HuExerciseCardBtnTypeWrong;
            }
        }

        HuButton *btn = [HuButton exerciseCardBtn:btnType];

        [_scrollView addSubview:btn];

        CGFloat yPos;
        CGFloat xPos;
        if(lastBtn == nil){
            yPos = eCard_btn_vFlap;
            xPos = common_margin;
            if(row==0){row = 1;}
        }else if(lastBtn.right + eCard_btn_hFlap + eCard_btn_width > HHBWIDTH){
            yPos = lastBtn.bottom + eCard_btn_vFlap;
            xPos = common_margin;
            row++;
        }else{
            yPos = lastBtn.top;
            xPos = lastBtn.right + eCard_btn_hFlap;
        }
        frame = CGRectMake(xPos, yPos, eCard_btn_width, eCard_btn_height);
        btn.frame = frame;
        btn.layer.cornerRadius = eCard_btn_width/2.0;

        [btn setTitle:curID forState:UIControlStateNormal];


        btn.tag = tag_begin_index + i;
        [btn addTarget:self action:@selector(btnClick:) forControlEvents:UIControlEventTouchUpInside];

        //设置当前位置的小红点
        if(i == _eId)
        {
            UILabel * redLabel = [[UILabel alloc] init];
            redLabel.backgroundColor = [UIColor redColor];
            CGFloat width = 7;
            redLabel.layer.cornerRadius = width/2;
            redLabel.layer.masksToBounds = YES;
            CGRect frame = CGRectMake(btn.centerX - width/2.0, btn.bottom, width, width);
            redLabel.frame = frame;
            [_scrollView addSubview:redLabel];
        }

        lastBtn = btn;
    }

    //设置_scrollView滚动相关属性
    if (row > 0) {
        CGFloat contentHeight = lastBtn.bottom + eCard_btn_vFlap;
        CGFloat viewHeight = eCard_contentView_height;
        //需要滚动
        if (contentHeight > viewHeight) {
            _scrollView.contentSize = CGSizeMake(HHBWIDTH, contentHeight);
            _scrollView.scrollEnabled = YES;
        }else{
            _scrollView.scrollEnabled = NO;
        }

        _scrollView.frame = CGRectMake(0, 0, HHBWIDTH, MIN(contentHeight,viewHeight));
    }
}
2017年4月17日
一.整行按钮 如何实现等间距显示
1.效果:
2.实现:
    NSArray *title=[[NSArray alloc]initWithObjects:@"电子会刊",@"介绍",@"嘉宾",@"获奖名单",@"会务咨询" ,nil];


    CGFloat viewWidth = HHBWIDTH - 2*common_margin;

    CGFloat allBtnViewWidth = 0;
    UIFont *fontSize = fontsize_T2;
    NSMutableArray *btnViewWidthArr = @[].mutableCopy;
    for (NSInteger i = 0; i < title.count; i++) {
        CGSize size = [title[i] sizeWithAttributes: @{NSFontAttributeName:fontSize}];
        allBtnViewWidth += size.width;
        [btnViewWidthArr addObject:@(size.width)];
    }

    CGFloat flap = (viewWidth - allBtnViewWidth)/(title.count - 1);
    if (flap < 0) {
        flap = 0;
    }

    CGFloat xPos = common_margin;
    CGFloat yPos = 25;
    CGFloat width = 0;
    CGFloat height = 30;
    for (int i = 0; i < title.count; i ++) {
       //////////

        width = [btnViewWidthArr[i] floatValue];
        navigationBtn.frame = CGRectMake(xPos, yPos, width, height);
        xPos += width + flap;

        [_navigationView addSubview:navigationBtn];

    }
2017年3月14日
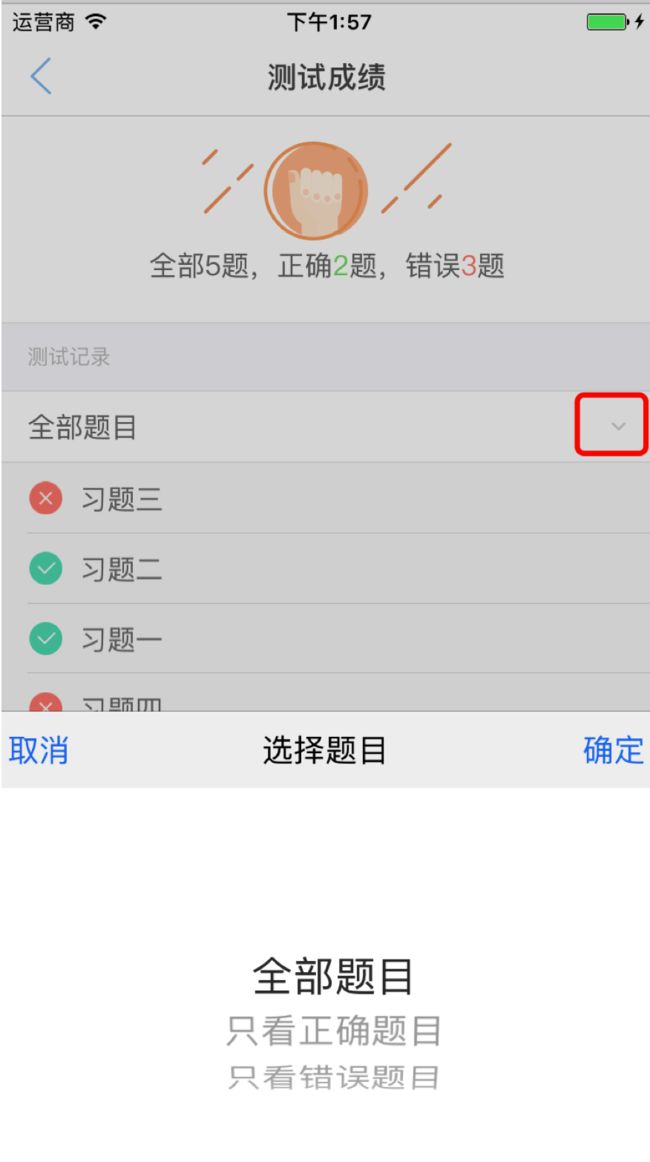
一.按钮点击区域太小解决,添加一个透明按钮
1.效果:
2.实现(添加一个透明按钮)
    xPos = HHBWIDTH - common_margin - filterBtn_width;
    yPos = (practice_filterView_height - filterBtn_height)/2.0;
    frame = CGRectMake(xPos, yPos, filterBtn_width, filterBtn_height);
    _filterBtn = [[UIButton alloc] initWithFrame:frame];
    [_filterBtn setImage:IMG(@"filterBtn") forState:UIControlStateNormal];
    [_filterBtn addTarget:self action:@selector(btnClick:) forControlEvents:UIControlEventTouchUpInside];
    [bgView addSubview:_filterBtn];

    //添加一个透明按钮扩大点击区域
    width = 50;
    height = practice_filterView_height;
    xPos = HHBWIDTH - width;
    yPos = 0;
    frame = CGRectMake(xPos, yPos, width, height);
    UIButton *enlargeBtn = [[UIButton alloc] initWithFrame:frame];
    [enlargeBtn addTarget:self action:@selector(btnClick:) forControlEvents:UIControlEventTouchUpInside];
    [bgView addSubview:enlargeBtn];

    [self.view addSubview:bgView];
2017年1月11日
1.延迟点击
UIButton * button = [_tabBarBgView viewWithTag:1];
[self performSelector:@selector(btnClick:) withObject:button afterDelay:5];
如果您发现本文对你有所帮助,如果您认为其他人也可能受益,请把它分享出去。
