一、制作镜像的目录结构说明及制作:
1.Dockerfile 文件说明
[root@k8s-node1 make_nginx]# cat Dockerfile
FROM centos:6.8

ENV NGINX_VERSION 1.13.6
# Init centos
ENV TERM="linux"
ENV TERMINFO="/etc/terminfo"
ENV LANG="en_US.UTF-8"
ENV LANGUAGE="en_US.UTF-8"
ENV LC_ALL="en_US.UTF-8"
ENV TZ="PRC"

RUN CONFIG="\
                --user=nginx \
                --group=nginx \
                --prefix=/usr/local/nginx \
                --with-http_stub_status_module \
                --with-http_ssl_module \
        " \
        && useradd nginx -s /sbin/nologin \
        && yum makecache fast \
        && yum install openssl openssl-devel pcre pcre-devel gcc epel-release openssh-server -y \
        && curl -fSL http://nginx.org/download/nginx-$NGINX_VERSION.tar.gz -o /usr/local/src/nginx-$NGINX_VERSION.tar.gz  \
        && tar -xvf /usr/local/src/nginx-$NGINX_VERSION.tar.gz  -C /usr/local/src \
        && cd /usr/local/src/nginx-$NGINX_VERSION \
        && ./configure $CONFIG \
        && make \
        && make install \
        && rm /usr/local/src/* -rf \
        && rm /usr/local/nginx/conf/nginx.conf -rf \
        && ln -s /tmp/nginx.conf/nginx.conf  /usr/local/nginx/conf/nginx.conf \
        && rm -f /etc/ssh/ssh_host_dsa_key /etc/ssh/ssh_host_rsa_key \
        && ssh-keygen -q -N "" -t dsa -f /etc/ssh/ssh_host_dsa_key \
        && ssh-keygen -q -N "" -t rsa -f /etc/ssh/ssh_host_rsa_key \
        && sed -i "s/#UsePrivilegeSeparation.*/UsePrivilegeSeparation no/g" /etc/ssh/sshd_config \
        && sed -i 's#GSSAPIAuthentication yes#GSSAPIAuthentication no#g' /etc/ssh/sshd_config  \
        && echo "root:xxxxx" | chpasswd \
        && yum install supervisor -y \
        && mkdir /etc/supervisor \
        && chkconfig --level 2345 supervisord on \
        && yum clean all

COPY localtime /etc/localtime
COPY supervisord.conf /etc/supervisor/

EXPOSE 80  22
CMD ["/usr/bin/supervisord","-c","/etc/supervisor/supervisord.conf"]
2.1 将localtime拷贝到容器中目的是为了保持时区的一致,localtime 从本地的/etc/localtime 拷贝到该目录下即可。
2.2 在Dockerfile 当前目录下创建一个supervisord.conf文件,文件内容如下:
[supervisord]
; start in foreground if true, default false
nodaemon = true
[program:sshd]
; the program (relative uses PATH, can take args)
command=/usr/sbin/sshd -D
auto_start = true
autorestart = true
[program:nginx]
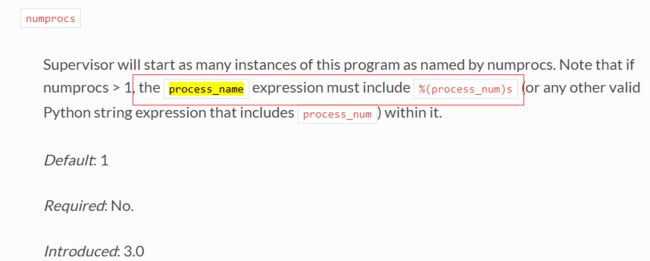
; Note that if numprocs > 1, the process_name expression must include %(process_num)s
command=/usr/local/nginx/sbin/nginx run
process_name=%(process_num)s
auto_start = true
autorestart = true
stdout_logfile = /dev/stdout
stdout_logfile_maxbytes = 0
stderr_logfile = /dev/stderr
stderr_logfile_maxbytes = 0
注意:服务的进程数大于1,需要添加process_name=%(process_num)s,官方文档中有明确说明。
提示:容器中的nginx需要在前台运行,所以nginx.conf 配置文件中需添加:daemon off; 否则容器中的nginx 不会自启。
3.构建镜像
[root@k8s-node1 make_nginx]# docker build -t pp100_nginx:V2 .
二、镜像在本地保存及在远端node上加载使用
1.保存本地的镜像
[root@k8s-node1 make_nginx]# docker save pp100_nginx:V2 | gzip > pp100_nginx_V2.tar.gz
2.将镜像拷贝到远端的node节点上(每个节点都需要操作,下同)
[root@k8s-node1 make_nginx]# scp pp100_nginx_V2.tar.gz 192.168.6.126:/root/images/
3.登陆到远端的node节点上将镜像进行加载
[root@k8s-node03 images]# docker load -i pp100_nginx_V2.tar.gz
三、k8s集群中创建容器 说明:
1. 创建容器所需要的yaml文件有pvc.yaml,deployment.yaml, service.yaml,ingress.yaml
①pvc.yaml配置文件
kind: PersistentVolumeClaim
apiVersion: v1
metadata:
  name: sit-h5web-pvc
  namespace:  kube-public
spec:
  storageClassName: heketi-usage
  accessModes:
    - ReadWriteMany
  resources:
    requests:
      storage: 1Gi
②deployment.yaml配置文件
apiVersion: extensions/v1beta1
kind: Deployment
metadata:
  name: sit-cl-h5web
  namespace:  kube-public
spec:
  replicas: 1
  template:
    metadata:
      labels:
        name: sit-cl-h5web
    spec:
      containers:
      - name: sit-cl-h5web
        image: pp100_nginx:V2
        imagePullPolicy: IfNotPresent
        ports:
        - name: nginxweb
          containerPort: 80
        - name: ssh
          containerPort: 22
        volumeMounts:
        - mountPath: /usr/local/nginx/html
          name: sit-h5web-folder
        - mountPath: /tmp/nginx.conf
          name: sit-h5web-configfile
      volumes:
      - name: sit-h5web-folder
        persistentVolumeClaim:
          claimName: sit-h5web-pvc
      - name: sit-h5web-configfile
        configMap:
          name: sit-h5web-config-conf
      dnsPolicy: ClusterFirst
③service.yaml配置文件
apiVersion: v1
kind: Service
metadata:
  name: sit-cl-h5web
  namespace:  kube-public
  labels:
    name: sit-cl-h5web
spec:
  ports:
    - name: nginxweb
      port: 80
      targetPort: nginxweb
    - name: ssh
      port: 22
      targetPort: ssh
  selector:
    name: sit-cl-h5web
④ingress.yaml配置文件
apiVersion: extensions/v1beta1
kind: Ingress
metadata:
  name: sit-cl-h5web
  namespace:  kube-public
spec:
  rules:
  - host: k8s-sit-masterback.pp100.net
    http:
      paths:
      - path: /
        backend:
          serviceName: sit-cl-h5web
          servicePort: nginxweb
2. 创建步骤
2.1创建configmap[要在创建deployment前创建]
[root@k8s-master01 uat-ssh-h5web]# kubectl -n kube-public create configmap h5web-config-conf --from-file=./nginx.conf
configmap "h5web-config-conf" created
[root@k8s-master01 uat-ssh-h5web]# kubectl -n kube-public get configmap  -o wide
NAME                DATA      AGE
h5web-config-conf   1         12s
Note: 因为通过configmap映射到容器里的目录下的文件会全部清空,因此采用先映射到一个临时文件夹下,再通过软链接的方式映射到Nginx的conf目录下
PS:修改已经创建好了的configmap方法:
[root@k8s-master01 k8s-1.7-release-yaml]# kubectl  -n pp100 get configmap
NAME                       DATA      AGE
jnlp-mvn-settings-xml      1         98d
job-admin-sit-server-xml   1         93d
job-admin-uat-server-xml   1         99d
prom-yaml                  1         64d
[root@k8s-master01 k8s-1.7-release-yaml]# kubectl  edit configmap jnlp-mvn-settings-xml  -n pp100
- 2创建deployment
[root@k8s-master01 uat-ssh-h5web]# kubectl create -f cl-h5web-deployment.yaml
[root@k8s-master01 uat-ssh-h5web]# kubectl -n kube-public get pod -o wide
2.3 创建service
[root@k8s-master01 uat-ssh-h5web]# kubectl create -f cl-h5web-svc.yaml
[root@k8s-master01 uat-ssh-h5web]# kubectl -n kube-public get svc -o wide
2.4创建ingress
[root@k8s-master01 uat-ssh-h5web]# kubectl create -f cl-h5web-ingress.yaml
[root@k8s-master01 uat-ssh-h5web]# kubectl -n kube-public get ingress -o wide
2.5做对外端口映射
[root@k8s-master01 uat-ssh-h5web]# cd /root/k8s-1.7-release-yaml/nginx-ingress-controller
[root@k8s-master01 nginx-ingress-controller]# cat nginx-tcp-ingress-configmap.yaml
apiVersion: v1
kind: ConfigMap
metadata:
  name: nginx-tcp-ingress-configmap
  namespace: kube-system
data:
  2200: "pp100/gitlab:22"
  2201: "kube-public/cl-pay-sit:22"
  2202: "kube-public/cl-web-sit:22"
  2203: "kube-public/mongodb:27017"
  2204: "pp100/sit-cl-h5web:22"
[root@k8s-master01 nginx-ingress-controller]# kubectl apply -f nginx-tcp-ingress-configmap.yaml --record
2.5复制代码到容器中
[root@k8s-master01 uat-ssh-h5web]# kubectl -n kube-public cp ./index.html  sit-cl-h5web-2533816659-2gp04:/usr/local/nginx/html/
[root@k8s-master01 uat-ssh-h5web]# kubectl -n kube-public cp ./static  sit-cl-h5web-2533816659-2gp04:/usr/local/nginx/html/
2.6Nginx配置文件修改的方法
[root@k8s-master01 uat-ssh-h5web]# kubectl -n kube-public edit configmap sit-h5web-config-conf
关于configmap的介绍官方文档地址:
https://kubernetes.io/docs/tasks/configure-pod-container/configure-pod-configmap/