人生苦短,我用 Python
前文传送门:
小白学 Python 爬虫(1):开篇
小白学 Python 爬虫(2):前置准备(一)基本类库的安装
小白学 Python 爬虫(3):前置准备(二)Linux基础入门
小白学 Python 爬虫(4):前置准备(三)Docker基础入门
小白学 Python 爬虫(5):前置准备(四)数据库基础
小白学 Python 爬虫(6):前置准备(五)爬虫框架的安装
小白学 Python 爬虫(7):HTTP 基础
小白学 Python 爬虫(8):网页基础
小白学 Python 爬虫(9):爬虫基础
小白学 Python 爬虫(10):Session 和 Cookies
小白学 Python 爬虫(11):urllib 基础使用(一)
小白学 Python 爬虫(12):urllib 基础使用(二)
小白学 Python 爬虫(13):urllib 基础使用(三)
小白学 Python 爬虫(14):urllib 基础使用(四)
小白学 Python 爬虫(15):urllib 基础使用(五)
小白学 Python 爬虫(16):urllib 实战之爬取妹子图
小白学 Python 爬虫(17):Requests 基础使用
小白学 Python 爬虫(18):Requests 进阶操作
小白学 Python 爬虫(19):Xpath 基操
小白学 Python 爬虫(20):Xpath 进阶
小白学 Python 爬虫(21):解析库 Beautiful Soup(上)
小白学 Python 爬虫(22):解析库 Beautiful Soup(下)
小白学 Python 爬虫(23):解析库 pyquery 入门
小白学 Python 爬虫(24):2019 豆瓣电影排行
小白学 Python 爬虫(25):爬取股票信息
小白学 Python 爬虫(26):为啥买不起上海二手房你都买不起
小白学 Python 爬虫(27):自动化测试框架 Selenium 从入门到放弃(上)
小白学 Python 爬虫(28):自动化测试框架 Selenium 从入门到放弃(下)
小白学 Python 爬虫(29):Selenium 获取某大型电商网站商品信息
小白学 Python 爬虫(30):代理基础
小白学 Python 爬虫(31):自己构建一个简单的代理池
小白学 Python 爬虫(32):异步请求库 AIOHTTP 基础入门
小白学 Python 爬虫(33):爬虫框架 Scrapy 入门基础(一)
小白学 Python 爬虫(34):爬虫框架 Scrapy 入门基础(二)
小白学 Python 爬虫(35):爬虫框架 Scrapy 入门基础(三) Selector 选择器
小白学 Python 爬虫(36):爬虫框架 Scrapy 入门基础(四) Downloader Middleware
小白学 Python 爬虫(37):爬虫框架 Scrapy 入门基础(五) Spider Middleware
引言
Item Pipeline 直译过来是项目管道的意思。
Spider 抓取了一个项目后,将其发送到项目管道,该管道通过依次执行的几个组件对其进行处理。
每个项目管道都是一个实现简单方法的 Python 类。 他们接收到一个项目并对其执行操作,还决定该项目是否应继续通过管道或被删除并不再处理。
Item Pipeline 主要用于以下场景:
- 清理HTML数据
- 验证抓取的数据(检查项目是否包含某些字段)
- 检查重复项(并将其删除)
- 将爬取的结果存储在数据库中
自定义 Item Pipeline
自定义 Item Pipeline 必须要实现一个方法 process_item(self, item, spider) 。
另外还有几个可选的比较有用的方法:
- open_spider(self, spider)
- close_spider(self, spider)
- from_crawler(cls, crawler)
接下来我们介绍详细一点的用法。
process_item(self, item, spider)
参数:
item (item 类型为对象或字典)–抓取的物品
spider (spider 对象)–抓取物品的 spider
这个方法是必须要实现的方法,每个 Item Pipeline 都调用此方法。 process_item() 必须返回带有数据的字典,返回Item(或任何后代类)对象,返回 Twisted Deferred 或引发 DropItem 异常。
open_spider(self, spider)
参数:
spider (spider 对象)–已开启的 spider
这个方法在 Spider 开启的时候被自动调用。
close_spider(self, spider)
参数:
spider (spider 对象)–已关闭的 spider
这个方法在 Spider 关闭的时候被自动调用。
from_crawler(cls, crawler)
from_crawler() 方法是一个类方法,用 @classmethod 标识,是一种依赖注入的方式。它的参数是 crawler ,通过 crawler 对象,我们可以获取到 Scrapy 所有的核心组件。
示例
本次示例还是使用妹子图。
目标是将妹子图首页的数据通过 Item Pipeline 存入 MongoDB 和 Mysql 中。
首先还是新建一个 MziTuSpider ,示例代码如下:
# -*- coding: utf-8 -*-
from scrapy import Spider, Request
from first_scrapy.items import ImageItem

class MziTuSpider(Spider):
    name = 'MziTuSpider'
    allowed_domains = ['www.mzitu.com']
    start_urls = ['https://www.mzitu.com/mm/']

    def start_requests(self):
        headers = {
            'user-agent': 'Mozilla/5.0 (Windows NT 10.0; Win64; x64) AppleWebKit/537.36 (KHTML, like Gecko) Chrome/79.0.3945.117 Safari/537.36',
            'referer': 'https://www.mzitu.com/'
        }
        yield Request('https://www.mzitu.com/mm/', self.parse, headers = headers)

    def parse(self, response):
        imageList = response.css('.postlist ul li')
        for image in imageList:
            item = ImageItem()
            item['id'] = image.css('a::attr("href")').extract_first().split('/')[3]
            item['url'] = image.css('a::attr("href")').extract_first()
            item['title'] = image.css('a img::attr("alt")').extract_first()
            item['thumb'] = image.css('a img::attr("data-original")').extract_first()
            yield item
其次我们再创建一个 Item 用来提取信息,示例代码如下:
import scrapy

class ImageItem(scrapy.Item):
    collection = table = 'image'
    id = scrapy.Field()
    url = scrapy.Field()
    title = scrapy.Field()
    thumb = scrapy.Field()
在前面的示例中我们已经创建了一个 MongoPipeline 用来讲数据保存在 MongoDB 中,本次我们再加一个 MysqlPipeline 将数据保存在 Mysql 中,示例代码如下:
前提需本地正常安装 pymysql 。
import pymysql


class MysqlPipeline():
    def __init__(self, host, database, user, password, port):
        self.host = host
        self.database = database
        self.user = user
        self.password = password
        self.port = port

    @classmethod
    def from_crawler(cls, crawler):
        return cls(
            host=crawler.settings.get('MYSQL_HOST'),
            database=crawler.settings.get('MYSQL_DATABASE'),
            user=crawler.settings.get('MYSQL_USER'),
            password=crawler.settings.get('MYSQL_PASSWORD'),
            port=crawler.settings.get('MYSQL_PORT'),
        )

    def open_spider(self, spider):
        self.db = pymysql.connect(self.host, self.user, self.password, self.database, charset='utf8',
                                  port=self.port)
        self.cursor = self.db.cursor()

    def close_spider(self, spider):
        self.db.close()

    def process_item(self, item, spider):
        print(item['title'])
        data = dict(item)
        keys = ', '.join(data.keys())
        values = ', '.join(['%s'] * len(data))
        sql = 'insert into %s (%s) values (%s)' % (item.table, keys, values)
        self.cursor.execute(sql, tuple(data.values()))
        self.db.commit()
        return item
这里和前面一样,我们需要在 settings 中配置一些有关 Mysql 的内容,如下:
MYSQL_HOST = 'localhost'
MYSQL_DATABASE = 'test'
MYSQL_USER = 'root'
MYSQL_PASSWORD = '123456'
MYSQL_PORT = 3306
还需在 settings 中增加我们的 MysqlPipeline 的相关配置,如下:
ITEM_PIPELINES = {
    'first_scrapy.pipelines.MongoPipeline': 400,
    'first_scrapy.pipelines.MysqlPipeline': 401,
}
这样,我们就创建好了我们的示例程序,现在通过命令行来启动我们的 Spider 。
scrapy crawl MziTuSpider执行结果:
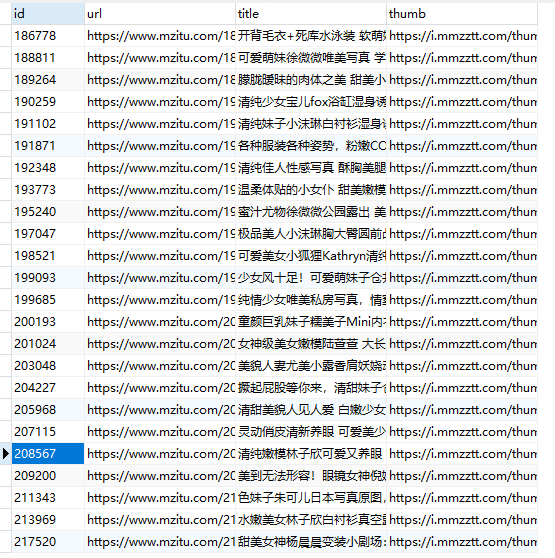
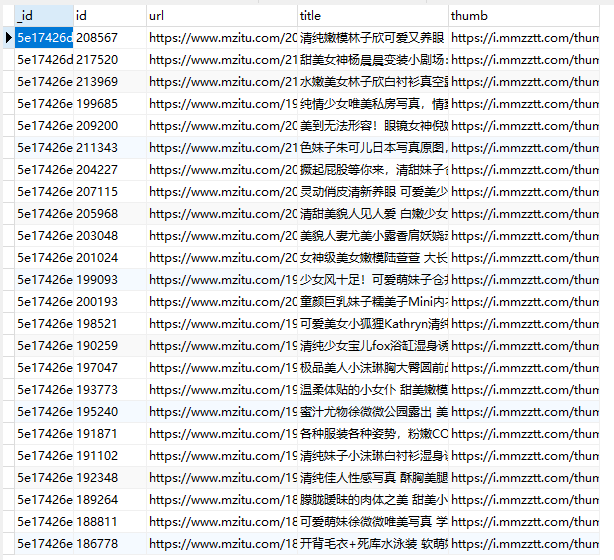
可以看到,我们的 MongoDB 和 Mysql 数据都正常的存入。
示例代码
本系列的所有代码小编都会放在代码管理仓库 Github 和 Gitee 上,方便大家取用。
示例代码-Github
示例代码-Gitee


