一、 什么是kickstart
kickstart是REDHAT公司针对自动安装RedHat、CentOS、Fedora同一体系Linux定制的规范。一般以.cfg作为文件后缀名,可以自动应答问题,指定要安装的包,在系统完成安装后自动执行定制脚本来配置系统。
二、 安装形式
kickstart 安装可以使用本地光盘,本地硬盘驱动器,或通过 NFS,FTP,HTTP 来执行.
要使用 kickstart,必须:
1.创建一个kickstart文件.
2.创建有kickstart文件的引导介质或者使这个文件在网络上可用.
3.筹备安装树.
4.开始kickstart安装.
三、 环境说明
| 服务名 |
IP |
用户名 |
密码 |
| Kickstart服务器 |
192.168.205.200 |
root |
123456 |
| 客户端 |
192.168.205.201 |
|
|
以RedHat6.4为例说明
l 网卡支持PXE网络启动
四、 kickstart服务器配置
4.1 关闭selinux
4.2 关闭防火墙
4.3 配置yum源
要想配置kickstart ,首先要配置个本地yum源,要不然用system-config-kickstart时选不上包。
而且,yum 源的名字一定是[base],要不然会报:
Package selection is disabled due to problems downloading package information.
4.4 安装apache服务器
# yum -y install httpd
# chkconfig httpd on
# service httpd start
# mkdir -p /var/www/html/os
将redhat6.4的镜像文件挂载/var/www/html/os目录下
# mount -t iso9660 -o loop /opt/os/rhel-server-6.4-x86_64-dvd.iso /var/www/html/os
开机自启动挂载
#vi /etc/fstab
/opt/os/rhel-server-6.4-x86_64-dvd.iso /var/www/html/os iso9660 defaults,ro,loop 0 0
4.5 安装配置tftp服务器
1) 安装
# yum -y install tftp tftp-server
2) 配置
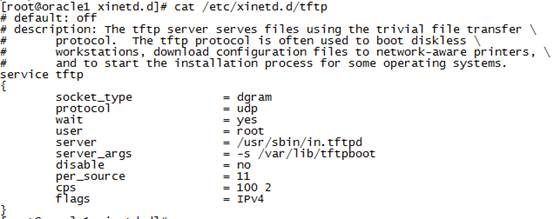
# cat /etc/xinetd.d/tftp
service tftp
{
socket_type = dgram
protocol = udp
wait = yes
user = root
server = /usr/sbin/in.tftpd
server_args = -s /var/lib/tftpboot
disable = no
per_source = 11
cps = 100 2
flags = IPv4
}
3) 准备tftpboot文件
# cp /var/www/html/os/images/pxeboot/vmlinuz /var/lib/tftpboot/
# cp /var/www/html/os/images/pxeboot/initrd.img /var/lib/tftpboot/
# cp /var/www/html/os/isolinux/*.msg /var/lib/tftpboot/
# mkdir -p /var/lib/tftpboot/pxelinux.cfg
# cp /var/www/html/os/isolinux/isolinux.cfg /var/lib/tftpboot/pxelinux.cfg/default
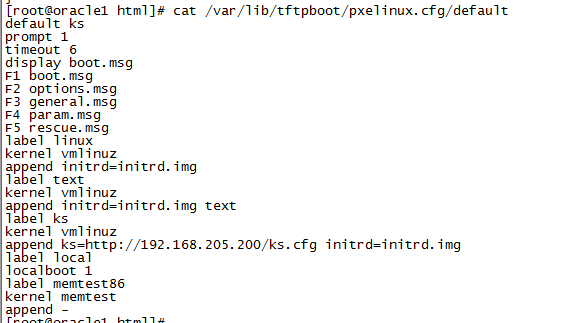
#vi /var/lib/tftpboot/pxelinux.cfg/default
default linux
prompt 1
timeout 600
display boot.msg
F1 boot.msg
F2 options.msg
F3 general.msg
F4 param.msg
F5 rescue.msg
label linux
kernel vmlinuz
append initrd=initrd.img ks=http://192.168.205.200/ks.cfg ksdevice=eth0 ip=dhcp
label text
kernel vmlinuz
append initrd=initrd.img text
label ks
kernel vmlinuz
append ks initrd=initrd.img
label local
localboot 1
label memtest86
kernel memtest
append –
4) 安装syslinux包
# yum -y install syslinux
# cp /usr/share/syslinux/pxelinux.0 /var/lib/tftpboot/
5) 启动tftp服务器
#/etc/init.d/xinetd restart
#chkconfig xinetd on
五、 安装dhcp服务器
1) 安装
# yum -y install dhcp
# cp /usr/share/doc/dhcp-4.1.1/dhcpd.conf.sample /etc/dhcp/dhcpd.conf
cp: overwrite `/etc/dhcp/dhcpd.conf'? y
2) 配置
# cat /etc/dhcp/dhcpd.conf
ddns-update-style interim; #设置DHCP服务器模式
ignore client-updates; #禁止客户端更新
subnet 192.168.205.0 netmask 255.255.255.0 { #设置网段
option routers 192.168.205.1; #设置网关
option subnet-mask 255.255.255.0; #设置子网掩码
option domain-name-servers 8.8.8.8,8.8.4.4; #设置dns服务器地址
range dynamic-bootp 192.168.205.201 192.168.205.220; #设置dhcp服务器IP地址租用的范围
default-lease-time 21600; #默认租约时间
max-lease-time 43200; #最大租约时间
next-server 192.168.205.200; #tftp服务器地址
filename "pxelinux.0"; #tftp服务器根目录下面的文件名
}
3) 设置dhcp使用的网口
# cat /etc/sysconfig/dhcpd
# Command line options here
DHCPDARGS=eth0
4) 测试dhcp是否配置正确
5) 启动dhcp
# service dhcpd start
# chkconfig dhcpd on
六、 配置kickstart自动安装文件
1) 安装
# yum -y install system-config-kickstart
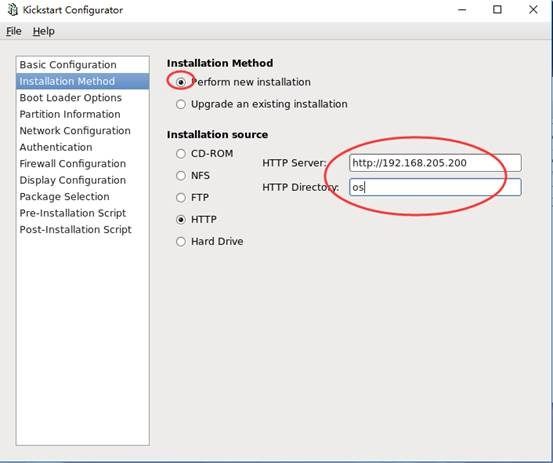
2) 图形获取配置
图形下执行system-config-kickstart
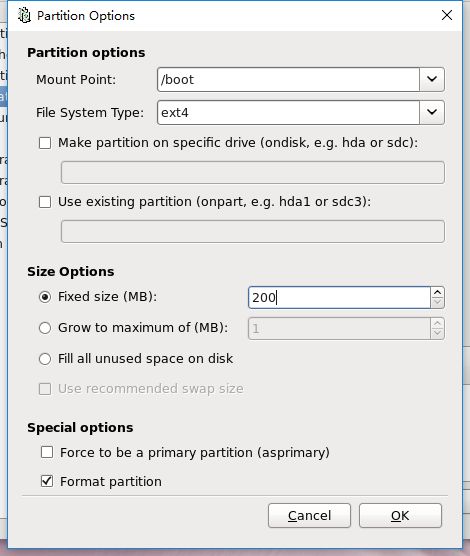
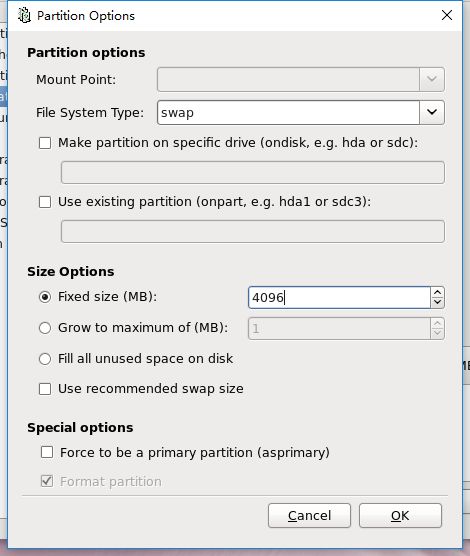
自定义分区
选择包
预览
保存配置文件
查看配置文件:
[root@oracle1 html]# cat ks.cfg
#platform=x86, AMD64, or Intel EM64T
#version=DEVEL
# Firewall configuration
firewall --disabled
# Install OS instead of upgrade
install
# Use network installation
url --url="http://192.168.205.200/os"
# Root password
rootpw --iscrypted $1$ATAwSigk$w4zc2dJNcQVCoR77xQ5Vm0
# System authorization information
auth --useshadow --passalgo=sha512
# Use graphical install
graphical
firstboot --disable
# System keyboard
keyboard us
# System language
lang en_US
# SELinux configuration
selinux --disabled
# Installation logging level
logging --level=info
# Reboot after installation
reboot
# System timezone
timezone Asia/Chongqing
# Network information
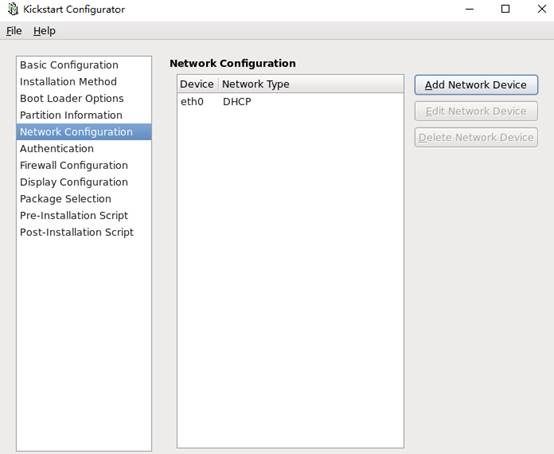
network --bootproto=dhcp --device=eth0 --onboot=on
# System bootloader configuration
key --skip
bootloader --location=mbr
# Clear the Master Boot Record
zerombr
# Partition clearing information
clearpart --all --initlabel
# Disk partitioning information
part /boot --fstype="ext4" --size=200
part swap --fstype="swap" --size=4096
part / --fstype="ext4" --size=20480
%packages
@additional-devel
@base
@basic-desktop
@chinese-support
@desktop-platform
@desktop-platform-devel
@development
@graphical-admin-tools
@kde-desktop
@legacy-x
@remote-desktop-clients
@server-platform-devel
@system-management
@tex
@x11
%end
说明:key --skip 如果是红帽系统,此选项可以跳过输入序列号过程;如果是CentOS 系列,则可以不保留此项内容;
reboot 此选项必须存在,也必须文中设定位置,不然kickstart显示一条消息,并等待用户按任意键后才重新引导;
clearpart --all --initlabel 此条命令必须添加,不然系统会让用户手动选择是否清除所有数据,这就需要人为干预了,从而导致自动化过程失败;
七、 客户端安装
7.1 客户端启动
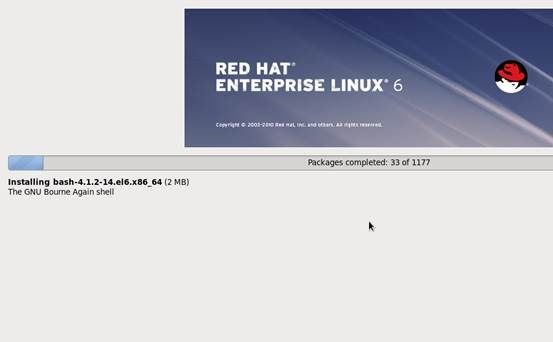
客户端网卡执行pxe,从网卡启动
装完系统后,选择从硬盘启动,否则又重新安装一遍

