1, iterm2 配色方案
http://iterm2colorschemes.com/
a, 下载iTerm2
http://iterm2.com/downloads.html
Preferences --> Colors --> Load Presets ( 导入下载的配色方案)
b, 设置.bash_profile
#enables colorin the terminal bash shell export
export CLICOLOR=1

#sets up thecolor scheme for list export
export LSCOLORS=gxfxcxdxbxegedabagacad

#sets up theprompt color (currently a green similar to linux terminal)
export PS1='\[\033[01;32m\]\u@\h\[\033[00m\]:\[\033[01;36m\]\w\[\033[00m\]\$ '

#enables colorfor iTerm
export TERM=xterm-256color
c, vim 配置
syntax enable
set background=dark
"set ruler
"colorscheme solarized
" 自动缩进
"set autoindent
"set cindent
" Tab键的宽度
set tabstop=4
set ts=4
set expandtab
set history=100 " keep 100 lines of history
set viminfo='20,\"200 " keep a .viminfo file
set hlsearch " highlight the last searched term
set fileencodings=utf-8,gb2312,gbk,gb18030
d, 常用快捷键
1. +数字在各 tab标签直接来回切换
2.选择即复制 + 鼠标中键粘贴,这个很实用
3. + f所查找的内容会被自动复制
4. + d 横着分屏 / + shift + d 竖着分屏
5. + r = clear,而且只是换到新一屏,不会想 clear一样创建一个空屏
6.ctrl + u 清空当前行,无论光标在什么位置
7.输入开头命令后 按 + ;会自动列出输入过的命令
8. + shift + h 会列出剪切板历史
9.可以在 Preferences > keys设置全局快捷键调出 iterm,这个也可以用过 Alfred实现
10.← / → 到一行命令最左边/最右边 ,这个功能同 C+a / C+e
11.← /→按单词前移/后移,相当与 C+f / C+b,其实这个功能在Iterm中已经预定义好了,f /b,看个人习惯了
再来些linux上也通用的快捷键:
C+a / C+e 这个几乎在哪都可以使用
C+p / !! 上一条命令
C+k 从光标处删至命令行尾 (本来 C+u是删至命令行首,但iterm中是删掉整行)
C+w A+d 从光标处删至字首/尾
C+h C+d 删掉光标前后的自负
C+y 粘贴至光标后
C+r 搜索命令历史,这个较常用
2, 部署vagrant开发环境
Note: 对于vagrant 开发环境的创建,可以使用在线的virtualbox(下载时间是个问题), 也可以下载到的box文件
1, 下载安装vagrant
2, 配置 vagrant
a, Discover Download Vagrant Boxes
b, 加载本地文件(如果使用在线box skip this step)
$ vagrant box add homestead .vagrant/ubuntu_trusty64_virtualbox.box
Note: homestead 是定义的本地vagrant box 的名称
c, 检出vagrant示例
$ git clone https://github.com/colynn/homestead.git homestead
d, 修改配置、启动主机, 参照 github
Refer to:http://www.cnblogs.com/wangkongming/p/4301021.html
3, 配置Dnsmasq
Note: 配置dnsmasq,缓存dns, 自定义域名使用的dns服务器.
1, Download dnsmasq
$ wget http://www.thekelleys.org.uk/dnsmasq/dnsmasq-2.75.tar.gz
2, Install dnsmasq
$ tar -zxf dnsmasq-2.75.tar.gz
$ cd dnsmasq-2.75
$ sudo make
$ sudo make install
3, Configure
$ sudo cp dnsmasq.conf.example /etc/dnsmasq.conf
server=/163.com/114.114.114.114
server=/126.net/114.114.114.114
#server=/netease.com/114.114.114.114
server=/xiami.com/114.114.114.114
server=/xiami.net/114.114.114.114
server=/baidu.com/114.114.114.114
server=8.8.8.8
4, Start Dnsmasq
Note: dnsmasq-2.75/contrib/MacOSX-launchd/launchd-README.txt get more infomation
$ cd contrib/MacOSX-launchd
sudo cp uk.org.thekelleys.dnsmasq.plist /Library/LaunchDaemons/
sudo chown root:admin /Library/LaunchDaemons/uk.org.thekelleys.dnsmasq.plist
sudo chmod 644 /Library/LaunchDaemons/uk.org.thekelleys.dnsmasq.plist
# enabled dnsmasq
sudo launchctl load /Library/LaunchDaemons/uk.org.thekelleys.dnsmasq.plist
# start/stop dnsmasq
sudo launchctl stop uk.org.thekelleys.dnsmasq
sudo launchctl start uk.org.thekelleys.dnsmasq
5, Reconnection *** and modified DNS record
Refer to http://passingcuriosity.com/2013/dnsmasq-dev-osx/
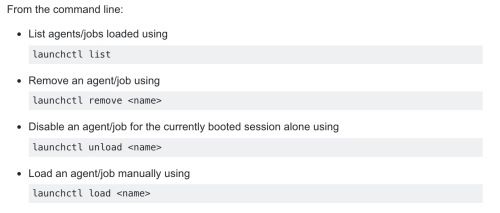
### disabled dnsmasq ??
# sudo launchctl unload /Library/LaunchDaemons/uk.org.thekelleys.dnsmasq.plist
### disable dnsmasq.
step1 check pid base on listen port
# sudo lsof -i udp:53
step2 base on pid get the service name
# sudo launchctl list
step3 disable specific service
# sudo launchctl disable service-name
FAQ
1, pasting multiline chunks of text info iTerm2 causes overlaps, broken lines and whatnot(iTerm2 多行粘贴,输出错误,不包含换行符)
调整为这个 Edit --> Paste Special --> Paster Slowly //这种粘贴速度很慢,还是建议使用其他方式避免这种多行粘贴的操作。
2, mac disable SIP
3, mac modified docker daemon.json file.
Under mac the daemon.json is kinda hidden.
1. goto ~/Library/Containers/com.docker.docker/Data/database
there is an .git repository (.git)
2. reset to HEAD git reset --hard
3. now you have com.docker.driver.amd64-linux
4. go into ~/Library/Containers/com.docker.docker/Data/database/com.docker.driver.amd64-linux/etc/docker there is your daemon.json
don't forget to commit your changes otherwise it might be lost
4, pip install python-ldap, mysql-python
mysql-python 依赖的环境:
1) Install Xcode;
2) Install
xcode-select --install
3) Install mysql
brew install mysql
python-ldap 依赖的环境:
1)
/usr/include appears to have moved
$ xcrun --show-sdk-path $ sudo ln -s/usr/include /usr/include


