在经过了一个阶段的学习之后,我们对基本的坐标轴和比例尺都有了很好的了解,今天我们结合之前的内容,配合节流函数来制作一款精美的可交互折线图。
准备的数据
const  line_data = [
    {
        country: "china",
        gdp: [
                [2008, 2033],
                [2009, 2400],
                [2010, 4333],
                [2011, 5600],
                [2012, 6500],
                [2013, 6700],
                [2014, 6933],
                [2015, 7400],
                [2016, 7733],
                [2017, 8200]
             ]
    },
    {
        country: "japan",
        gdp: [
                [2008, 3333],
                [2009, 4400],
                [2010, 5233],
                [2011, 5800],
                [2012, 6333],
                [2013, 6400],
                [2014, 6533],
                [2015, 6700],
                [2016, 7033],
                [2017, 7200]
             ]
    }

]
添加坐标轴
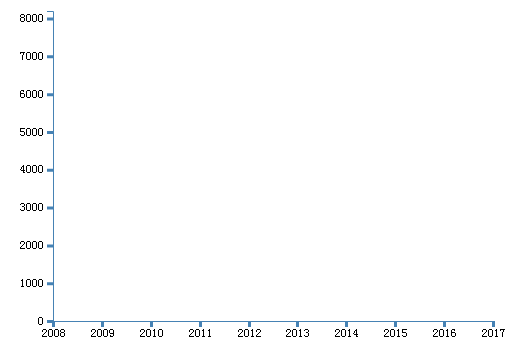
坐标轴的建立在前几节已多次介绍,这里就不再赘述。
    const data = line_data;

    var initWidth = 340
    var initHeight = 500

    var padding = { left:40, top:10, right:20, bottom: 20}

    var height = initWidth - padding.top - padding.bottom
    var width  = initHeight - padding.left - padding.right


    var svg = d3.select("body")
                .append("svg")
                .attr("id", "chart")
                .attr("width", width)
                .attr("height", height)
                .style("padding-left", padding.left)
                .style("padding-right", padding.right)
                .style("padding-top", padding.top)
                .style("padding-bottom", padding.bottom)


     //添加y轴坐标轴

        //y轴比例尺
        let nums = [...data[0]["gdp"], ...data[1]["gdp"]].map(function(e){
            return e[1]
        })
        let yScale = d3.scaleLinear()
         .domain([0, d3.max(nums)])
         .range([height , 0]);

         let _yScale = d3.scaleLinear()
         .domain([0, d3.max(nums)])
         .range([0, height]);

        //定义y轴
        let yAxis = d3.axisLeft(yScale)
                      .tickFormat(d3.format("d")); //把x,xxx 的数据计数方式格式化,转化为不带逗号的格式

        //添加y轴
        svg.append("g")
        .attr("class","axis")
        .attr("transform","translate(" + 0 + "," + 0 + ")")
        .call(yAxis);

     //添加x轴坐标轴

         //x轴比例尺
         let years = data[0]["gdp"].map(function(e){
                    return e[0]
          })

         let xScale =  d3.scaleLinear()
                        .domain([2008,2017])
                        .rangeRound([0, width])

        let _xScale =  d3.scaleLinear()
                       .domain([0,width])
                       .rangeRound([2008, 2017])

        //定义x轴
        let xAxis = d3.axisBottom(xScale)
                            .tickFormat(d3.format("d"))

        //添加x轴
         svg.append("g")
            .attr("class","axis")
            .attr("transform","translate(" + "0 ," + height + ")")
            .call(xAxis);
坐标轴的样式
    .axis path {
        stroke: steelblue;
        stroke-width: 1
    }
    .axis .tick line{
      stroke: steelblue;
      stroke-width: 3
    }
添加背景间隔线
添加网线的内容上一节已经介绍过了,这次只使用了y轴方向的网线,来帮助使用者确立数据位置
        //添加x轴
         svg.append("g")
            .attr("class","axis")
            .attr("transform","translate(" + "0 ," + height + ")")
            .call(xAxis);


        //添加
        // gridlines in x axis function
        function make_x_gridlines() {
            return d3.axisBottom(xScale)
                .ticks(years.length)

        }

        // add the X gridlines
      var grid =  svg.append("g")
            .attr("id", "grid")
            .attr("transform", "translate(0," + height + ")")
            .call(make_x_gridlines()
                .tickSize(-height)
                .tickFormat("")
            )
样式
    #grid .tick:nth-child(2) {
      display: none
    }
    #grid path {
      display: none
    }
效果展示
绘制图形
绘制网线的时候我们使用了直线生成器,这里简要介绍一下直线生成器。
首先,在svg中,线段元素放的写法是
或者是
生成效果
了解了这个知识点之后,继续绘制折线图
        //创建一个直线生成器
        var linePath = d3.line()
                          .curve(d3.curveCardinal.tension(0.5))
                         .x( function(d){ return xScale(d[0]) })
                         .y( function(d){ return yScale(d[1])})


        var colors = ["rgb(0, 188, 212)", "rgb(255, 64, 129)"]


        //添加路径
        svg.append("g").selectAll("path")
            .data(data)
            .enter()
            .append("path")
            .attr("transform","translate(0, 0)")
            .attr("d", function(d){
                return linePath(d.gdp)
            })
            .attr("fill", "none")
            .attr("stroke-width", "2px")
            .attr("stroke", function(d, i){
              return colors[i]
            })
添加路径之后的效果
添加左侧指示栏
类别指示栏在上一节已经介绍过了,这一节也就不过多介绍,代码示下
        var cover =svg.append("g")

            cover.selectAll("rect")
                .data(data)
                .enter()
                .append("rect")
                .attr("width", 10)
                .attr("height", 10)
                .attr("fill", function(d, i){
                  return i%2 == 0 ? colors[0] : colors[1]
                })
                .attr("transform", function(d, i){
                    return `translate(10, ${(i)*20})`
                })


            cover.selectAll("text")
                  .data(data)
                  .enter()
                  .append("text")
                  .text(function(d, i){
                    return d.country
                  })
                  .attr("transform", function(d, i){
                      return `translate(27, ${(i)*20})`
                  })
                  .attr("font-size", '12px')
                  .attr("dy",function(){
                    return '0.75em'
                  })
                  .attr("fill", function(){
                    return '#333'
                  })
此时的效果
添加提示栏和准线
截至到这里,已经完成了折线图的基本制作。接下来添加一些交互效果。
- 滑动准线
- 内容提示框
最后要达到的效果,鼠标在图表移动时,准线吸附到最近的参考线,并且提示栏内显示该参考线位置上折线的数据。
其实思路很简单,只要计算出每两个参考线之间的距离singleStep,就可以根据鼠标位置找到当前鼠标距离哪两个参考线之间,并且距离哪个参考线更近,判断出来之后准线就吸到相应的参考线。
这里采用了mousemove事件来实时判断当前鼠标位置并进行运算,事实上,并不需要实时触发这个函数,准线吸附速度只要流畅就可以,大量触发会极大浪费计算机性能。这里采用了一个高级函数,通过控制函数在多少毫秒内只执行一次,来帮助解决这个问题。节流函数详细讲解在这里
节流函数
//节流函数
var throttle = function (fn, interval) {
        var  timer, firstTime = true;

        return function () {
          var args = arguments;
          var _me = this;

           if ( firstTime ) {
             fn.apply(_me, args)
             return firstTime = false;
           }

           if ( timer ) {
             return false
           }

           timer = setTimeout(function () {
             clearTimeout(timer);
             timer=null;
             fn.apply(_me, args)
           }, interval || 500)
        }

    }
绘制提示栏和准线(无刻度的y轴)
        var detailLine = svg.append("g")
                            .attr("class","line_y")
                            .attr("transform","translate(" + width + "," + 0 + ")")
                            .call(yAxis.ticks(0).tickSize(0).tickFormat(""));

        //添加提示栏
        var tooltip = d3.select("body")
                        .append("div")
                        .attr("class", "tooltip")
                        .style("opacity", 0)

        //计算位置 便于吸附
        let singleStep = width / (years.length-1)

        //这里使用节流函数,避免过多运算导致浏览器卡顿
        document.getElementById('chart').onmousemove =throttle(function(e){
              console.log(e.offsetX)
              e.stopPropagation();
              let t = Math.round((e.offsetX - padding.left) / singleStep)*singleStep
              detailLine.attr("transform","translate(" + t + "," + 0 + ")")
              let year = _xScale(t)
              let currentHtml = []
              data.forEach( (e) => {
                  e.gdp.forEach( (ev, i) =>{
                    if(ev[0]==year){
                      currentHtml.push(`${e.country}: ${ev[1]}`);
                    }
                  })
              })
            currentHtml.unshift(`${year}`)
            tooltip.html(currentHtml.join(""))
                   .style("left", e.pageX + 20+ "px")
                   .style("top", e.pageY + 20 + "px")
                   .style("opacity", 1)
        },50)


        //隐藏显示栏
        document.onclick= function(){
          tooltip.style("opacity", 0)
        }
提示栏样式
    .tooltip {
        position: absolute;
        min-width: 100px;
        height: auto;
        font-size: 14px;
        text-align: center;
        border: 1px solid #666;
        border-radius: 5px;
        color: #fff;
        background:rgba(0, 0, 0, 0.8);
        padding-bottom: 5px;
        transition: transform 0.2s
    }
最终效果
源码地址


