前言
系统复杂了,抽离单一职责的模块几乎是必须的;若需维护多个项目,抽离公用包上传私有仓库管理也几乎是必须的。其优点无需赘述,以下将记录操作过程。
1. 多模块拆分
在.NET 中由于其统一性,实现上更自然一点。Spring Boot 通过 Maven 构建多模块工程也不麻烦,假如我的项目中包含以下几个包: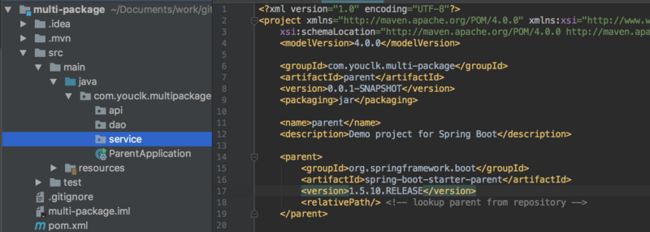
我需要将他们分别拆分成独立模块,首先要修改的是根目录下的 pom.xml,packaging 类型改为 pom,并添加 modules 节点:
    4.0.0

    com.youclk.multi-package
    parent
    0.0.1-SNAPSHOT

        api
        service
        dao

    pom


        org.springframework.boot
        spring-boot-starter-parent
        1.5.10.RELEASE


        UTF-8
        UTF-8
        1.8

        1.16.20


            org.springframework.boot
            spring-boot-starter-test
            test


            org.projectlombok
            lombok
            ${lombok}
之后新建一个个 Module,将对应的代码移植过去: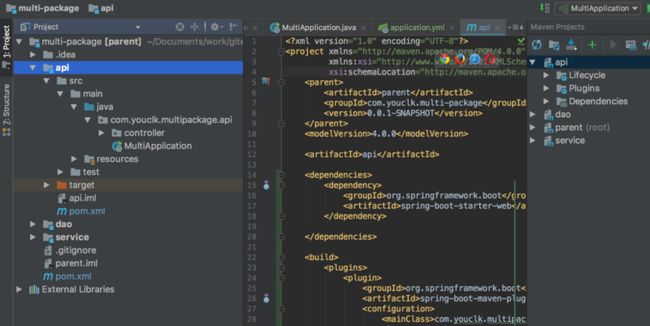
需要注意的是在启动模块的 pom.xml 中需要指定启动类:
            org.springframework.boot
            spring-boot-maven-plugin

                com.youclk.multipackage.api.MultiApplication
                ZIP
统一升级版本命令:mvn versions:set -DnewVersion=0.0.1-SNAPSHOT,到此差不多完成了,引用方式与普通的依赖包一致:
    com.youclk.multi-package
    service
    0.0.1-SNAPSHOT
补充
外层 pom :
    4.0.0

    com.youclk
    et2
    pom
    ${own-project.version}


        org.springframework.boot
        spring-boot-starter-parent
        2.1.0.RELEASE


        start
        service
        client


        UTF-8
        UTF-8
        1.8
        1.0.0


                com.youclk
                start
                ${own-project.version}


                com.youclk
                service
                ${own-project.version}


            org.springframework.boot
            spring-boot-starter


            org.springframework.boot
            spring-boot-starter-aop


            org.springframework.boot
            spring-boot-starter-test
            test


            org.springframework.boot
            spring-boot-starter-web


            org.projectlombok
            lombok
内层 pom
    4.0.0


        com.youclk
        et2
        1.0.0


    service
    jar
    ${own-project.version}
    4.0.0


        com.youclk
        et2
        1.0.0


    start
    jar
    ${own-project.version}


            com.youclk
            service

注意 start 模块下的包结构为根结构,不要加 .start,否则要指定需要扫描的包。
2. Nexus3 私有仓库搭建
Docker 时代一切都变得异常简单,Compose 配置如下:
version: '3.5'

services:

  nexus:
    image: sonatype/nexus3:3.10.0
    networks:
      - proxy
      - youclk
    volumes:
      - /mnt/nas/db/nexus-data:/nexus-data
    deploy:
      mode: replicated
      labels:
        - com.df.notify=true
        - com.df.port=8081
        - com.df.serviceDomain=nexus.youclk.com
      restart_policy:
        condition: any
        max_attempts: 3
      update_config:
        delay: 5s
        order: start-first
      resources:
        limits:
          cpus: '0.50'
          memory: 1g

networks:
  proxy:
    external: true
  youclk:
    external: true
启动过程需要一分钟左右:
需要注意的是如果你的 ssl 是在负载均衡或者其他的反向代理之上,那么必须在 HTTP 头中指定 X-Forwarded-Proto 传输协议为 HTTPS,然后,就可以愉快地玩耍了。
3. 上传与引用
3.1 上传
首先需要在 Nexus 创建私有仓库,例如我的: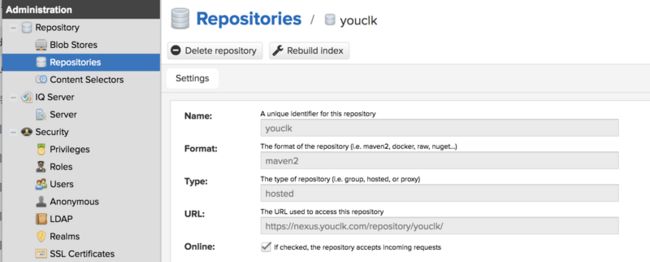
其次在本地 maven 设置中添加 server 节点,默认在 ~/.m2/settings.xml:
    youclk
    admin
    youclk
pom.xml 中添加上传地址:
        nexus
        Releases Repository
        https://nexus.youclk.com/repository/youclk-releases/


        nexus
        Snapshot Repository
        https://nexus.youclk.com/repository/youclk-snapshots/
最后执行 mvn clean deploy 便会上传至私有仓库,单独传包命令如下:
mvn deploy:deploy-file -DgroupId=com.youclk -DartifactId=utils -Dversion=0.0.1-SNAPSHOT -Dpackaging=jar -Dfile=target/utils-0.0.1-SNAPSHOT.jar -Durl=https://nexus.youclk.com/repository/youclk/ -DrepositoryId=youclk管理和查看: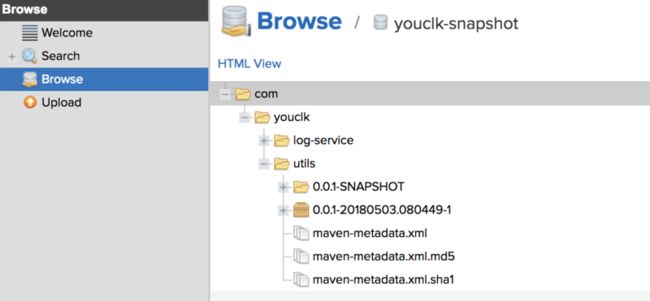
3.1 引用
Finally,最后的最后就是怎么使用啦~ 如果需要全局引用的话需要在 settings.xml 添加和激活仓库:
            aliyun
            central
            central mirror
            http://maven.aliyun.com/mvn/repository


            nexus
            maven-public
            private mirror
            http://local-nexus.youclk.com/repository/maven-public/


            nexus
            admin
            youclk


            nexus


                    maven
                    local private nexus
                    http://local-nexus.youclk.com/repository/maven-public/

                        true


                        true


                    maven
                    local private nexus
                    http://local-nexus.youclk.com/repository/maven-public/

                        true


                        true


        nexus
不过一般不推荐这么写,settings.xml 应该尽可能保持简洁,精简配置,此处留下代理和权限认证即可,其余的可以移植到 pom.xml 中:
        aliyun
        http://maven.aliyun.com/nexus/content/groups/public/


        nexus
        http://local-nexus.youclk.com/repository/maven-public/


        central

            http://maven.aliyun.com/nexus/content/groups/public/


        maven-public
        http://local-nexus.youclk.com/repository/maven-public/
我的公众号《捷义》