Spring+Spring MVC+MyBatis+Maven
SSM整合的核心还是Spring+MyBatis的整合,回顾一下MyBatis操作数据库流程,我们是使用一个SQLSessionFactory对象来获得SQLSession,之后再进行CRUD操作。
现在,有了spring,我们就把SQLSessionFactory通过spring进行装载和管理。
如果是想直接使用的话,请去SSM-Maven-Archetype
步骤
1.创建maven项目
2.添加依赖
    4.0.0

    com.wan
    SSM-Template
    1.0-SNAPSHOT
    war

    SSM-Template Maven Webapp

    http://www.example.com


        UTF-8
        1.7
        1.7


            junit
            junit
            4.11
            test


            commons-logging
            commons-logging
            RELEASE


            org.springframework
            spring-context
            4.3.9.release


            org.springframework
            spring-context-support
            4.3.9.release


            org.springframework
            spring-test
            4.3.9.release


            org.springframework
            spring-core
            4.3.9.release


            org.springframework
            spring-beans
            4.3.9.release


            org.springframework
            spring-expression
            4.3.9.release


            org.springframework
            spring-web
            4.3.9.release


            org.springframework
            spring-webmvc
            4.3.9.release


            org.springframework
            spring-orm
            4.3.9.release


            org.springframework
            spring-aop
            4.3.9.release


            org.aspectj
            aspectjweaver
            RELEASE


            aopalliance
            aopalliance
            RELEASE


            com.fasterxml.jackson.core
            jackson-core
            2.7.3


            com.fasterxml.jackson.core
            jackson-databind
            2.7.3


            org.apache.commons
            commons-lang3
            3.3.2


            javax.servlet
            javax.servlet-api
            4.0.1


            org.apache.taglibs
            taglibs-standard-spec
            1.2.5


            org.apache.taglibs
            taglibs-standard-impl
            1.2.5


            com.github.noraui
            ojdbc8
            12.2.0.1


            org.mybatis
            mybatis
            3.5.2


            com.alibaba
            druid
            1.1.10


            org.mybatis
            mybatis-spring
            2.0.2


            commons-fileupload
            commons-fileupload
            1.3.1


            org.slf4j
            slf4j-api
            1.7.25


            org.slf4j
            slf4j-log4j12
            1.7.25


            log4j
            log4j
            1.2.17


            org.apache.logging.log4j
            log4j-core
            2.5


            com.github.pagehelper
            pagehelper

            5.1.6


        SSM-Template


                    maven-clean-plugin
                    3.1.0


                    maven-resources-plugin
                    3.0.2


                    maven-compiler-plugin
                    3.8.0


                    maven-surefire-plugin
                    2.22.1


                    maven-war-plugin
                    3.2.2


                    maven-install-plugin
                    2.5.2


                    maven-deploy-plugin
                    2.8.2
3.整合SpringMVC
前三步主要是整合Spring+SpringMVC框架,可以参考一下这篇Spring MVC框架,这里不过多补充
4.整合Spring和MyBatis
spring中,完美地整合了MyBatis,所以,可以不需要MyBatis的配置的文件,如果需要的话,也可以配置MyBatis的配置文件,之后引入即可
主要流程为:
- 创建一个db.properties,存放数据库url、账户和密码
- 创建DataSource的bean对象(使用连接池,利用上面的db.properties)
- 创建MyBatis的SqlSessionFactory的bean对象(使用上面的DataSourcebean的bean对象)
- 配置自动装载mapper接口
下面是我的spring配置,使用了阿里巴巴的连接池开源库,以及MyBatis的分页插件
                            helperDialect=oracle
                            supportMethodsArguments=true
                            rowBoundsWithCount=true
                            offsetAsPageNum=true
                            pageSizeZero=false
                            reasonable=true
5.生成maven骨架
打开IDEA中的命令行窗口,输入下面命令(得配置好maven的环境变量)
mvn archetype:create-from-project出现build success就说明成功了
PS: 保留空白文件夹的解决方法
上述创建的项目有几个是空白文件夹,但是安装骨架之后,使用骨架创建maven项目的时候发现,空白文件夹被忽略了,找到了网上的两个解决方法
- 在空白文件夹放文件
- 修改配置
这里就讲一下第二种方法,是在Stack Overflow找到的方法
执行mvn archetype:create-from-project之后,修改target/generated-sources/archetype/src/main/resources/META-INF/maven archetype-metadata.xml
src/main/application/controller
下面是我的添加部分:
  src/main/java

    **/*.java


  src/main/java/controller


  src/main/java/dao


  src/main/java/model


  src/main/resources/mapper


  src/main/webapp/css


  src/main/webapp/img


  src/main/webapp/js


  src/main/webapp/view
除此之外,还有几个文件需要修改
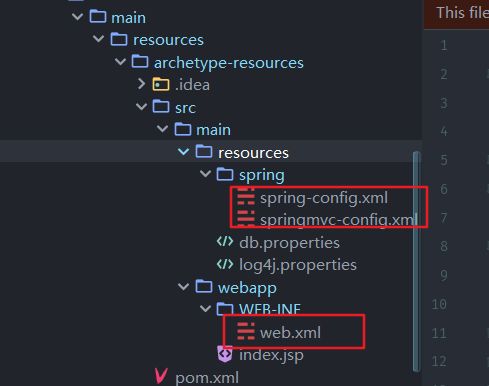
target\generated-sources\archetype\src\main\resources\archetype-resources\src\main\resources下面的spring和springmvc两个配置文件
target\generated-sources\archetype\src\main\resources\archetype-resources\src\main\webapp中的web.xml
里面的xml版本莫名其妙变成了1.0-SNAPSHOT,我们全部改成固定的1.0
6.安装并添加maven骨架
命令行路径进入到target\generated-sources\archetype
cd target\generated-sources\archetype输入安装命令
mvn clean install出现build success表示成功
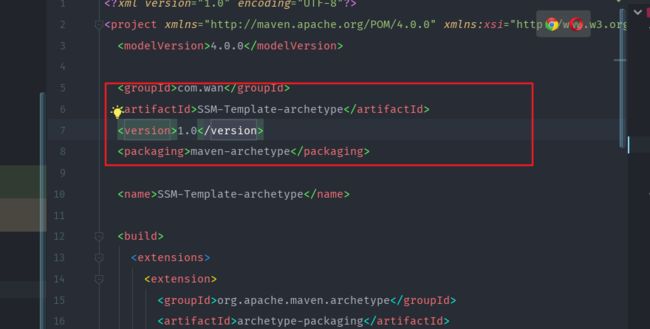
打开target\generated-sources\archetype目录下的pom.xml,记住下面的前三个坐标信息
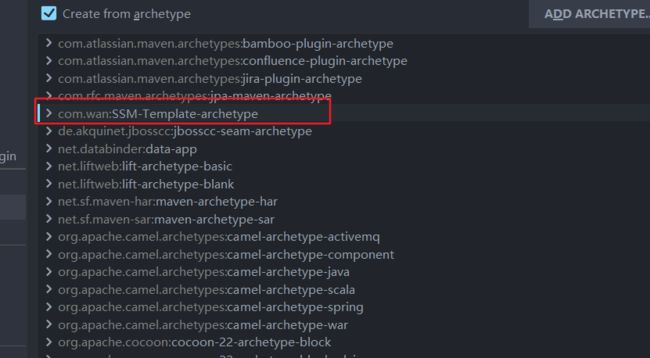
重新新建一个maven项目,之后,选择添加一个archetype,输入坐标
之后就是可以看到列表由我们的自定义骨架了
7.使用maven骨架
像之前一样,选择我们的自定义骨架,新建一个maven项目
使用注意事项
修改配置
根据自己的要求,进行配置的更改
首先是数据源的配置db.properties
spring-config.xml
72行 mapper的路径(相对于resources目录来说)
105行 dao类中的包,
是会自动扫描Mapper所在的包,并生成一个id为xx的bean(Dao对象),之后我们就可以通过spring容器获得这个对象,使用这个对象来进行CRUD操作
相当于下面的代码
Mybatis使用
Mybatis中,我们可以按照约定,把接口类和mapper.xml文件对应起来,从而更为简单地实现CRUD操作
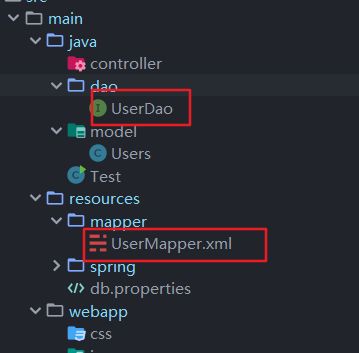
项目中,我有这样的对应的接口类和mapper.xml文件
UserMapper中的namespace就是为dao.UserDao,这里namespace一定要对应上接口类UserDao
UserMapper.xml
UserDao.java
package dao;

import java.util.List;

import model.Users;

/**
 * @author StarsOne
 * @date Create in  2019/10/11 0011 20:22
 * @description
 */
public interface UserDao {
    List select();
}
使用的话就通过这样
ClassPathXmlApplicationContext context = new ClassPathXmlApplicationContext("spring/spring-config.xml");
//spring中自动装载,第一个字母小写,如果是EmployeeDao,则是就是employeeDao
UserDao userMapper = (UserDao) context.getBean("userDao");
List users = userMapper.selectAll();
for (Users user : users) {
    System.out.println(user.toString());
}
分页使用
ClassPathXmlApplicationContext context = new ClassPathXmlApplicationContext("spring/spring-config.xml");
AccountDao acountDao = (AccountDao) context.getBean("accountDao");
//查询第一页,每页有两条数据
PageHelper.startPage(1, 2);
List accounts = acountDao.selectAll();
for (Account account : accounts) {
    System.out.println(account.toString());
} 


