zabbix是一个基于WEB界面的提供分布式系统监视以及网络监视功能的企业级的开源解决方案。zabbix能监视各种网络参数,保证服务器系统的安全运营;并提供灵活的通知机制以让系统管理员快速定位/解决存在的各种问题。
下面是Centos7上yum安装zabbix的步骤。
本文档在同一台机器上安装了zabbix-server 和zabbix-agent 自己监控自己。
一、lamp环境搭建
1、安装依赖包
#yum install gcc bison bison-devel zlib-devel libmcrypt-devel mcrypt mhash-devel openssl-devel libxml2-devel libcurl-devel bzip2-devel readline-devel libedit-devel sqlite-devel libpng-devel libjpeg-devel freetype freetype-devel
2.yum安装apache
yum install httpd -y
systemctl start httpd
systemctl enable httpd
firewall设置允许远程登录
firewall-cmd --permanent --add-service=http
systemctl restart firewalld
3、安装mariadb
# yum -y install mariadb mariadb-server mariadb-devel
#yum install mysql-community-server
#service mysqld start
systemctl start mariadb
systemctl enable mariadb
默认情况下,root密码为空。为防止未授权的访问,我们设置root密码
mysql_secure_installation
4、安装php
yum install php php-mysql php-gd php-pear -y
测试PHP:
在Apache文档根目录创建“testphp.php”
vi/var/www/html/testphp.php
编辑内容如下
phpinfo();?>
重启 httpd 服务
systemctl restart httpd
也可以使用如下命令安装所有php modules,重启httpd服务,查看http://server-ip-address/testphp.php,可以看到所有安装的modules
yum install php* -y
5、Install phpMyAdmin (可选)
phpMyAdmin
是一个以PHP为基础,以Web-Base方式架构在网站主机上的MySQL的数据库管理工具,让管理者可用Web接口管理MySQL数据库。由于phpMyAdmin跟其他PHP程式一样在网页服务器上执行,您可以在任何地方使用这些程式产生的HTML页面,也就是于远端管理MySQL数据库,方便的建立、修改、删除数据库及资料表。也可借由phpMyAdmin建立常用的php语法,方便编写网页时所需要的sql语法正确性。
添加 EPEL repository 参照(Install EPEL Repository on RHEL/CentOS/Scientific Linux 7)
yum install epel-release
安装 phpMyAdmin:
yum install phpmyadmin -y
配置phpMyAdmin
默认,phpMyAdmin只能由本机访问。为了能够远程访问,编辑phpmyadmin.conf file
vi/etc/httpd/conf.d/phpMyAdmin.conf
查找/
AddDefaultCharset UTF-8
# Apache 2.4
Require ip 127.0.0.1
Require ip ::1
# Apache 2.2
Order Deny,Allow
Deny from All
Allow from 127.0.0.1
Allow from ::1
# Apache 2.4
Require ip 127.0.0.1
Require ip ::1
# Apache 2.2
Order Deny,Allow
Deny from All
Allow from 127.0.0.1
Allow from ::1
添加
Options none
AllowOverride Limit
Require all granted
编辑“config.inc.php”改变phpMyAdmin的authentication,修改“cookie” 为 “http”
vi/etc/phpMyAdmin/config.inc.php
Change‘cookie’to‘http’.
重启the Apache service:
systemctl restart httpd
访问 phpmyadmin 的控制台http://server-ip-address/phpmyadmin/
输入MySQL username and password,将重定向到PhpMyAdmin main web interface.
现在你可以通过phpMyAdmin web interface 管理你的MariaDB数据库了。
至此LAMP环境搭建完毕
二、yum安装zabbix
Zabbix在CentOS基本源里不可获得,因此必须配置EPEL 和Zabbix 官方repository
安装EPEL repository
yum install epel-release
配置ZabbixZone package repository and GPG key
rpm --import http://repo.zabbix.com/RPM-GPG-KEY-ZABBIX
rpm -Uv http://repo.zabbix.com/zabbix/2.4/rhel/7/x86_64/zabbix-release-2.4-1.el7.noarch.rpm
安装Zabbix server and agent(agent是可选的)
安装Zabbix server and agent:(配置自己监控自己,所以安装了zabbix-agent)
yum install zabbix-server-mysql zabbix-web-mysql zabbix-agent zabbix-java-gateway
编辑 file /etc/httpd/conf.d/zabbix:
vi/etc/httpd/conf.d/zabbix.conf
更新时区:
php_value date.timezone Asia/Shanghai
重启httpd
systemctl restart httpd
创建MySQL 数据库和用户
登录MariaDB:
mysql –u root –p
创建一个数据库‘zabbix’和数据库用户‘zabbix’
MariaDB[(none)]>create database zabbix character set utf8;
MariaDB [(none)]>grant all privileges on zabbix.* to 'zabbix'@'localhost' identified by 'zabbix';
MariaDB [(none)]>flush privileges;
数据库导入zabbix template
使用数据库用户zabbix登录数据库
mysql –uzabbix –p
切换到zabbix数据库
use zabbix
导入模板数据
MariaDB[zabbix]>source /usr/share/doc/zabbix-server-mysql-2.4.8/create/schema.sql
MariaDB [zabbix]>source /usr/share/doc/zabbix-server-mysql-2.4.8/create/images.sql
MariaDB [zabbix]>source /usr/share/doc/zabbix-server-mysql-2.4.8/create/data.sql
配置Zabbix server
编辑文件/etc/zabbix/zabbix_server.conf,
vi/etc/zabbix/zabbix_server.conf
配置下面的三个参数
DBName=zabbix
DBUser=zabbix
DBPassword=zabbix
vi/etc/zabbix/zabbix_agentd.conf
配置zabbix server 的ip
## Line 85 - Specify Zabbix server ##
Server=127.0.0.1
## Line 126 - Specify Zabbix server ##
ServerActive=127.0.0.1
## Line 137 - Specify Zabbix server Hostname or IP address ##
Hostname=127.0.0.1
修改PHP 设置
修改php.ini为zabbix 建议的设置
编辑文件 php.ini,
vi/etc/php.ini
设置下面的参数.
max_execution_time = 600
max_input_time = 600
memory_limit = 256
post_max_size = 32M
upload_max_filesize = 16M
date.timezone = Asia/Shanghai
修改Firewall 和SELinux 设置
开放zabbix端口10050 and 10051.
firewall-cmd --permanent --add-port=10050/tcp
firewall-cmd --permanent --add-port=10051/tcp
重启firewall
systemctl restart firewalld
如果使用 SELinux, 运行以下命令使 Apache 可以和 Zabbix通信
setsebool -P httpd_can_connect_zabbix=1
允许Zabbix web console 对特定IP段可用 (可选)
编辑文件 /etc/httpd/conf.d/zabbix.conf,
vi/etc/httpd/conf.d/zabbix.conf
添加允许访问 zabbix web interface的ip段. 如果设置 ‘Allow from All’, 这可以允许全部可以访问
# Zabbix monitoring system php web frontend
Alias /zabbix /usr/share/zabbix
AllowOverride None
Require all granted
php_value memory_limit 128M
php_value post_max_size 16M
php_value upload_max_filesize 2M
php_value max_input_time 300
php_value date.timezone Asia/Shanghai
启动zabbix-server 和zabbix-agent。重启httpd,,并设置zabbix-server和zabbix-agent开机自动启动
systemctl start zabbix-server
systemctl start zabbix-agent
systemctl restart httpd
systemctl restart mariadb
systemctl enable zabbix-server
systemctl enable zabbix-agent ---- (可选)
三、通过控制台配置Zabbix
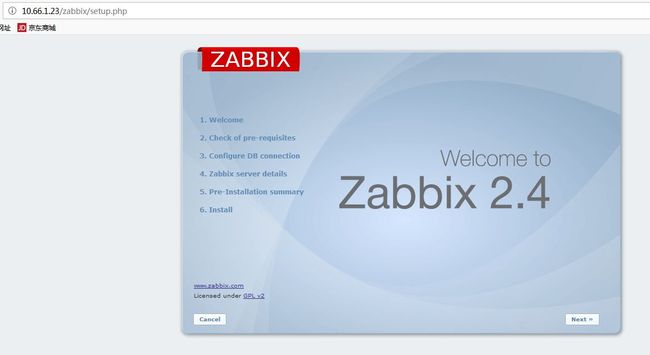
浏览器访问http://ip-address/zabbix
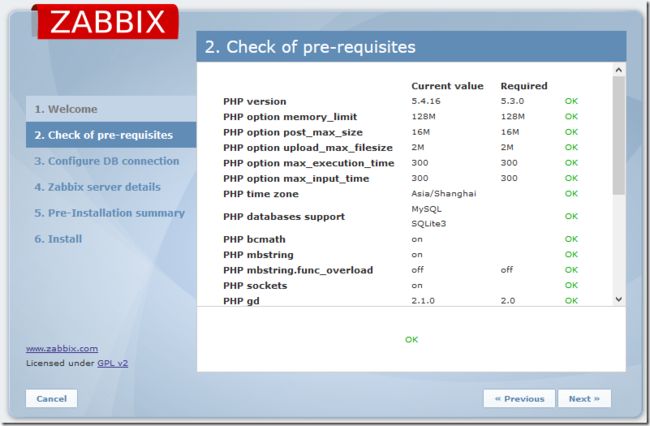
检查包的完整性和参数配置
数据zabbix数据库名、数据库用户和密码,并测试
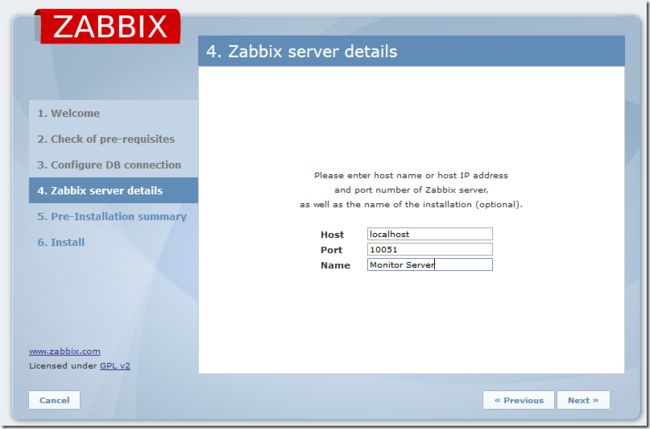
输入Server name(可选)
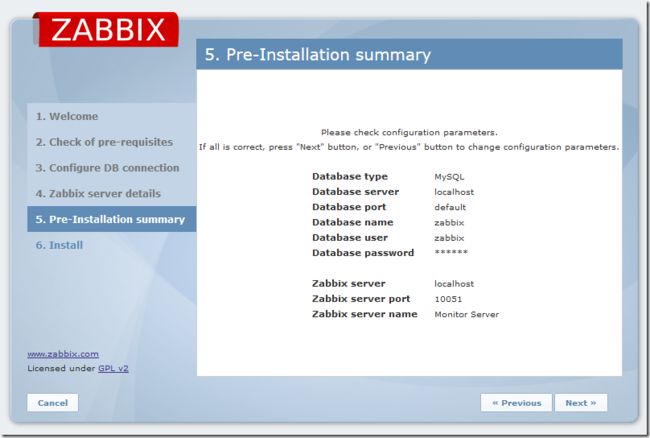
预安装summary
点击完成,完成安装
安装完成后,重定向到zabbix控制台登录页面. 输入用户名和密码,默认的用户名和密码为admin/zabbix.
管理仪表盘页面如下
四、解决zabbix中文乱码、汉化
1、在windows中找一个自己喜欢的字体或者去网上下载一个字体
2、将字体上传至/var/www/html/zabbix/fonts目录下
3、修改zabbix页面管理的中文字体设置
vim /var/www/html/zabbix/include/defines.inc.php #修改以下两行
define('ZBX_FONT_NAME', 'simfang');
define('ZBX_GRAPH_FONT_NAME', 'simfang');
4、登陆页面设置相应用户的默认语言Administrator—->Users(此处要保证显示的是用户,否则显示的都是用户组)
5、点击用户名进入用户信息编辑,默认语言选择简体中文,然后点击save保存
6、刷新页面


