1、介绍及环境需求
1、介绍:PSI是一款基于SaaS模式(Software as a Service软件即服务)的企业管理软件。PSI以商贸企业的核心业务:采购、销售、库存(进销存)为切入点,最终目标是行业化的ERP解决方案。
2、PSI支持多种安装方式可以在windows或者linux上进行安装,本文只介绍在centos7下的安装(因为现实情况不可能一台服务器只跑一个网站,而且后期管理也很繁琐)。其它平台及环境(包括一键安装包请查看其在码云上托管文档https://gitee.com/crm8000/PSI/tree/master/doc/04 安装)
3、基本软件:
操作系统:centos7系列
PHP版本:7+
数据库:MySQL5.5+及MariaDB
Nginx:系统自带版本即可
2、关于Nginx和PHP安装
1、安装Nginx:
请先安装扩展源:yum -y install epel-*
yum -y install nginx
安装完成,由于是yum安装,安装文件及配置文件在/etc/nginx目录下
useradd www -d /data/www/ -m
初始化nginx配置文件
cd /etc/nginx
cp nginx.conf.default nginx.conf
编辑nginx.conf
需修改内容已加粗
include /usr/share/nginx/modules/*.conf;
events {
worker_connections 1024;
}
http {
log_format main '$remote_addr - $remote_user [$time_local] "$request" '
'$status $body_bytes_sent "$http_referer" '
'"$http_user_agent" "$http_x_forwarded_for"';
access_log /var/log/nginx/access.log main;
sendfile on;
tcp_nopush on;
tcp_nodelay on;
keepalive_timeout 65;
types_hash_max_size 2048;
include /etc/nginx/mime.types;
default_type application/octet-stream;
include /etc/nginx/conf.d/*.conf;
server {
listen 80 default_server;
listen [::]:80 default_server;
server_name localhost; //修改服务的主机名
root /data/www; //更改服务读取目录
# Load configuration files for the default server block.
include /etc/nginx/default.d/*.conf;
location / {
}
error_page 404 /404.html;
location = /40x.html {
}
error_page 500 502 503 504 /50x.html;
location = /50x.html {
}
}
}
在conf.d目录下vim新建虚拟主机配置文件
server
{
listen 8001;
server_name crm;
index index.php index.html index.htm;
root /data/www/psi;
client_body_buffer_size 1m;
client_body_temp_path /data/tmp/nginx;
client_max_body_size 10m;
location ~ /\.
{
deny all;
}
location / {
if (!-e $request_filename){
rewrite ^/web/(.*)$ /web/index.php/$1 last; #--关键的配置,支持ThinkPHP的rewrite支持
}
}
location ~ .*\.php { #--经测试,必须以去除?$结尾,去掉$是为了不匹配行末,即可以匹配.php/,以实现pathinfo
fastcgi_pass 127.0.0.1:9000;
fastcgi_index index.php;
include fastcgi.conf;
include pathinfo.conf; #--关键的配置,支持ThinkPHP的pathinfo支持
}
access_log test.psi.com_access.log main;
error_log test.psi.com_error.log;
}
上部分内容使用include引入了pathinfo.conf,所以我们需要在nginx主目录vim新建这个文件
set $real_script_name $fastcgi_script_name;
if ($fastcgi_script_name ~ "(.+?\.php)(/.*)") {
set $real_script_name $1;
set $path_info $2;
}
fastcgi_param SCRIPT_FILENAME $document_root$real_script_name;
fastcgi_param SCRIPT_NAME $real_script_name;
fastcgi_param PATH_INFO $path_info;
2、安装php 7.2.12
前往PHP官网(http://php.net/get/php-7.2.12.tar.gz/from/a/mirror)点击下图圈中内容进行下载
上传到服务器相关位置并解压
tar xf php-7.2.12.tar.gz
cd php-7.2.12
yum 安装相关依赖
yum install -y gcc gcc-c++ make zlib zlib-devel pcre pcre-devel libjpeg libjpeg-devel libpng libpng-devel freetype freetype-devel libxml2 libxml2-devel glibc glibc-devel glib2 glib2-devel bzip2 bzip2-devel ncurses ncurses-devel curl curl-devel e2fsprogs e2fsprogs-devel krb5 krb5-devel openssl openssl-devel openldap openldap-devel nss_ldap openldap-clients openldap-servers gmp gmplib gmp-devel libmcrypt libmcrypt-devel readline readline-devel
其中会有几个提示找不到相关资源,请自行百度查找并进行安装,可以进行编译安装。
./configure --prefix=/usr/local/php7 --enable-fpm --enable-soap --with-xmlrpc --with-openssl --with-mcrypt --with-pcre-regex --with-sqlite3 --with-zlib --enable-bcmath --with-iconv --with-bz2 --with-curl --with-cdb --enable-dom --enable-exif --enable-fileinfo --enable-filter --with-pcre-dir --enable-ftp --with-gd --with-openssl-dir --with-jpeg-dir --with-png-dir --with-freetype-dir --enable-gd-native-ttf --enable-gd-jis-conv --with-gettext --with-gmp --with-mhash --enable-json --enable-mbstring --enable-pdo --with-pdo-mysql --with-zlib-dir --with-pdo-sqlite --with-readline --enable-session --enable-shmop --enable-simplexml --enable-sockets --with-libxml-dir
make && make install
find . -name "php.ini*"
cp php.ini-production /usr/local/php7/lib/php.ini
find . -name "php-fpm*"
cp ./sapi/fpm/php-fpm.service /etc/systemd/system/
cd /usr/local/php7/etc/php-fpm.d/
cp www.conf.default www.conf
systemctl start php-fpm
systemctl enable php-fpm
3、部署PSI
前往码云下载(需注册或者登陆才可以下载)
上传并解压,拷贝到 /data/www/psi
平滑重启nginx:systemctl reload nginx
4、导入数据库
进入如下目录
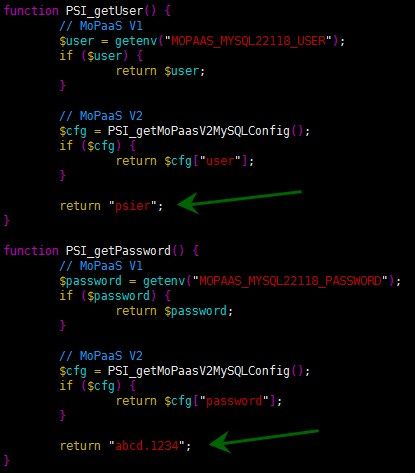
-创建数据库 创建库名为psi,字符集为utf8的库,授权psier用户来登录,密码为abcd.1234
mysql -u root -p
create database psi character set utf8;
grant all on psi.* to 'psier'@'localhost' identified by 'abcd.1234';
exit
导入初始化数据库数据
导入表结构:mysql -upsier -h127.0.0.1 -pabcd.1234 psi < 01CreateTables.sql
导入初始化数据:mysql -upsier -h127.0.0.1 -pabcd.1234 psi < 02InsertInitData.sql
导入测试数据(这一步可选,我没有导入):mysql -upsier -h127.0.0.1 -pabcd.1234 psi < 99psi_demo_data.sql
修改配置文件的数据库连接
vim /data/www/psi/web/Application/Common/Conf/config.php
systemctl reload nginx
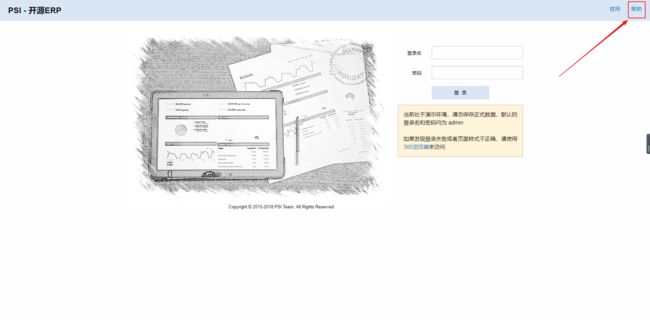
之后使用ip+端口的方式进行访问,默认用户名密码都是admin
使用方式请参照下图


