R语言基础绘图系统
基础绘图包之低级绘图函数——气泡图、一页多图、背景网格、添加线条和散点、数学表达式
4.气泡图
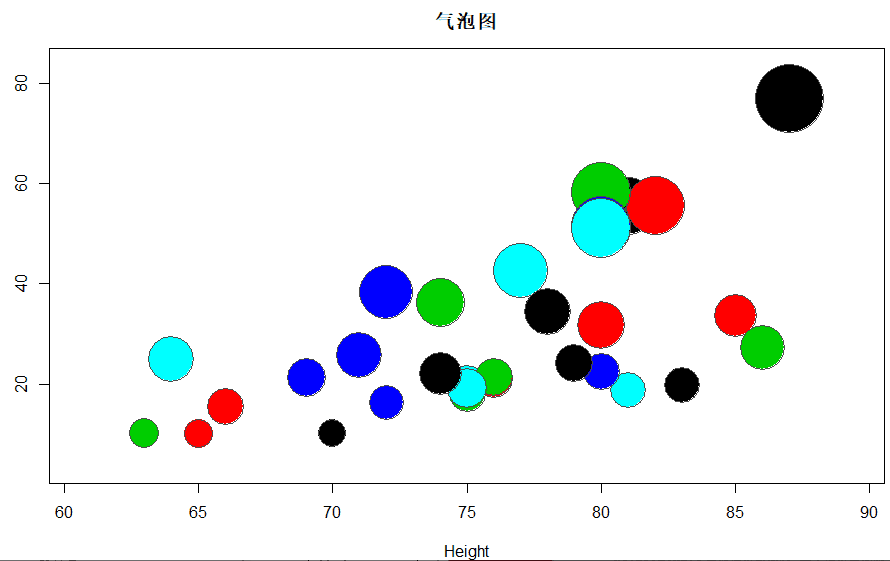
symbols是高级绘图函数,可在图上添加标记,标记的形状包括:circles,squares,rectangles,stars,thermometers,boxplots. 默认标记圆圈,可用于绘制气泡图
op <- palette(rainbow(5,end = 0.9))
with(trees,{
  symbols(Height,Volume,circles = Girth/16,
          inches = F,bg=1:5, #背景色
          fg='gray30', #前景色
          main = '气泡图')
  palette(op)
})
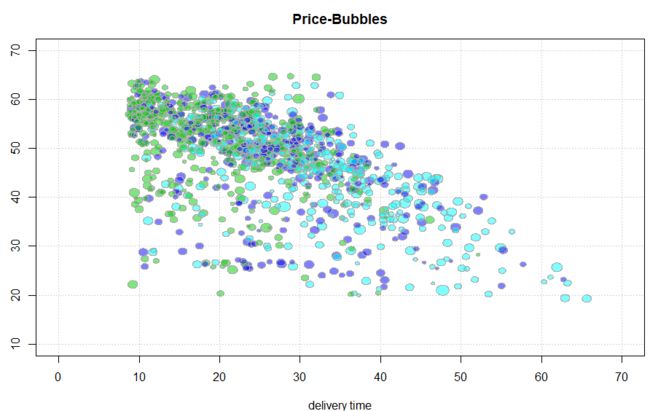
重叠点透明色气泡图.
#重叠点透明色气泡图
library(DescTools)
DescTools::PlotBubble(x=d.pizza$delivery_min,y=d.pizza$temperature,
                      area=d.pizza$price/40, #填充数据,数值标化
                      xlab='delivery time',ylab='temperature',
                      col=SetAlpha(as.numeric(d.pizza$area)+2,0.5),
                      #第一个参数颜色向量,第二个参数透明度
                      border='darkgrey',
                      na.rm=TRUE,main='Price-Bubbles',
                      panel.first=grid()) #panel.grid在画图前添加网格线
#添加图例,与legend类似 。这里图例没生成。
BubbleLegend('bottomleft',
             frame = TRUE,
             cols = SetAlpha('lightskyblue',0.5),
             bg='green',
             radius=c(10,5,2)/2,
             labels = c(10,5,2),
             cex=0.8,
             cols.lbl = c('yellow','red','blue'),
             width = 12)
5. 一页多图
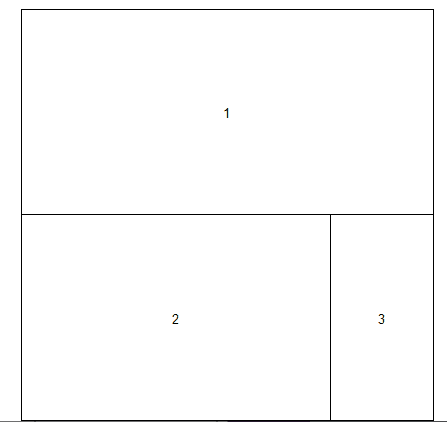
mfrow/mfcol是等距切分画布,不等面积切割需要layout函数。
nf <- layout(matrix(c(1,1,2,3),2,2,byrow = T),
             #将画布切分2行2列四部分,第一块占一行,第2、3块占第二行。
             widths = c(3,1),
             #每一列宽度,这里第一列是第二列的3倍
             heights = c(2,2),
             #每一列的高度,这是相对宽/高度,也可用绝对lcm(5)
             TRUE)
#展示画布切分效果
layout.show(nf)
```nf <- layout(matrix(c(1,1,2,3),2,2,byrow=T),widths = c(3,1),heights = c(2,2),TRUE)
a <- seq(100,1)+4*runif(100,0.4)
b <- seq(1,100)^2+runif(100,0.98)
c <- rnorm(100,5,4)
hist(c,breaks = 30,border = F,col = rgb(0.4,0.5,0.4,0.5),
xlab = '',main = '',freq = F)
lines(density(c),col='red')
boxplot(a,xlab='a',col = rgb(0.3,0.8,0.2,0.5),las=2)
boxplot(b,xlab='b',col=rgb(0.7,0.3,0.3,0.5))

此外,split.screen函数也可用于切分屏幕。
#### 6.背景网格
在基础绘图包中,通过grid函数添加网格背景。op <- par(mfcol=1:2)
with(iris,{
#默认网格
plot(Sepal.Length,Sepal.Width,col=as.integer(Species),
xlim = c(4,8),ylim=c(2,4.5),panel.first = grid(),
main = 'grid 1')
#三行三列网格,宽度为2实线
plot(Sepal.Length,Sepal.Width,col=as.integer(Species),
panel.first = grid(3,lty = 1,lwd = 2),
main = 'grid 2')
})

#### 7. 添加线条和散点
添加线条。prevalence_m <- runif(10,0.5,0.8)
prevalence_f <- runif(10,0.3,0.6)
plot(prevalence_m,col='red',lty=1,type = 'l',
ylab='某种疾病患病率',xlab='时间',
lwd=2,ylim=c(0,0.9))
lines(prevalence_f,col='blue',lty=2,lwd=2)
lines参数与plot大致相同
legend(2.3,0.38,legend = c('男性','女性'),lty=1:2,
lwd=2,col=c('red','blue'))

添加散点。data <- runif(100)
plot(data,xlab = '',ylab = '')
points(50,mean(data),pch=17,col='red',cex=2)

#### 8. 添加数学表达式
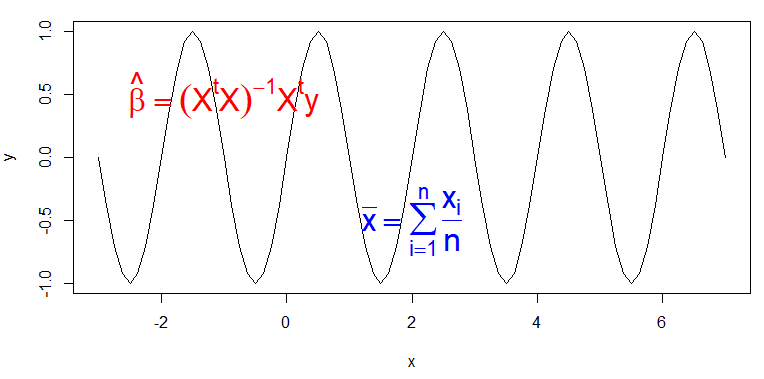
仍通过text添加,借助expression函数。x <- seq(-3,7,by=1/8)
y <- sin(pi*x)
plot(y~x,type='l')
text(-1,0.5,labels = expression(hat(beta)==(X^t * X)^{-1} * X^t *y),
col='red',cex=2)
text(2,-0.5,labels = expression(bar(x)==sum(frac(x[i],n),i==1,n)),
col = 'blue',cex=2)
```


