两种方式(用第三方库RESideMenu实现)
第三库添加用cocoapods方法,过程省略
-1.代码手写
-2.storyboard画
1.代码手写
可在AppDelegate.m加载完成启动方法中实现,如下
#import "AppDelegate.h"
#import
@interface AppDelegate ()

@end

@implementation AppDelegate

- (BOOL)application:(UIApplication *)application didFinishLaunchingWithOptions:(NSDictionary *)launchOptions {
    [self creatSideMenu];
    return YES;
}

-(void)creatSideMenu{
    //1.背景
    RESideMenu *rootVc=[[RESideMenu alloc]init];

    //创建的rootVc这是视图控制器;创建控制器时其view的方法无法调到;使用它的时候才能调到,所以在这个位置设颜色会报对象为空;需写在后面
    //rootVc.view.backgroundColor=[UIColor redColor];

    //2.左边
    UIViewController *leftVc=[UIViewController new];
    leftVc.view.backgroundColor=[UIColor greenColor];
    //右边
    UIViewController *rightVc=[UIViewController new];
    rightVc.view.backgroundColor=[UIColor yellowColor];

    //3.中间
    UIViewController *mainVc=[UIViewController new];
    mainVc.view.backgroundColor=[UIColor blueColor];

    //三者联系,rootVc来管理其他三个
    rootVc.leftMenuViewController=leftVc;
    rootVc.rightMenuViewController=rightVc;
    rootVc.contentViewController=mainVc;//中间
    rootVc.view.backgroundColor=[UIColor redColor];//这个需要写在“中间”之后才行

    rootVc.scaleMenuView=NO;//关闭菜单栏缩放
    rootVc.scaleContentView=NO;//关闭主视图缩放
    rootVc.contentViewShadowEnabled=YES;//开启主视图阴影效果
    rootVc.contentViewInPortraitOffsetCenterX=-50;//分割线距离中心点的距离

    self.window=[[UIWindow alloc]initWithFrame:[UIScreen mainScreen].bounds];
    self.window.rootViewController=rootVc;
    [self.window makeKeyWindow];
}
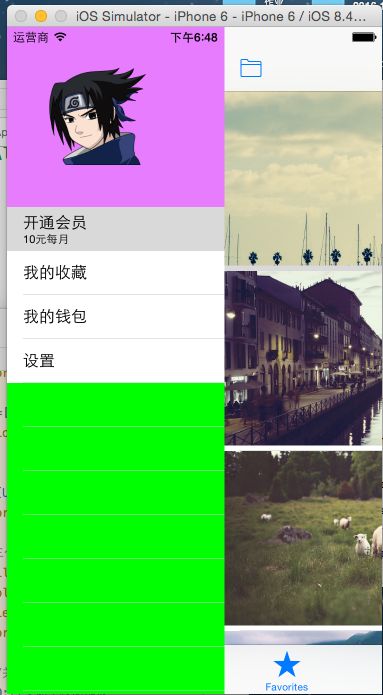
屏幕快照 2016-02-22 下午6.48.49.png
2.storyboard画(右边这不做)
先创建三个视图控制器
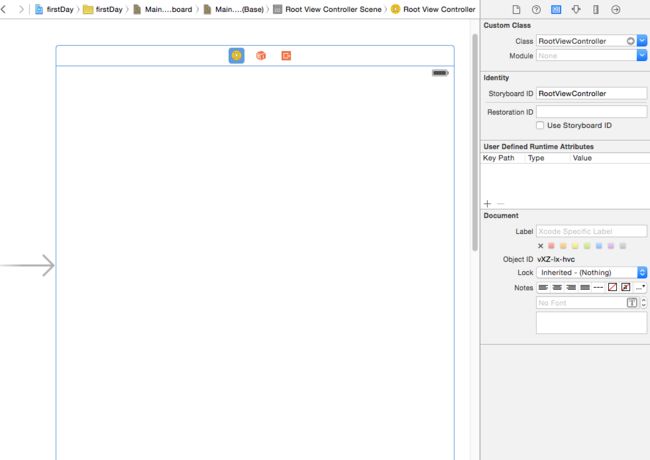
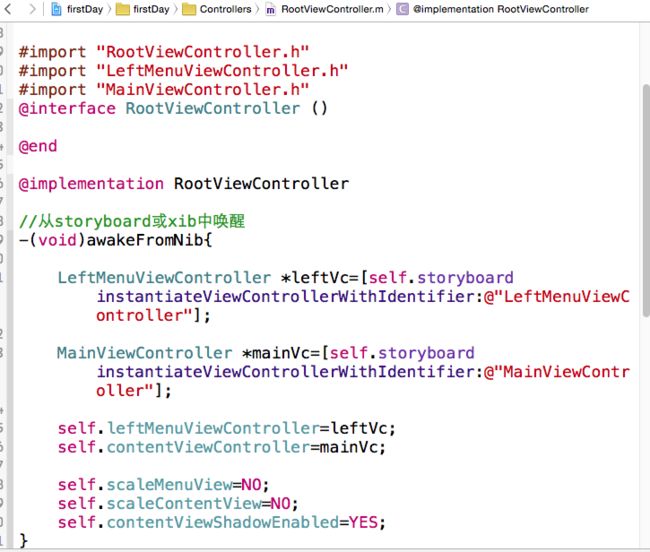
1.背景的(rootVc)继承UIViewController创建再改成继承RESideMenu;代替掉原来的viewcontroller(删除);再用故事版画出与之对应,并设ID(名字和类名一样较好)
屏幕快照 2016-02-22 下午7.18.27.png
屏幕快照 2016-02-22 下午7.45.18.png
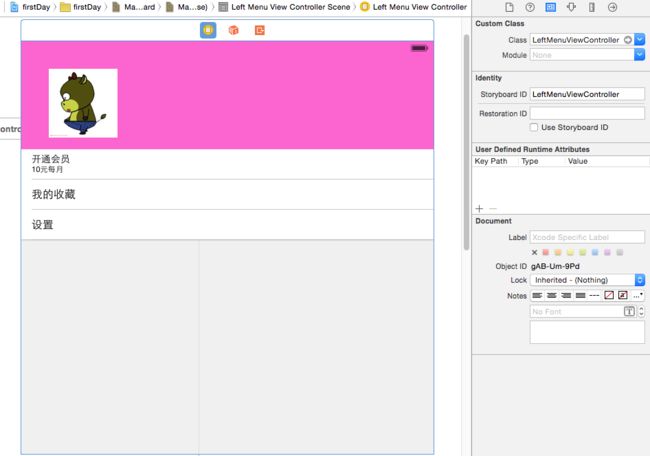
2.左边,继承UITableViewController
屏幕快照 2016-02-22 下午7.18.57.png
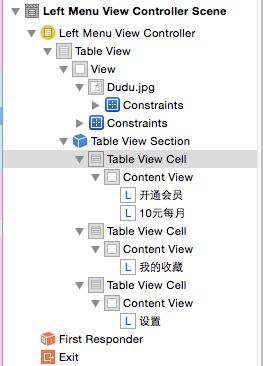
屏幕快照 2016-02-22 下午7.20.03.png
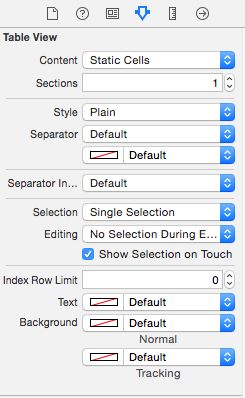
cell设静态,再各个单元格自定义风格,第二个表示组数
屏幕快照 2016-02-22 下午7.29.14.png
增加单元格数用下面图示;或者直接左边选中Table View Cell 粘贴复制

屏幕快照 2016-02-22 下午7.30.33.png
#import "LeftMenuViewController.h"
#import
#import "MainViewController.h"

@interface LeftMenuViewController ()

@end

@implementation LeftMenuViewController

- (void)viewDidLoad {
    [super viewDidLoad];
    self.view.backgroundColor = [UIColor greenColor];
    // Do any additional setup after loading the view.
}

- (void)tableView:(UITableView *)tableView didSelectRowAtIndexPath:(NSIndexPath *)indexPath
{
    NSLog(@"index.row = %ld",indexPath.row);

    NSArray * arr = @[@"开通会员",
                      @"我的收藏",
                      @"我的钱包",
                      @"设置"];

    // 1. 获取到背景视图控制器
     //self.sideMenuViewController.contentViewController

    // 2. 获取到主视图控制器
    MainViewController *mainVc = (MainViewController *)self.sideMenuViewController.contentViewController;
    // 3. 获取到主视图当前选中的视图控制器
    UINavigationController *navi =(UINavigationController *) mainVc.selectedViewController;

    // 4. 推出目标页面
    UIViewController *destVc = [UIViewController new];
    destVc.view.backgroundColor = [UIColor orangeColor];
    destVc.title = arr[indexPath.row];
    [navi pushViewController:destVc animated:YES];
    [self.sideMenuViewController hideMenuViewController];
}
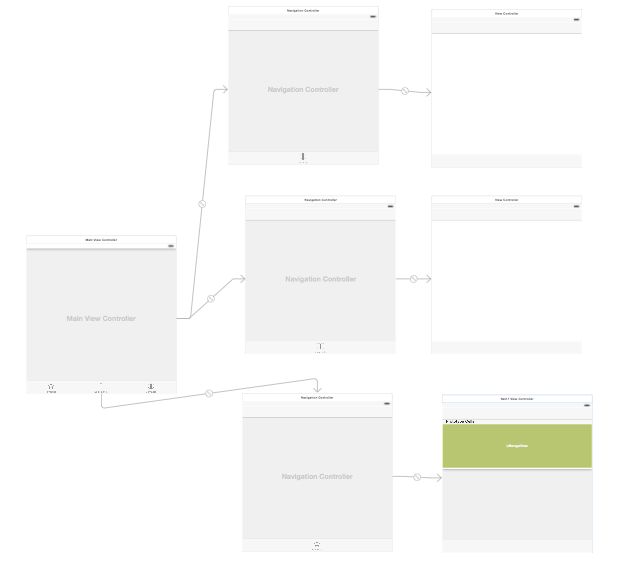
3.中间,用UITabBarController分栏
托完分栏后,再根据需要对各个item视图做改变,比如加导航控制器

屏幕快照 2016-02-22 下午7.00.30.png
屏幕快照 2016-02-22 下午7.01.16.png
创建相对应的与上面画的对应起来
屏幕快照 2016-02-22 下午7.38.17.png
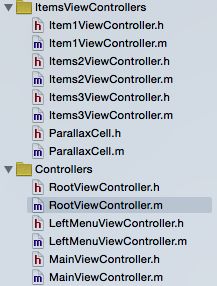
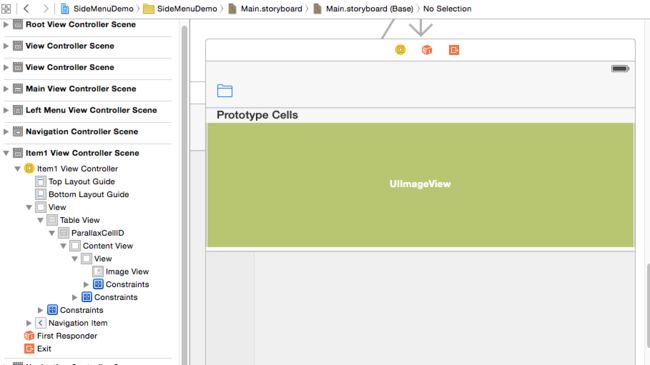
用items1(继承UIViewcontroller)
imageview不是直接放在表格单元上,先放一张view到cell的contentView上再把图片放到view上面,这样比较好
屏幕快照 2016-02-22 下午7.55.40.png
#import "Item1ViewController.h"
#import
#import "ParallaxCell.h"

static NSString *cellID = @"ParallaxCellID";//与故事版中设定的ID号对应

@interface Item1ViewController ()
@property (weak, nonatomic) IBOutlet UITableView *tableView;

/**数据源*/
@property (nonatomic, strong) NSMutableArray *imgNamesArr;

@end

@implementation Item1ViewController
//懒加载
- (NSMutableArray *)imgNamesArr
{
    if (_imgNamesArr == nil) {
     _imgNamesArr = @[].mutableCopy;//空数组可变拷贝;copy不可变-->只看后不看前
     _imgNamesArr = [NSMutableArray array];
        for (int i = 0; i < 14; i++) {
            NSString *imgName = [NSString stringWithFormat:@"image%03d.jpg",i];
            [_imgNamesArr addObject:imgName];
        }
    }
    return _imgNamesArr;
}


- (void)viewDidLoad {
    [super viewDidLoad];

    // Do any additional setup after loading the view.
}

- (void)didReceiveMemoryWarning {
    [super didReceiveMemoryWarning];
    // Dispose of any resources that can be recreated.
}
- (IBAction)showLeftMenuAction:(UIBarButtonItem *)sender {
    // 显示左侧边菜单
    // 1. 找到背景视图控制器,也即是RootViewController

    // 2. 让背景视图控制器显示出左侧边栏
     [self.sideMenuViewController presentLeftMenuViewController];
}


#pragma mark -- UITableviewDelegate & DataSource

- (NSInteger)tableView:(UITableView *)tableView numberOfRowsInSection:(NSInteger)section
{
    return self.imgNamesArr.count;
}

- (UITableViewCell *)tableView:(UITableView *)tableView cellForRowAtIndexPath:(NSIndexPath *)indexPath
{
    ParallaxCell *cell = [tableView dequeueReusableCellWithIdentifier:cellID];

    // 填充数据
    cell.imgName = self.imgNamesArr[indexPath.row];

    //复用时先调用一下,解决问题(具体再深究?)
    [cell scrollImageInTableView:self.tableView inView:self.view];

    return cell;
}


/** 滑动视图滑动的时候的回调方法*/
- (void)scrollViewDidScroll:(UIScrollView *)scrollView
{
    //做视差效果:图片比cell大
    // 1.获取可视的cells
    NSArray *cells = [self.tableView visibleCells];

    for (ParallaxCell *cell in cells) {
        // 改变cell里面image的位置。
        [cell scrollImageInTableView:self.tableView inView:self.view];

    }

}
ParallaxCell.h
#import

@interface ParallaxCell : UITableViewCell

@property (nonatomic, copy) NSString *imgName;


/** 让cell的image在 tableview 中滑动*/
- (void)scrollImageInTableView:(UITableView *)tableView
                        inView:(UIView *)view;

@end
ParallaxCell.m
#import "ParallaxCell.h"

@interface ParallaxCell ()

@property (weak, nonatomic) IBOutlet UIImageView *pImgView;


@end


@implementation ParallaxCell

- (void)awakeFromNib {
    // Initialization code
}

//重写Set方法
- (void)setImgName:(NSString *)imgName
{
    UIImage *img = [UIImage imageNamed:imgName];
    self.pImgView.image = img;
}

- (void)scrollImageInTableView:(UITableView *)tableView inView:(UIView *)view
{
    // 1. 找出cell在ViewController的view中的位置。将cell相对于tableview的frame转换成相对于view的frame(将cell相对于表格视图的位置转成相对于view(屏幕)的位置,让他显示出来)
    CGRect inSuperRect = [tableView convertRect:self.frame toView:view];

    // 2. 计算出cell的起始位置相对于 view的中线的差值。
    CGFloat dis = CGRectGetMidY(view.frame) - CGRectGetMinY(inSuperRect);

    // 2.1 计算出imageView的高度和cell的高度差
    CGFloat dif = CGRectGetHeight(self.pImgView.frame) - CGRectGetHeight(self.frame);

    // 3. 计算出imageView应该移动的距离。
    CGFloat moveDis = dis / CGRectGetHeight(view.frame) * dif;

    // 4. 让image移动
    CGRect imgRect = self.pImgView.frame;
    imgRect.origin.y = -dif * 0.5 + moveDis;

    self.pImgView.frame = imgRect;


}


- (void)setSelected:(BOOL)selected animated:(BOOL)animated {
    [super setSelected:selected animated:animated];

    // Configure the view for the selected state
}

@end