1.未登录各个界面的展示
   /*
    *  设置未登录界面
    *  isHome:  是否是主页
    *  image:   图片的名字
    *  message: 文本的信息
    */
    func setupVistorInfo(isHome:Bool,image:String,message:String) {
    // 如果不是首页,就隐藏转盘
    iconView.isHidden = !isHome
    // 修该中间图标
    homeIcob.image = UIImage(named:image)
    // 修改文本
    messageLabel.text = message
    messageLabel.height = NSString.JKtextStringHeight(string:message as NSString, size: CGSize(width:224,height:1000), fontSize: 14)

    loginButton.y = messageLabel.frame.maxY + 10
    zhuceBtn.y = messageLabel.frame.maxY + 10

    // 如果是首页就执行下面的动画
    if isHome {

        startAnimation()
     }
    }
2. 首页核心动画的调用
核心动画
     // MARK: 在这里执行动画
     private func startAnimation(){

        // 1.创建动画
        let anim = CABasicAnimation(keyPath: "transform.rotation")
        // 2.设置动画属性
        anim.toValue = 2 * M_PI
        anim.duration = 20
        anim.repeatCount = MAXFLOAT
        // 特别添加,该属性默认为YES,代表动画只要执行完毕就移除,false 代表不移除
        anim.isRemovedOnCompletion = false

        // 3.将动画添加到图层上
        iconView.layer.add(anim, forKey: nil)
     }
3.在各个页面的调用方式
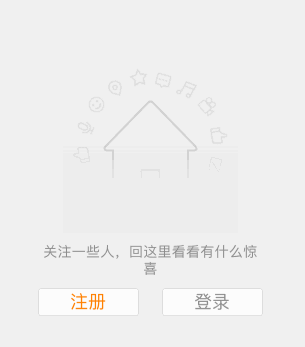
  if !userLogin {

        vistorView?.setupVistorInfo(isHome: true, image: "visitordiscover_feed_image_house", message: "关注一些人,回这里看看有什么惊喜")
   }
4.在此加一下关于传一段文字返回其高度和宽度的计算
 import UIKit

 extension NSString {
   // MARK: 1.返回文字的高度
   static func JKtextStringHeight(string: NSString, size: CGSize, fontSize: CGFloat) -> CGFloat {
    return string.boundingRect(with: size, options: NSStringDrawingOptions.usesLineFragmentOrigin, attributes: [NSFontAttributeName: UIFont.systemFont(ofSize: fontSize)], context: nil).size.height
   }
   // MARK: 2.返回文字的宽度
    static func JKtextStringWidth(string: NSString, size: CGSize, fontSize: CGFloat) -> CGFloat {
    return string.boundingRect(with: size, options: NSStringDrawingOptions.usesLineFragmentOrigin, attributes: [NSFontAttributeName: UIFont.systemFont(ofSize: fontSize)], context: nil).size.width
   }

 }
5.在swift里面如何定义协议
  // 1.swift如何定义协议, 必须遵守 NSObjectProtocol
  protocol VisitorViewDelete: NSObjectProtocol{

       // 登录点击
       func logionWillClick()
       // 注册点击
       func registerWillClick()
   }
   // 2. 定义一个对象保存delegate,必须用weak 防止循环引用
   weak var delegate: VisitorViewDelete?

   // 3.方法的触发
   delegate?.registerWillClick()

   // 4.遵守协议 VisitorViewDelete

   // 5.挂代理
    customView.delegate = self

   // 6.方法的实现
   // MARK: 登录按钮的点击事件
   func logionWillClick() {


   }
   // MARK: 注册按钮的点击事件
   func registerWillClick() {


   }
6.导航栏的设置
 // 设置导航条的颜色 最好是设置外观来设置全局的颜色
 //navigationController?.navigationBar.tintColor = UIColor.orange
 navigationItem.leftBarButtonItem = UIBarButtonItem(title: "注册", style: UIBarButtonItemStyle.plain, target: self,action: #selector(BaseViewController.registerWillClick))
 navigationItem.rightBarButtonItem = UIBarButtonItem(title: "登录", style: UIBarButtonItemStyle.plain, target: self,action: #selector(BaseViewController.logionWillClick))
7. 设置导航条和工具条的外观,因为外观设定全局有效,所以应该在程序一进来就设定,在AppDelegate里面设施
    UINavigationBar.appearance().tintColor = UIColor.orange
    UITabBar.appearance().tintColor = UIColor.orange