Android中的Monkey测试极大的帮助Android开发者保证了开发质量,iOS自身是没有Monkey测试的,最开始有基于UIAutomation 的 monkey 测试[https://github.com/jonathanpenn/ui-auto-monkey]. xCode7之后,UIAutomation被弃用,对应Monkey也随之淡化.当大家习惯Monkey测试,突然消失之后就会怀念,正所谓有需求就会有市场,老外用Swift基于XCUITesting框架开发新的Monkey工具SwiftMonkey.
Swift Monkey测试
SwiftMonkey基于Swift语言编写,按照SwiftMonkey提供的Demo,运行之后看到效果如下图所示:
SwiftMonkey实现测试需要SwiftMonkey和SwiftMonkeyPaws两个框架,如果我们的项目开始就是Swift语言编写的,那么使用起来就非常简单,主要过程如下:
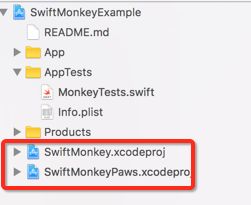
①将Demo中SwiftMonkey和SwiftMonkeyPaws两个项目拖入自身的Swift项目中.
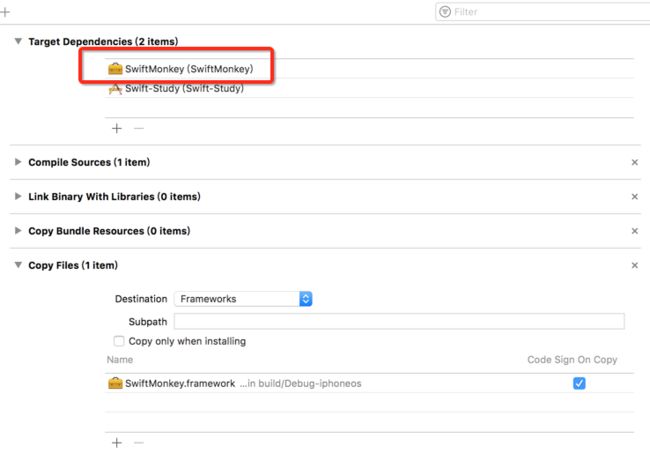
②SwiftMonkey作为FrameWork加入UITest对应的Target文件中:
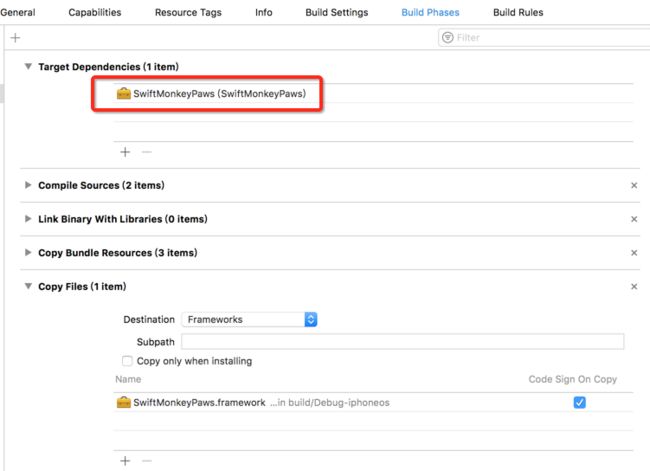
③SwiftMonkeyPaws作为FrameWork加入App项目对应的Target中;
④AppDelegate中加入Paws:
class AppDelegate: UIResponder, UIApplicationDelegate {

    var window: UIWindow?
    var paws: MonkeyPaws?

    func application(_ application: UIApplication, didFinishLaunchingWithOptions launchOptions: [UIApplicationLaunchOptionsKey: Any]?) -> Bool {
        // Override point for customization after application launch.
        paws = MonkeyPaws(view: window!)
        return true
    }
⑤UITest中加入Monkey测试代码:
override func setUp() {
        super.setUp()

        // Put setup code here. This method is called before the invocation of each test method in the class.

        // In UI tests it is usually best to stop immediately when a failure occurs.
        continueAfterFailure = false
        // UI tests must launch the application that they test. Doing this in setup will make sure it happens for each test method.
        XCUIApplication().launch()

        // In UI tests it’s important to set the initial state - such as interface orientation - required for your tests before they run. The setUp method is a good place to do this.
    }

    override func tearDown() {
        // Put teardown code here. This method is called after the invocation of each test method in the class.
        super.tearDown()
    }

    func testMonkey() {
        let application = XCUIApplication()

        // Workaround for bug in Xcode 7.3. Snapshots are not properly updated
        // when you initially call app.frame, resulting in a zero-sized rect.
        // Doing a random query seems to update everything properly.
        // TODO: Remove this when the Xcode bug is fixed!
        _ = application.descendants(matching: .any).element(boundBy: 0).frame

        // Initialise the monkey tester with the current device
        // frame. Giving an explicit seed will make it generate
        // the same sequence of events on each run, and leaving it
        // out will generate a new sequence on each run.
        //let monkey = Monkey(frame: application.frame)
        let monkey = Monkey(seed: 123, frame: application.frame)

        // Add actions for the monkey to perform. We just use a
        // default set of actions for this, which is usually enough.
        // Use either one of these but maybe not both.
        // XCTest private actions seem to work better at the moment.
        // UIAutomation actions seem to work only on the simulator.
        monkey.addDefaultXCTestPrivateActions()

        //monkey.addDefaultUIAutomationActions()

        // Occasionally, use the regular XCTest functionality
        // to check if an alert is shown, and click a random
        // button on it.
        monkey.addXCTestTapAlertAction(interval: 100, application: application)

        // Run the monkey test indefinitely.
        monkey.monkeyAround()
    }
这段代码是SwiftMonkey的默认代码,addDefaultXCTestPrivateActions是调用Apple私有手势方法,addDefaultUIAutomationActions只在模拟器中有效,内部实现如下:
 public func addDefaultXCTestPrivateActions() {
        addXCTestTapAction(weight: 25)
        addXCTestLongPressAction(weight: 1)
        addXCTestDragAction(weight: 1)
        addXCTestPinchCloseAction(weight: 1)
        addXCTestPinchOpenAction(weight: 1)
        addXCTestRotateAction(weight: 1)
        //addXCTestOrientationAction(weight: 1) // TODO: Investigate why this does not work.
    }
默认执行点击,长按,拖拽,捏合,旋转,横竖屏切换操作,Weight代表的是时间间隔,如果觉得系统默认的操作过多,可以自行删减.
monkeyAround代表次数,默认如果不设置次数,会一直执行下去.
public func monkeyAround() {
        while true {
            actRandomly()
            actRegularly()
        }
    }
OC Monkey 测试
如果你的项目一开始就是Swift编写,或者已经全面迁移到Swift语言,恭喜你下面这段介绍可以忽略了.鉴于目前大部分App都是OC为主,如果直接按照Swift的套路去使用SwiftMonkey会遇到一些问题,有兴趣可以自行实践,以下是本人实战过程.
① 将Demo中SwiftMonkey和SwiftMonkeyPaws两个项目拖入自身的Swift项目中.
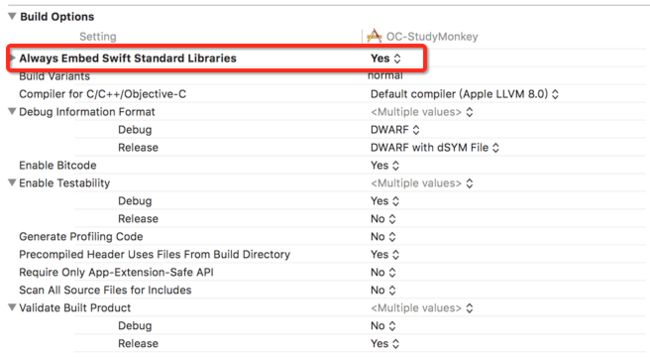
② 将Always Embed Swift Standard Libraries设置为YES.
③ 正常的套路直接调用Moneky,MonkeyPaws类,但是事实上无法调用,折腾了很久,中间各种报错.
④ 简单粗暴的方式是将SwiftMonkey两个项目中的Swift拷贝到OC项目中:
⑤ AppDelegate中代码实现:
@interface AppDelegate ()

@property (strong, nonatomic) MonkeyPaws *paws;

@end

@implementation AppDelegate


- (BOOL)application:(UIApplication *)application didFinishLaunchingWithOptions:(NSDictionary *)launchOptions {
    // Override point for customization after application launch.
    self.paws = [[MonkeyPaws alloc] initWithView:self.window tapUIApplication:true];

    return YES;
}
⑤ UITest测试代码:
- (void)setUp {
    [super setUp];

    // Put setup code here. This method is called before the invocation of each test method in the class.

    // In UI tests it is usually best to stop immediately when a failure occurs.
    self.continueAfterFailure = NO;
    // UI tests must launch the application that they test. Doing this in setup will make sure it happens for each test method.
    [[[XCUIApplication alloc] init] launch];

    // In UI tests it’s important to set the initial state - such as interface orientation - required for your tests before they run. The setUp method is a good place to do this.
}

- (void)tearDown {
    // Put teardown code here. This method is called after the invocation of each test method in the class.
    [super tearDown];
}

- (void)testExample {
    // Use recording to get started writing UI tests.
    [XCUIDevice sharedDevice].orientation = UIDeviceOrientationPortrait;
    // Use XCTAssert and related functions to verify your tests produce the correct results.
}

- (void)testMonkey {

    XCUIApplication *application = [XCUIApplication new];
    CGRect frame = [[application descendantsMatchingType:XCUIElementTypeAny] elementBoundByIndex:0].frame;

    Monkey *monkey = [[Monkey alloc] initWithSeed:123 frame:application.frame];

    [monkey addDefaultXCTestPrivateActions];
    [monkey addXCTestTapAlertActionWithInterval:100 application:application];
    [monkey monkeyAround];
}
如果项目中之前没有进行过Monkey测试,SwiftMonkey会帮我们测出一些以前开发中没有注意的问题.SwiftMonkey涉及调用XCTesting的私有API,不建议包含SwiftMonkey直接上传到AppStore.
参考资料
SwiftMonkey
SwiftMonkey :iOS 上的 monkey