Azure IoT文档中心:https://docs.azure.cn/zh-cn/iot-hub/iot-hub-devguide
GitHub:https://github.com/Azure/azure-iot-sdk-java/tree/master/device
简介
Azure IoT 中心是一项完全托管的服务,可在数百万个 IoT 设备和一个解决方案后端之间实现安全可靠的双向通信。 Azure IoT 中心:
提供了多个设备到云和云到设备通信选项。 这些选项包括单向消息传送、文件传输和请求-回复方法。
提供路由到其他 Azure 服务的内置声明性消息。
提供设备元数据和同步状态信息的可查询存储。
使用每个设备的安全密钥或 X.509 证书来实现安全通信和访问控制。
可广泛监视设备连接性和设备标识管理事件。
包含最流行语言和平台的设备库。
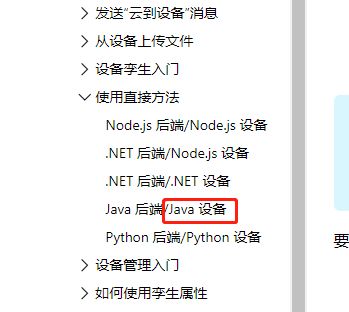
主要看Java 开发文档就行,针对设备端开发
主要看Java端设备开发文档OK
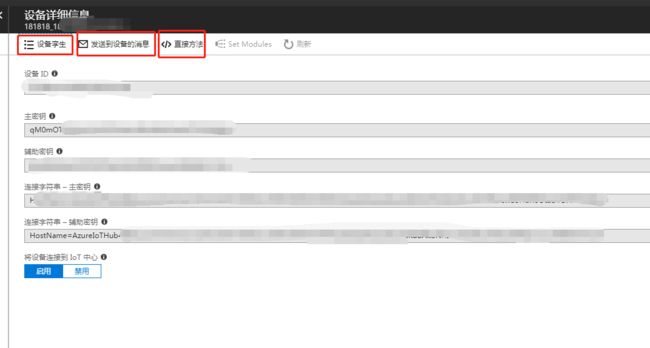
可在后台发送消息,直接方法,设备孪生查看
在Android Studio中
一、gradle配置
 //iot hub
    compile 'com.microsoft.azure.sdk.iot:iot-device-client:1.10.0'
二、初始化
将以下类级变量添加到 App 类。 将 {youriothubname} 替换为 IoT 中心名称,将 {yourdevicekey} 替换为在“创建设备标识”部分中生成的设备密钥值:
private static String connString = "HostName={youriothubname}.azure-devices.cn;DeviceId=myDeviceID;SharedAccessKey={yourdevicekey}";
private static IotHubClientProtocol protocol = IotHubClientProtocol.MQTT;
private static String deviceId = "myDeviceId";
private static final int METHOD_SUCCESS = 200;
private static final int METHOD_NOT_DEFINED = 404;
实例化 DeviceClient 对象时使用 protocol 变量。
设备创建Client
 DeviceClient client = new DeviceClient(connString, protocol);

  try
  {
    client.open();
    //此处可以订阅方法,接收方法,接收直接方法等等

  }
  catch (Exception e)
  {
  }
三、接收直接方法消息
直接方法
client.subscribeToDeviceMethod(new DirectMethodCallback(), null, new DirectMethodStatusCallback(), null);
若要向 IoT 中心返回状态代码,向 App 类添加以下嵌套类:
protected static class DirectMethodStatusCallback implements IotHubEventCallback
{
  public void execute(IotHubStatusCode status, Object context)
  {
    System.out.println("IoT Hub responded to device method operation with status " + status.name());
  }
}
若要处理从解决方案后端进行的直接方法调用,向 App 类添加以下嵌套类:
protected static class DirectMethodCallback implements com.microsoft.azure.sdk.iot.device.DeviceTwin.DeviceMethodCallback
{
  @Override
  public DeviceMethodData call(String methodName, Object methodData, Object context)
  {
    DeviceMethodData deviceMethodData;
    switch (methodName)
    {
      case "writeLine" :
      {
        int status = METHOD_SUCCESS;
        System.out.println(new String((byte[])methodData));
        deviceMethodData = new DeviceMethodData(status, "Executed direct method " + methodName);
        break;
      }
      default:
      {
        int status = METHOD_NOT_DEFINED;
        deviceMethodData = new DeviceMethodData(status, "Not defined direct method " + methodName);
      }
    }
    return deviceMethodData;
  }
}
四、接收消息
在 App 类中添加以下 MessageCallback 类作为嵌套类。 设备从 IoT 中心接收消息时,将调用 execute 方法。 在本示例中,设备始终通知 IoT 中心它已完成消息:
private static class AppMessageCallback implements MessageCallback {
  public IotHubMessageResult execute(Message msg, Object context) {
    System.out.println("Received message from hub: "
      + new String(msg.getBytes(), Message.DEFAULT_IOTHUB_MESSAGE_CHARSET));

    return IotHubMessageResult.COMPLETE;
  }
}
修改 main 方法,以创建 AppMessageCallback 实例,并在打开客户端之前调用 setMessageCallback 方法,如下所示:
client = new DeviceClient(connString, protocol);

MessageCallback callback = new AppMessageCallback();
client.setMessageCallback(callback, null);
client.open();
五、 发送消息
发送消息请求
               String message="发送消息";
                Message msg = new Message(message);
                msg.setExpiryTime(5000);
                Object lockobj = new Object();
                WriteEventCallback callback = new WriteEventCallback();
                mClient.sendEventAsync(msg, callback, lockobj);
发送成功回调
private class WriteEventCallback implements IotHubEventCallback {
        @Override
        public void execute(IotHubStatusCode status, Object context) {
            Log.i(TAG, "write-->receive IoT Hub responded to message with status " + status.name() + " | context:" + context);
            if (context != null) {
                synchronized (context) {
                    //context.notifyAll();
                }
            }
        }

    }
六、设备孪生
简而言之,使用设备孪生时,解决方案后端可以为托管的设备指定所需配置,而不需要发送特定的命令。 此方法让设备负责设置更新其配置状态的最佳方式(对于特定设备条件影响即时执行特定命令的能力的 IoT 方案而言十分重要),同时继续向解决方案后端报告更新过程的当前状态和潜在的错误条件。 此模式能够帮助管理大量设备,因为它让解决方案后端能够跨所有设备完全掌握配置流程状态。
解决方案后端采用以下方式将配置存储在设备孪生的所需属性中:
    {
        ...
        "properties": {
            ...
            "desired": {
                "telemetryConfig": {
                    "configId": "{id of the configuration}",
                    "sendFrequency": "{config}"
                }
            }
            ...
        }
        ...
    }
-
若要为设备孪生状态事件实现回调处理程序(用于调试),请将以下嵌套类添加到 App 类:
protected static class DeviceTwinStatusCallBack implements IotHubEventCallback { public void execute(IotHubStatusCode status, Object context) { //System.out.println("IoT Hub responded to device twin operation with status " + status.name()); } } -
将以下嵌套类添加到 App 类:
private static class TelemetryConfig extends Device
{
    private String configId = "0000";
    private String sendFrequency = "45m";

    private Boolean initialRun = true;

    private Property telemetryConfig = new Property("telemetryConfig", "{configId=" + configId + ", sendFrequency=" + sendFrequency + "}");

    public void InitTelemetry() throws IOException
    {
        System.out.println("Report initial telemetry config:");
        System.out.println(this.telemetryConfig);

        this.setReportedProp(this.telemetryConfig);

        client.sendReportedProperties(this.getReportedProp());
    }

    private void UpdateReportedConfiguration()
    {
        try {
            System.out.println("Initiating config change");

            this.setReportedProp(this.telemetryConfig);
            client.sendReportedProperties(this.getReportedProp());

            System.out.println("Simulating device reset");

            Thread.sleep(10000);

            System.out.println("Completing config change");
            System.out.println("Config change complete");
        } catch (Exception e) {
            System.out.println("Exception \n" + " Cause: " + e.getCause() + " \n" + e.getMessage());
        }
    }

    @Override
    public void PropertyCall(String propertyKey, Object propertyValue, Object context)
    {
        if (propertyKey.equals("telemetryConfig")) {
            if (!(initialRun)) {
                System.out.println("Desired property change:");
                System.out.println(propertyKey + ":" + propertyValue);

                telemetryConfig.setValue(propertyValue);

                UpdateReportedConfiguration();
            } else {
                initialRun = false;
            }
        }
    }
}
TelemetryConfig 类扩展了 Device 类来获取对所需属性回调的访问权限。
-
修改 main 方法的签名,引发以下异常:
public static void main(String[] args) throws IOException, URISyntaxException -
将以下代码添加到 main 方法以实例化 DeviceClient 和 TelemetryConfig:
client = new DeviceClient(connString, protocol); telemetryConfig = new TelemetryConfig(); -
将以下代码添加到 main 方法以启动设备孪生服务:
client.open();
client.startDeviceTwin(new DeviceTwinStatusCallBack(), null, telemetryConfig, null);
telemetryConfig.InitTelemetry();
 client.subscribeToDesiredProperties(telemetryConfig.getDesiredProp());
具体问题具体对待,到次已经实现了设备和IoT 实时通信了


