参考:http://www.jianshu.com/p/850d08a4bd57
概述
phabricator是软件开发的一整套工具。包括一系列应用程序来帮助你管理任务和迭代,审查在Git,SVN或者mercurial库上的代码,建立持续集成,审查设计,内部聊天探讨频道,以及更多。它是快速的、可扩展的、完全开放的源代码。源代码的github路径为:https://github.com/phacility/phabricator
官网地址是:https://www.phacility.com
可以在官网上查看相应的安装、配置等帮助文档。
安装
官方安装文档
概览
Phabricator is a LAMP (Linux, Apache, MySQL, PHP) 应用. 要安装 Phabricator, 需要以下准备:
- 一台操作系统是linux或者类似系统的电脑用于安装
- 一个域名(例如phabricator.mycompany.com)
- 基本的系统管理员技能
- Apache, nginx, 或者另外一个web服务器
- PHP, MySQL和Git.
安装要求
安装Phabricator服务端软件的电脑操作系统不能是windows。命令行接口在windows上不能使用,不过可以在任何操作系统上可以通过浏览器使用Phabricator。可以在Linux、mac、FreeBSD、Solaris操作系统上安装使用Phabricator服务端软件。
除了操作系统,还需要一个web服务器。可以选择Apache、nginx、lighttpd以及其他可以运行PHP的web服务器器。我这里使用nginx。
还需要安装:
- MySQL: MySQL 5.5及以上
- PHP: PHP 5.2 及以上
还需要一个域名:
NOTE: Phabricator必须安装在一个完整的域名商. 不能将其安装到现有域上的路径,
例如 example.com/phabricator/.  将它安装在一个完整的域名或者子域名上,
像 phabricator.example.com.
环境搭建
mac下采用 homebrew 安装相关环境,所以首先保证电脑中已经安装了homebrew。安装命令如下:
ruby -e "$(curl -fsSL https://raw.githubusercontent.com/Homebrew/install/master/install)"
PHP环境搭建
最新版的php包中都自带php-fpm,所以只需要安装带有php-fpm的php包即可,命令如下:
brew tap homebrew/dupes
brew tap homebrew/php
brew install --without-apache --with-fpm --with-mysql php56
安装完成,将php-fpm 添加入环境变量中,方便通过终端直接进行启动
echo 'export PATH="/usr/local/sbin:$PATH"' >> ~/.bash_profile
创建文件夹,并启动服务,输入以下命令
mkdir -p ~/Library/LaunchAgents
ln -sfv /usr/local/opt/php56/homebrew.mxcl.php56.plist ~/Library/LaunchAgents/
launchctl load -w ~/Library/LaunchAgents/homebrew.mxcl.php56.plist
如果没有报出什么bug的话 在终端中键入
lsof -Pni4 | grep LISTEN | grep php
应该会有下图的显示
php-fpm   69659  frdmn    6u  IPv4 0x8d8ebe505a1ae01        0t0  TCP 127.0.0.1:9000 (LISTEN)
php-fpm   69660  frdmn    0u  IPv4 0x8d8ebe505a1ae01        0t0  TCP 127.0.0.1:9000 (LISTEN)
php-fpm   69661  frdmn    0u  IPv4 0x8d8ebe505a1ae01        0t0  TCP 127.0.0.1:9000 (LISTEN)
php-fpm   69662  frdmn    0u  IPv4 0x8d8ebe505a1ae01        0t0  TCP 127.0.0.1:9000 (LISTEN)  `
mysql 安装
brew install mysql
ln -sfv /usr/local/opt/mysql/*.plist ~/Library/LaunchAgents
添加mysql到环境变量中
launchctl load ~/Library/LaunchAgents/homebrew.mxcl.mysql.plist
输入权限密码(按以上步骤安装无密码,直接enter),这时你应该能看见
Type \'help;\' or \'h\' for help. Type \'c\' to clear the
current input statement.
mysql> exit  # 退出mysql
nginx的安装
使用homebrew来安装nginx
brew install nginx
我们必须确保80端口是开启的,因为nginx是基于80端口的
sudo cp -v /usr/local/opt/nginx/*.plist /Library/LaunchDaemons/
sudo chown root:wheel /Library/LaunchDaemons/homebrew.mxcl.nginx.plist
第一次开始nginx
sudo launchctl load /Library/LaunchDaemons/homebrew.mxcl.nginx.plist
默认的配置设置是将监听8080端口而非http默认的80端口
curl -IL http://127.0.0.1:8080
终端中应该有如下显示
HTTP/1.1 200 OK
Server: nginx/1.12.0
Date: Thu, 29 Jun 2017 10:14:35 GMT
Content-Type: text/html
Content-Length: 612
Last-Modified: Wed, 12 Apr 2017 14:46:09 GMT
Connection: keep-alive
ETag: "58ee3db1-264"
Accept-Ranges: bytes
最后对PHP启动相关的命令 添加全局变量
// If you use Bash 打开如下路径下的文件
~/.bash_profile
// If you use ZSH 打开如下路径下的文件
~/.zshrc

alias nginx.start='sudo launchctl load /Library/LaunchDaemons/homebrew.mxcl.nginx.plist'
alias nginx.stop='sudo launchctl unload /Library/LaunchDaemons/homebrew.mxcl.nginx.plist'
alias nginx.restart='nginx.stop && nginx.start'
alias php-fpm.start="launchctl load -w ~/Library/LaunchAgents/homebrew.mxcl.php56.plist"
alias php-fpm.stop="launchctl unload -w ~/Library/LaunchAgents/homebrew.mxcl.php56.plist"
alias php-fpm.restart='php-fpm.stop && php-fpm.start'
alias mysql.start="launchctl load -w ~/Library/LaunchAgents/homebrew.mxcl.mysql.plist"
alias mysql.stop="launchctl unload -w ~/Library/LaunchAgents/homebrew.mxcl.mysql.plist"
alias mysql.restart='mysql.stop && mysql.start'
alias nginx.logs.error='tail -250f /usr/local/etc/nginx/logs/error.log'
alias nginx.logs.access='tail -250f /usr/local/etc/nginx/logs/access.log'
alias nginx.logs.default.access='tail -250f /usr/local/etc/nginx/logs/default.access.log'
alias nginx.logs.default-ssl.access='tail -250f /usr/local/etc/nginx/logs/default-ssl.access.log'
alias nginx.logs.phpmyadmin.error='tail -250f /usr/local/etc/nginx/logs/phpmyadmin.error.log'
alias nginx.logs.phpmyadmin.access='tail -250f /usr/local/etc/nginx/logs/phpmyadmin.access.log'
现在我们可以输入以下命令更新我们的变量 让我们的设置生效
source ~/.bash_profile
//or
source ~/.zshrc`
现在可以使用更加简短的命名来优雅的开关服务
nginx.start
nginx.stop
Phabricator 安装
首先在安装Phabricator 之前启动相应的环境.
nginx.start
php-fpm.start
mysql.start
从github上clone关键组件
先在本机建一个根目录,本文为:~/phabricator ,然后
$ cd phabricator/ # pick some install directory
phabricator/ $ git clone https://github.com/phacility/libphutil.git
phabricator/ $ git clone https://github.com/phacility/arcanist.git
phabricator/ $ git clone https://github.com/phacility/phabricator.git
修改nginx配置文件
打开该路径下的配置文件:
/usr/local/etc/nginx/nginx.conf
修改相应的配置如下:
server {
  server_name phabricator.zy.com;
  root  /Users/zhangyang/phabricator/phabricator/webroot; #phabricator安装路径下的对应文件

  location / {
    index index.php;
    rewrite ^/(.*)$ /index.php?__path__=/$1 last;
  }

  location /index.php {
    fastcgi_pass   localhost:9000;
    fastcgi_index   index.php;

    #required if PHP was built with --enable-force-cgi-redirect
    fastcgi_param  REDIRECT_STATUS    200;

    #variables to make the $_SERVER populate in PHP
    fastcgi_param  SCRIPT_FILENAME    $document_root$fastcgi_script_name;
    fastcgi_param  QUERY_STRING       $query_string;
    fastcgi_param  REQUEST_METHOD     $request_method;
    fastcgi_param  CONTENT_TYPE       $content_type;
    fastcgi_param  CONTENT_LENGTH     $content_length;

    fastcgi_param  SCRIPT_NAME        $fastcgi_script_name;

    fastcgi_param  GATEWAY_INTERFACE  CGI/1.1;
    fastcgi_param  SERVER_SOFTWARE    nginx/$nginx_version;

    fastcgi_param  REMOTE_ADDR        $remote_addr;
  }
}
添加上面这一段,注意server_name后的域名以及root根目录要换成自己的实际参数。
phabricator 启动及部分配置
php-fpm及nginx启动成功后,浏览http://phabricator.zy.com (即:刚才nginx中server配置的域名,本机配置时,可在hosts中增加127.0.0.1 phabricator.zy.com以方便测试),我看到的界面如下:

即需要进入phabricator子目录下,执行:
./bin/storage upgrade
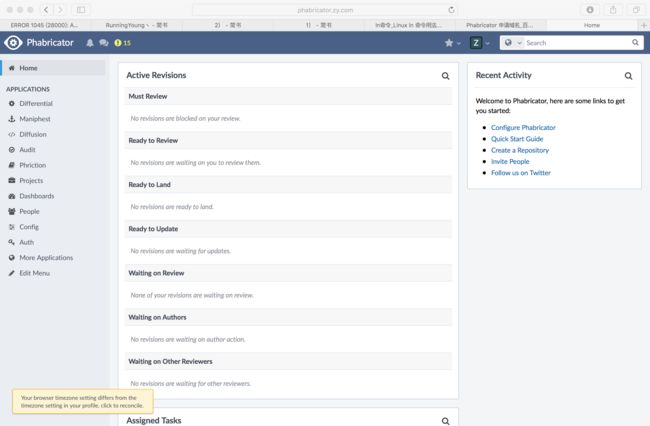
执行完以上的命令,刷新页面,即可看到下面的页面,下面的页面用于注册管理员账号。

注册完成之后,就可以进入主页面了。但配置还没有完成,需要解决问题,我这里标识有15个问题需要解决。一个个点击按照它的指导来解决就可以了。