写这些之前,我想说一下,该文章只是我的笔记,希望对需要的人有帮助。
属性动画
通过改变图层或者视图上面的属性值(支持动画的属性)产生的动画
属性动画的常用方法属性
1.初始化 + (instancetype)animationWithKeyPath:(nullable NSString *)path
path:需要产生动画的属性
如:中心点 -> 移动
2.keyPath 描述 动画的属性
改变动画的属性:
        transform.scale = 比例转换
        transform.scale.x
        transform.scale.y
        transform.rotation.z
        opacity = 透明度
        zPosition
        backgroundColor 背景颜色
        cornerRadius 拐角
        borderWidth 边框的宽度
        bounds
        contents 内容
        contentsRect
        frame
        hidden
        masksToBounds
        opacity
        position
        shadowColor
        shadowOffset
        shadowOpacity
        shadowRadius
基础动画
CABasicAnimation:基础动画
介绍:
通过改变某个属性的值 到某个值 ->只能设置两个值
fromValue 开始值
toValue 结束值
byValue 通过哪个值
CAAnimation:核心动画 是所有动画的父类
1、CAMediaTiming 媒体时间类协议
AMediaTiming中的协议内容
1》beginTime 动画开始的时间 默认为0
2、duration 动画的持续时间 默认为0 持续时间 受速度的影响
实际的动画完成时间 = 持续时间/速度
3.speed 动画播放的速度 默认为1 速度设置成0 可以暂停动画
speed 2秒  duration 60秒 动画真正播放完成的时间 30秒
4、timeOffset  动画播放时间的偏移量
5、repeatCount 动画的循环次数  默认是0 只播放一次
6、repeatDuration 动画循环的持续时间  只能设置其中的一个属性 repeatCount/repeatDuration
7、autoreverses 是否以动画的形式 返回到播放之前的状态
8、fillMode 设置当前对象在非活动时间段的行为 要想fillMode有效 需设置removedOnCompletion = NO
KCAFillModeForwards 当动结束后,Layer会一直保持着动画最后的状态
kCAFillModeBackwards 立即进入动画的初始状态并等待动画开始
            kCAFillModeBoth 动画加入后开始之前 layer处于动画初始状态 动画结束后layer保持动画最后的状态
            kCAFillModeRemoved 默认值 动画结束后 layer会恢复到之前的状态
2、CAAnimationd动画属性方法介绍
0.初始化 animation
1.timingFunction 速度控制类控制动画运行的节奏
初始化:functionWithName:
kCAMediaTimingFunctionLinear 匀速
            kCAMediaTimingFunctionEaseIn 慢进快出
            kCAMediaTimingFunctionEaseOut 快进慢出
            kCAMediaTimingFunctionEaseInEaseOut 慢进慢出 中间加速
            kCAMediaTimingFunctionDefault 默认
2.delegate
3.removedOnCompletion 动画完成的时候 是否移除动画效果
4.代理方法
- (void)animationDidStart:(CAAnimation *)anim
- (void)animationDidStop:(CAAnimation *)anim finished:(BOOL)flag
案例:
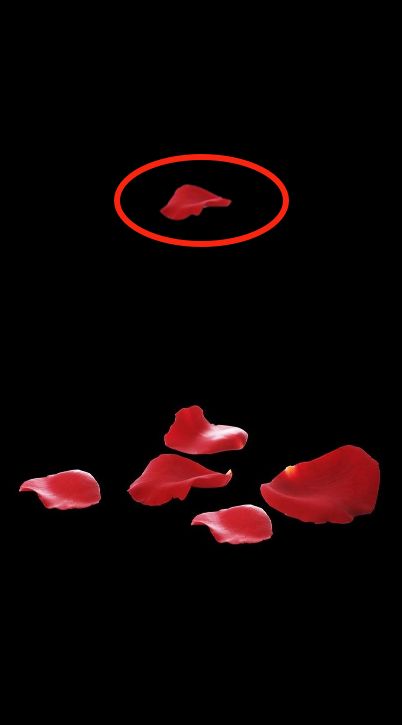
我们首先创建懒加载,为了方便使用;
//背景
@property (nonatomic,strong) CALayer *layer;
//花瓣
@property (nonatomic,strong) CALayer *petalLayer;
- (void)viewDidLoad {
    [super viewDidLoad];
    self.view.backgroundColor = [UIColor blackColor];
    [self.view.layer addSublayer:self.layer];
    [self.view.layer addSublayer:self.petalLayer];


}
-(CALayer *)layer{
    if (_layer) {
        return _layer;
    }
    _layer = [CALayer layer];
    _layer.position = CGPointMake(self.view.center.x, self.view.center.y+100);
    UIImage *image = [UIImage imageNamed:@"4"];
    _layer.bounds = CGRectMake(0, 0, image.size.width/2, image.size.height/2);
    _layer.contents = (id)image.CGImage;
    return _layer;

}
-(CALayer *)petalLayer{
    if (_petalLayer) {
        return _petalLayer;
    }
    _petalLayer = [CALayer layer];
    _petalLayer.position = CGPointMake(self.view.center.x, 50);
    UIImage *image = [UIImage imageNamed:@"3"];
    _petalLayer.bounds = CGRectMake(0, 0, image.size.width, image.size.height);
    _petalLayer.contents = (id)image.CGImage;
    return _petalLayer;

}
/*
 - (CABasicAnimation *)moveAnimation{
 if (_moveAnimation) {
 return _moveAnimation;
 }
 _moveAnimation = [CABasicAnimation animationWithKeyPath:@"position"];
 //    CGPoint -> 转id
 //    CGPoint -> NSValue
 _moveAnimation.fromValue = [NSValue valueWithCGPoint:self.petalLayer.position];
 _moveAnimation.toValue = [NSValue valueWithCGPoint:toValue];
 return _moveAnimation;
 }
 */
//移动中心点
-(void)demo1:(CGPoint)toValue{
    CABasicAnimation *animation = [CABasicAnimation animationWithKeyPath:@"position"];

//    CGPoint -> 转id
//   CGPoint -> NSValue
    animation.fromValue = [NSValue valueWithCGPoint:self.petalLayer.position];
    animation.toValue = [NSValue valueWithCGPoint:toValue];
//    CAMediaTimingFunction协议->duration动画的持续时间
    animation.duration = 3;
//    动画执行的总时间 受动画速度的影响
    animation.speed = 2;

//    设置动画在完成的时候 固定在完成的状态
//    这个属性 必须把remocedOnCompletion 设置成NO 这个属性 才可以效果
    animation.removedOnCompletion = NO;
    animation.fillMode = kCAFillModeBoth;

//    速度控制
//    快进慢出
    animation.timingFunction = [CAMediaTimingFunction functionWithName:kCAMediaTimingFunctionEaseOut];


//    CALayer -> addAnimation: forKey:添加动画
//    Animation 动画
//    forKey 表示动画的字符串 可以通过key 来找到这个动画

    [self.petalLayer addAnimation:animation forKey:@"可以通过这个key找到此动画"];

//    查找某个可以对应的动画
//    CABasicAnimation *an = (CABasicAnimation *)[self.petalLayer animationForKey:@"可以通过这个key找到此动画"];

}

-(void)touchesBegan:(NSSet *)touches withEvent:(UIEvent *)event{

    [self demo1:[[touches anyObject]locationInView:self.view]];


}
这时候我们就设置了一个能下落的花瓣。
下面是设置一个心动的图片:
-(void)demo2{
    self.view.backgroundColor = [UIColor whiteColor];
    UIImage *image = [UIImage imageNamed:@"心跳"];
    self.layer.contents = (id)image.CGImage;
    self.layer.bounds = CGRectMake(0, 0, image.size.width/10, image.size.height/10);

    CABasicAnimation *animation = [CABasicAnimation animationWithKeyPath:@"bounds"];
    /*
     1.放大后还原到原来的位置 以动画的方法
     2.先慢后快
     3.一直循环
     */
    animation.fromValue = [NSValue valueWithCGRect:self.layer.bounds];
    animation.toValue = [NSValue valueWithCGRect:CGRectMake(0, 0, image.size.width/7, image.size.height/7)];
    animation.repeatCount= HUGE;
    animation.duration = 0.5;
    // 以动画的效果 还原到 开始的状态
    animation.autoreverses = YES;
    animation.timingFunction = [CAMediaTimingFunction functionWithName:kCAMediaTimingFunctionEaseIn];
    [self.layer addAnimation:animation forKey:@"heartJamp"];


}
-(void)touchesBegan:(NSSet *)touches withEvent:(UIEvent *)event{

    [self demo2];

}
如果有好的建议,希望提出来,一起讨论。

