这里使用的是xml配置mybatis,如喜欢注解,请待下一篇。
1 修改配置,引入json、mybatis
在pom.xml中添加mybatis-spring、mybatis、mysql-connector-java(用于mysql连接)、jackson-core、jackson-databind(用于返回对象直接映射成json),整体工程现在配置如下:
  4.0.0
  com.nothing
  hellospringmvc
  war
  1.0-SNAPSHOT
  hellospringmvc Maven Webapp
  http://maven.apache.org


      junit
      junit
      3.8.1
      test


      org.springframework
      spring-core
      4.2.5.RELEASE


      com.fasterxml.jackson.core
      jackson-core
      2.7.2


      com.fasterxml.jackson.core
      jackson-databind
      2.7.2


      org.springframework
      spring-context
      4.2.5.RELEASE


      javax.servlet.jsp
      jsp-api
      2.2


      jstl
      jstl
      1.2


      org.springframework
      spring-web
      4.2.5.RELEASE


      org.springframework
      spring-webmvc
      4.2.5.RELEASE


      org.springframework.data
      spring-data-jpa
      1.9.4.RELEASE


      javax.servlet
      servlet-api
      2.5


      mysql
      mysql-connector-java
      5.1.38


      org.mybatis
      mybatis
      3.3.1


      org.mybatis
      mybatis-spring
      1.2.4


      org.json
      json
      20160212


    hellospringmvc
2 上篇的myspring-servlet.xml 和web.xml 不用修改。
3 配置mybatis conf.xml文件:
需要注意的是,如下与jdbc连接的代码差不多的,这里使用xml配置,由于我使用的是mysql(如使用其他数据库请百度),url中为数据库的名称,我这里是mysql。后面两项是username 和password需自行配置。
这里需要注意路径:本文放在src/main/resources 目录下。我在这卡了很久。
userMapper.xml
insert into user_nothing(username,password) values(#{username},#{password})
这里使用xml配置sql语句。user_nothing 在mysql数据库中创建的表。三个字段,待会给出。parameterType为输入参数 id的类型int,esultType="com.nothing.Model.User"为返回值User对象。
4 User
package com.nothing.Model;


public class User {

    private String username;
    private String password;
    private int id;


    public String getUsername() {
        return username;
    }

    public void setUsername(String username) {
        this.username = username;
    }

    public String getPassword() {
        return password;
    }

    public void setPassword(String password) {
        this.password = password;
    }

    public User(String username, String password, int id) {
        this.username = username;
        this.password = password;
        this.id = id;
    }

    public User(String username, String password) {
        this.username = username;
        this.password = password;
    }

    public int getId() {
        return id;
    }

    public void setId(int id) {
        this.id = id;
    }

    public User() {
    }

}
5 UserDao
public interface IUserDao {
    public User findUserById(int id); //查询
    public void addUser(User user); //添加
}
UserDaoImpl 才是正真的实现类,参与数据库curd,本文只有简单的单个查询。
public class UserDaoImpl implements IUserDao{
    private  SqlSessionFactory sessionFactory;
    private  SqlSession session;
    public UserDaoImpl() {
        String resource = "conf.xml";
        try {
            Reader reader = Resources.getResourceAsReader(resource);
            sessionFactory = new SqlSessionFactoryBuilder().build(reader);
            session = sessionFactory.openSession();
        } catch (IOException e) {
            e.printStackTrace();
        }
    }

    public User findUserById(int id) {
        String statement = "userMapper.findUserById";
        User user = (User)session.selectOne(statement, 1);
        return user;
    }
   public void addUser(User user) {
        String statement = "userMapper.addUser";
        session.insert(statement, user);
        session.commit();  //一定要记得commit
    }
}
UserService中间层,负责dao与controller交互,本文较简单,可省略。
public interface IUserService {
    public User findUserById(int id);
    public void addUser(User user);
}
UserServiceImpl真正实现
public class UserServiceImpl implements IUserService{
    private IUserDao userDao;

    public UserServiceImpl() {
        userDao = new UserDaoImpl();
    }

    public User findUserById(int id) {
        return userDao.findUserById(id);
    }
   public void addUser(User user){
        userDao.addUser(user);
    }
}
6 index.jsp 利用上次的剩余价值,吼吼。
<%@ page language="java" contentType="text/html; charset=UTF-8" pageEncoding="UTF-8"%>
<%@ taglib prefix="sf" uri="http://www.springframework.org/tags/form" %>
Hello World!
用户名:
这里使用jstl标签库。
7 最后看一眼MainController,实现是用户到/hello 页面就跳到index .jsp 页面,在该页面注册后,。然后action动作toJson,返回id为2的用户
@Controller
public class MainController {
    private IUserService service = new UserServiceImpl();
    @RequestMapping(value = "/hello", method = RequestMethod.GET)
    public String index( User user) {
        return "index";
    }

    @RequestMapping(value ="/toJson",method=RequestMethod.POST)
    @ResponseBody
    public User toJson(User user){
        service.addUser(user); //一起测试了
        return service.findUserById(2);
    }

}
整个工程的架构如图:

框架.png
另外我使用mysql的可视化管理工具navicat:
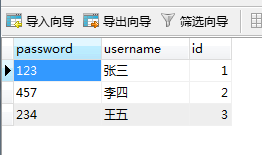
mysql.png
最后运行截图:

run1.png
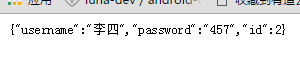
run2.png