- 今天这一篇来告诉大家搭建最新版的wordpress
- 如果有云服务器可以用云服务器搭建
准备工作
- centos6.9
- httpd-2.4.27.tar.bz2
- apr-1.5.2.tar.bz2
- apr-util-1.5.4.tar.bz2
- mariadb-5.5.57-linux-x86_64.tar.gz <<二进制软件
- php-5.6.31.tar.bz2
- wordpress-4.8-zh_CN.tar.gz
- xcache-3.2.0.tar.bz2
- 首先全部下载好,版本号最好是对上号,不然中间会出问题
开始搭建
- 这一篇就懒得啰嗦就直接开始搭建了
- 但是还是要看看自己的yum源是否配了epel源,没有赶快配,因为php里面有个依赖包需要epel源下载
- 首先我们先安装开发包组,运行命令
[root@localhost ~]# yum groupinstall "Development Tools" -y
- 安装完毕以后,我们开始安装httpd的依赖包运行命令
[root@localhost ~]# yum install pcre-devel openssl-devel -y
- 完成以后,首先我在家目录里面创建一个目录
src,把我们下载的所有包上传上去,运行rz命令
- 一般最小化安装里面是没有这个包的需要运行
[root@localhost ~]# `yum -y install lrzsz
- 上传完毕以后接下来我们就开始编译了
- 首先先解压
apr-1.5.2.tar.bz2
[root@localhost scr]# tar xfv apr-1.5.2.tar.bz2
- 在解压
apr-util-1.5.4.tar.bz2
[root@localhost scr]# tar xfv apr-util-1.5.4.tar.bz2
- 最后解压 httpd-2.4.27.tar.bz2
[root@localhost scr]# tar xfv httpd-2.4.27.tar.bz2
[root@localhost scr]# mv apr-1.5.2/ httpd-2.4.27/srclib/apr
- 接下来开始剪切
apr-util-1.5.4,并改名为apr-util
[root@localhost scr]# mv apr-util-1.5.4/ httpd-2.4.27/srclib/apr-util
- 操作完毕以后,运行命令
cd httpd-2.4.27
[root@localhost scr]# cd httpd-2.4.27
[root@localhost httpd-2.4.27]# ./configure --prefix=/app/httpd24 --enable-so --enable-ssl --enable-cgi --enable-rewrite --with-zlib --with-pcre --with-included-apr --enable-modules=most --enable-mpms-shared=all --with-mpm=prefork
./configure --prefix=/app/httpd24 --enable-so --enable-ssl --enable-cgi --enable-rewrite --with-zlib --with-pcre --with-included-apr --enable-modules=most --enable-mpms-shared=all --with-mpm=prefork
config.status: creating include/ap_config_auto.h
config.status: executing default commands
configure: summary of build options:

    Server Version: 2.4.27
    Install prefix: /app/httpd24
    C compiler:     gcc -std=gnu99
    CFLAGS:          -g -O2 -pthread
    LDFLAGS:
    LIBS:
    CPPFLAGS:        -DLINUX -D_REENTRANT -D_GNU_SOURCE
    C preprocessor: gcc -E
- 编译成功以后,接下来就是安装了运行
make && make install开始安装
[root@localhost httpd-2.4.27]# make && make install
Installing configuration files
mkdir /app/httpd24/conf
mkdir /app/httpd24/conf/extra
mkdir /app/httpd24/conf/original
mkdir /app/httpd24/conf/original/extra
Installing HTML documents
mkdir /app/httpd24/htdocs
Installing error documents
mkdir /app/httpd24/error
Installing icons
mkdir /app/httpd24/icons
mkdir /app/httpd24/logs
Installing CGIs
mkdir /app/httpd24/cgi-bin
Installing header files
Installing build system files
Installing man pages and online manual
mkdir /app/httpd24/man
mkdir /app/httpd24/man/man1
mkdir /app/httpd24/man/man8
mkdir /app/httpd24/manual
make[1]: Leaving directory `/root/scr/httpd-2.4.27'
- 安装完成以后接下来我们,开始配置环境变量,运行命令
vim /etc/profile.d/app.sh
[root@localhost httpd-2.4.27]# vim /etc/profile.d/app.sh
- 然后运行一个简单的小命令
. /etc/profile.d/app.sh,注意点和空格必须要
- 以上的运行完毕以后,我们就开始安装脚本
httpd
[root@localhost httpd-2.4.27]# yum install httpd -y
cd /etc/rc.d/init.d/
[root@localhost init.d]# cp httpd httpd24
- 当然,我们还需要修改几项,运行
vim httpd24
[root@localhost init.d]# vim httpd24
# Path to the apachectl script, server binary, and short-form for messages.
apachectl=/app/httpd24/bin/apachectl
httpd=${HTTPD-/app/httpd24/bin/apachectl}
prog=httpd
pidfile=${PIDFILE-/app/httpd24/logs/httpd.pid}
lockfile=${LOCKFILE-/var/lock/subsys/httpd}
RETVAL=0
STOP_TIMEOUT=${STOP_TIMEOUT-10}
- 完成以后我们就可以启动下看看了,运行
service httpd24 start命令
[root@localhost init.d]# service httpd24 start
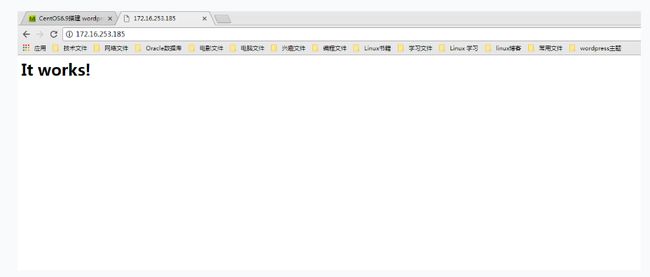
- 我们出去用游览器连接看看,出现下面字样表示连接成功
- 或者用
ss -nutl命令来查看下端口,80端口有没有打开
[root@localhost init.d]# ss -nutl
Netid State      Recv-Q Send-Q                                 Local Address:Port                                   Peer Address:Port
udp   UNCONN     0      0                                                  *:68                                                *:*
udp   UNCONN     0      0                                                  *:68                                                *:*
tcp   LISTEN     0      128                                               :::80                                               :::*
tcp   LISTEN     0      128                                               :::22                                               :::*
tcp   LISTEN     0      128                                                *:22                                                *:*
tcp   LISTEN     0      100                                              ::1:25                                               :::*
tcp   LISTEN     0      100                                        127.0.0.1:25                                                *:*
- 如果连接不上可能是你的CentOS系统防火墙的问题,必须要关闭掉防火墙
查询防火墙状态:
[root@localhost ~]# service   iptables status
停止防火墙:
[root@localhost ~]# service   iptables stop
启动防火墙:
[root@localhost ~]# service   iptables start
重启防火墙:
[root@localhost ~]# service   iptables restart
永久关闭防火墙:
[root@localhost ~]# chkconfig   iptables off
永久关闭后启用:
[root@localhost ~]# chkconfig   iptables on
- 自己看着用
- 接下来我们要创建数据库
- 我们装的数据库是
mariadb-5.5.57,和mysql差不多关于历史自行百度
- 首先我们还是要先切换到我们原来上传软件的目录
- 切换进入以后,我们解压数据库,记住数据库一定要是二进制的,不是源代码,这是为了后期加速的稳定
- 运行命令
tar xvf mariadb-5.5.57-linux-x86_64.tar.gz -C /usr/local
[root@localhost scr]# tar xvf mariadb-5.5.57-linux-x86_64.tar.gz -C /usr/local
[root@localhost scr]# useradd -r -m -s /sbin/nologin -d /app/mysqldb mysql
- 在改所有者,运行命令
chown mysql.mysql /app/mysqldb
[root@localhost scr]# chown mysql.mysql /app/mysqldb
[root@localhost scr]# cd /usr/local
[root@localhost local]# ln -s mariadb-5.5.57-linux-x86_64/ mysql
[root@localhost local]# cd mysql
[root@localhost mysql]# scripts/mysql_install_db --datadir=/app/mysqldb --user=mysql
[root@localhost mysql]# mkdir /etc/mysql
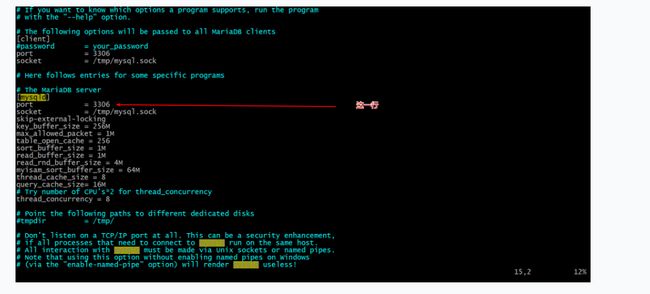
[root@localhost mysql]# cp support-files/my-large.cnf /etc/mysql/my.cnf
[root@localhost mysql]# touch /var/log/mysqld.log
[root@localhost mysql]# chown mysql /var/log/mysqld.log
[root@localhost mysql]# service mysqld start
- 也可以用
ss -nutl来查询,看有没有3306端口
[root@localhost mysql]# ss -nutl
Netid State      Recv-Q Send-Q                                 Local Address:Port                                   Peer Address:Port
udp   UNCONN     0      0                                                  *:68                                                *:*
udp   UNCONN     0      0                                                  *:68                                                *:*
tcp   LISTEN     0      50                                                 *:3306                                              *:*
tcp   LISTEN     0      128                                               :::80                                               :::*
tcp   LISTEN     0      128                                               :::22                                               :::*
tcp   LISTEN     0      128                                                *:22                                                *:*
tcp   LISTEN     0      100                                              ::1:25                                               :::*
tcp   LISTEN     0      100                                        127.0.0.1:25                                                *:*
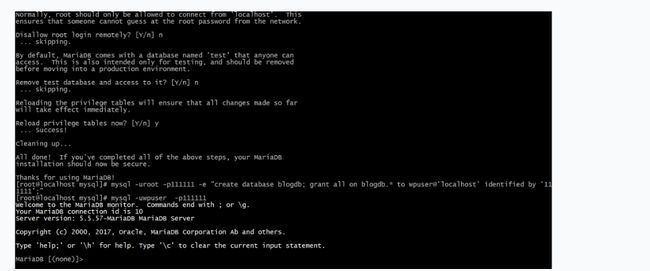
- 接下来我们设置安全上下文命令:mysql_secure_installation 关于怎么设定
- 之间回车以后回登录数据库,登录了以后回让你设置密码,看下图
- 完成以后我们开始创建wordpress使用的数据库和用户及权限
[root@localhost mysql]# mysql -uroot -p111111 -e "create database blogdb; grant all on blogdb.* to wpuser@'localhost' identified by '111111';"
- 接下来我们就要开始编译PHP了
- 回到我们的上传目录,运行
tar xfv php-5.6.31.tar.bz2
[root@localhost scr]# tar xfv php-5.6.31.tar.bz2
[root@localhost mysql]#yum -y install bzip2-devel libxml2-devel libmcrypt-devel
[root@localhost php-5.6.31]# ./configure --prefix=/app/php --with-mysql=/usr/local/mysql --with-openssl --with-mysqli=/usr/local/mysql/bin/mysql_config --enable-mbstring --with-freetype-dir --with-jpeg-dir --with-png-dir --with-zlib --with-libxml-dir=/usr --enable-xml --enable-sockets --with-apxs2=/app/httpd24/bin/apxs --with-mcrypt --with-config-file-path=/etc --with-config-file-scan-dir=/etc/php.d --with-bz2
Generating files
configure: creating ./config.status
creating main/internal_functions.c
creating main/internal_functions_cli.c
+--------------------------------------------------------------------+
|                        *** WARNING ***                             |
|                                                                    |
| You have built PHP for Apache's current non-threaded MPM.          |
| If you change Apache to use a threaded MPM you must reconfigure    |
| PHP with --enable-maintainer-zts                                   |
+--------------------------------------------------------------------+
| License:                                                           |
| This software is subject to the PHP License, available in this     |
| distribution in the file LICENSE.  By continuing this installation |
| process, you are bound by the terms of this license agreement.     |
| If you do not agree with the terms of this license, you must abort |
| the installation process at this point.                            |
+--------------------------------------------------------------------+

Thank you for using PHP.

config.status: creating php5.spec
config.status: creating main/build-defs.h
config.status: creating scripts/phpize
config.status: creating scripts/man1/phpize.1
config.status: creating scripts/php-config
config.status: creating scripts/man1/php-config.1
config.status: creating sapi/cli/php.1
config.status: creating sapi/cgi/php-cgi.1
config.status: creating ext/phar/phar.1
config.status: creating ext/phar/phar.phar.1
config.status: creating main/php_config.h
config.status: executing default commands
[root@localhost php-5.6.31]# make && make install
[root@localhost php-5.6.31]# cp php.ini-production /etc/php.ini
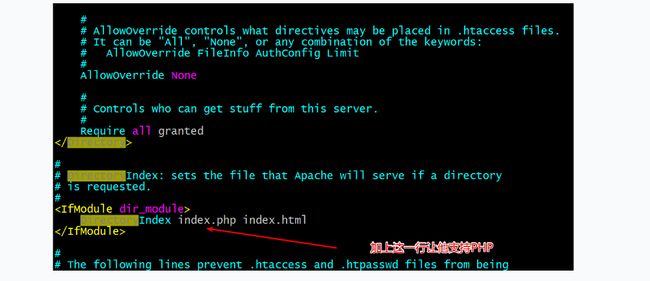
- 然后我们开始修改httpd的配置文件,让他支持PHP
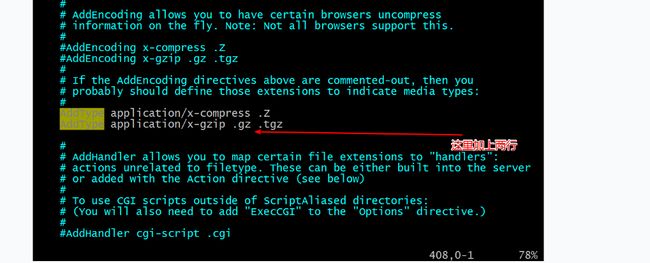
[root@localhost php-5.6.31]# vim /app/httpd24/conf/httpd.conf
[root@localhost php-5.6.31]# service httpd24 restart
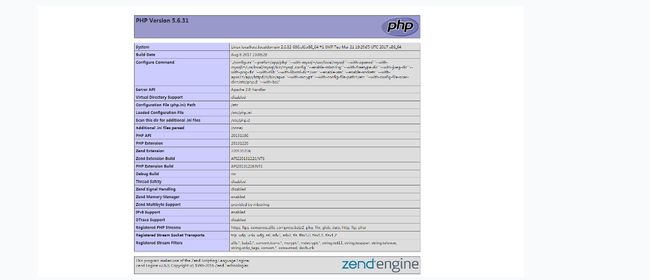
[root@localhost php-5.6.31]# vim /app/httpd24/htdocs/index.php
- 出来了表示成功
- 接下我们去解压
wordpress
[root@localhost scr]# tar xfv wordpress-4.8-zh_CN.tar.gz -C /app/httpd24/htdocs/
- 在切换到
/app/httpd24/htdocs/下面,改下他的名字
[root@localhost htdocs]# mv wordpress/ blog
[root@localhost htdocs]# cd blog/
[root@localhost blog]# cp wp-config-sample.php wp-config.php
[root@localhost blog]# vim wp-config.php
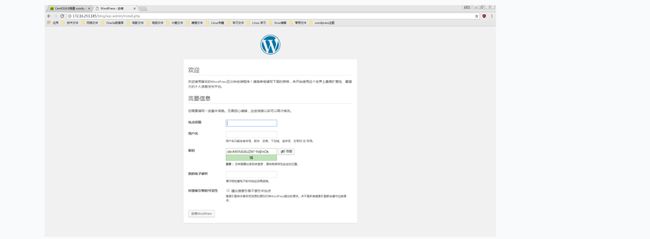
- 已经成功接下来的事都是你们自己的事了
- 网页是别忘记了是
http://172.16.253.185/blog/ 哦


