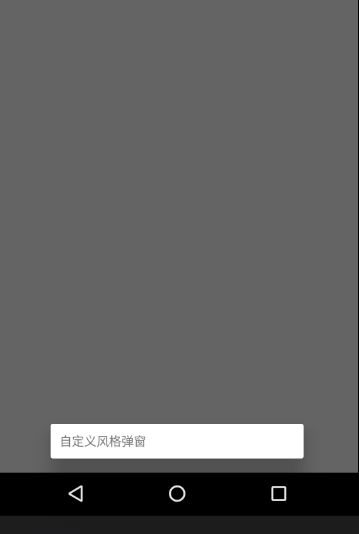
android自定义Dialog实现底部弹窗
拿到这个需求,很多人都是直接想用popWindow 实现,但是这样的效果我们完全可以根据系统的Dialog 自定义一个。
AlertDialog.Builder builder = new AlertDialog.Builder(MainActivity.this);
builder.setTitle("SSS");
builder.show();
这样就直接显示出一个对话框,但是,这个对话框在屏幕的中间,然后,我们去查看dialog的源码:
看dialog.show()里面判断了是否正在显示中,并没有和根布局有关系,看这个类的父类。里面的show()中:
public void show() {
    if (mShowing) {
        if (mDecor != null) {
            if (mWindow.hasFeature(Window.FEATURE_ACTION_BAR)) {
                mWindow.invalidatePanelMenu(Window.FEATURE_ACTION_BAR);
            }
            mDecor.setVisibility(View.VISIBLE);
        }
        return;
    }

    mCanceled = false;

    if (!mCreated) {
        dispatchOnCreate(null);
    } else {
        // Fill the DecorView in on any configuration changes that
        // may have occured while it was removed from the WindowManager.
        final Configuration config = mContext.getResources().getConfiguration();
        mWindow.getDecorView().dispatchConfigurationChanged(config);
    }

    onStart();
    mDecor = mWindow.getDecorView();

    if (mActionBar == null && mWindow.hasFeature(Window.FEATURE_ACTION_BAR)) {
        final ApplicationInfo info = mContext.getApplicationInfo();
        mWindow.setDefaultIcon(info.icon);
        mWindow.setDefaultLogo(info.logo);
        mActionBar = new WindowDecorActionBar(this);
    }

    WindowManager.LayoutParams l = mWindow.getAttributes();
    if ((l.softInputMode
            & WindowManager.LayoutParams.SOFT_INPUT_IS_FORWARD_NAVIGATION) == 0) {
        WindowManager.LayoutParams nl = new WindowManager.LayoutParams();
        nl.copyFrom(l);
        nl.softInputMode |=
                WindowManager.LayoutParams.SOFT_INPUT_IS_FORWARD_NAVIGATION;
        l = nl;
    }

    mWindowManager.addView(mDecor, l);
    mShowing = true;

    sendShowMessage();
}
这个调用addView 进去,我们Dialog就是这样加进去的;
可以看到Dialog的源码中的方法,也有onCreate( ) 他也是初始化 对话框的
/**
 * Similar to {@link Activity#onCreate}, you should initialize your dialog
 * in this method, including calling {@link #setContentView}.
 * @param savedInstanceState If this dialog is being reinitialized after a
 *     the hosting activity was previously shut down, holds the result from
 *     the most recent call to {@link #onSaveInstanceState}, or null if this
 *     is the first time.
 */
protected void onCreate(Bundle savedInstanceState) {
}
看Dialog 的实现类。里面有个日期弹窗的实现类,效果如下,更多时间筛选的对话框可以看我的另一个自定义的 文章:
系统的效果如下:
[图片上传失败...(image-ceb45e-1511342382391)]
自定义Dialog实现
1.创建一个自定义类继承dialog类,创建布局,当成Activity 重写onCreate()看效果
public class SmartDialog extends Dialog {
    public SmartDialog(@NonNull Context context) {
        super(context);
    }

    public SmartDialog(@NonNull Context context, @StyleRes int themeResId) {
        super(context, themeResId);
    }

@Override
protected void onCreate(Bundle savedInstanceState) {
    super.onCreate(savedInstanceState);
    setContentView(R.layout.smartlayout);
}

}
布局文件:
点击事件调用:
SmartDialog smartDialog = new SmartDialog(DialogShowActivity.this);
smartDialog.setTitle("我是Title");
smartDialog.show();
设置View的 属性,让弹窗到底部
requestWindowFeature(Window.FEATURE_NO_TITLE);//事情定需不需要加
setContentView(R.layout.smartlayout);
WindowManager.LayoutParams params = getWindow().getAttributes();
if(params!=null){
    //获取属性可能失败 为空
    params.gravity= Gravity.CENTER_HORIZONTAL|Gravity.BOTTOM;
    getWindow().setAttributes(params);
}
更改布局,添加数据
这里我们简单做一个ListView
.显示效果你会发现没有完全填充,这个时候,再去看我们调用Dialog 默认的构造函数,
查看源码。更改style
public Dialog(@NonNull Context context) {
    this(context, 0, true);
}
if (createContextThemeWrapper) {
    if (themeResId == 0) {
        final TypedValue outValue = new TypedValue();
        context.getTheme().resolveAttribute(R.attr.dialogTheme, outValue, true);
        themeResId = outValue.resourceId;
    }
    mContext = new ContextThemeWrapper(context, themeResId);
} else {
    mContext = context;
}
如果走默认的构造就不显示,去SDK中找到 R.attr.dialogTheme 先找到自己对应版本的SDK 到自己项目 的build.gradle 中找到
进到自己的安装目录下找对于的 dialogTheme 发现只是定义了 类型,并没具体定义。然后去themes 里面找到:
- @style/Theme.Dialog
- @layout/dialog_title_icons
- @layout/dialog_custom_title
- @layout/dialog_title
- @dimen/dialog_padding
因为并没有找到具体的定义属性,再去搜索 Theme.Dialog 去 style 中找下 没找到,发现这个文件就在 themes 中,如下:
我们重点看这个属性:
在资源文件中搜索这个panel_background,打开你会发现是一张 .9图片如下:
我们自己在项目中实现一个style 去重写这个background 属性,去覆盖
然后在代码中去使用就直接多传递一个参数去设置:
 public Smartdialog(@NonNull Context context) {
        super(context,R.style.MtStyle);
    }
这样就实现我们要的效果,和PopWindow 一样,但是注意了,在一些新的版本上该效果还是有间隙,这个就要去研究对应SDK的刚才那个属性 中的参数影响了。试了两个版本都不行。。。。只有在老版本上可以,不过也给大家提供了一个思路!


