本文将讲述如何通过使用Spring Boot 快速起步搭建web服务。
最终实现:
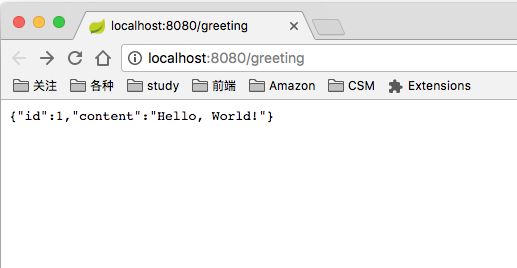
位于如下位置的HTTP服务,
http://localhost:8080/greeting
返回如下JSON数据:
{"id":1,"content":"Hello, World!"}
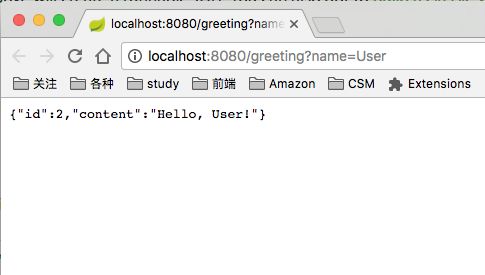
或带有name参数:
http://localhost:8080/greeting?name=User
//Response
{"id":1,"content":"Hello, User!"}
前提:
- IDEA
- JDK 1.8
- Maven 3.0+
创建工程:
- IDEA选择Create New Project。
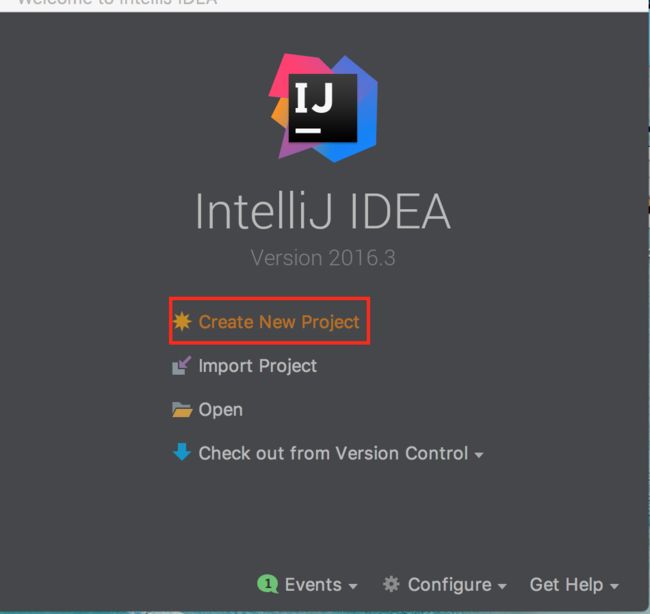 创建工程-1.png
 - 确定Java版本,选择Maven工程。
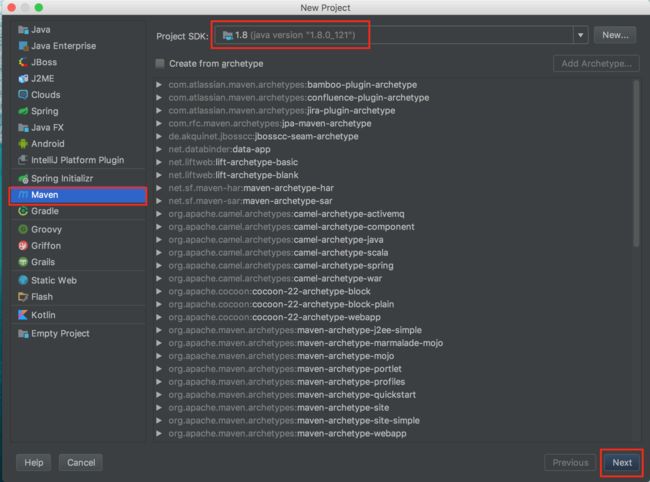 创建工程-2.png
 - 自己起一个
GroupID和ArtifactId吧。IDEA会根据ArtifactId自动生成工程名。下面的Version会体现在pom.xml中。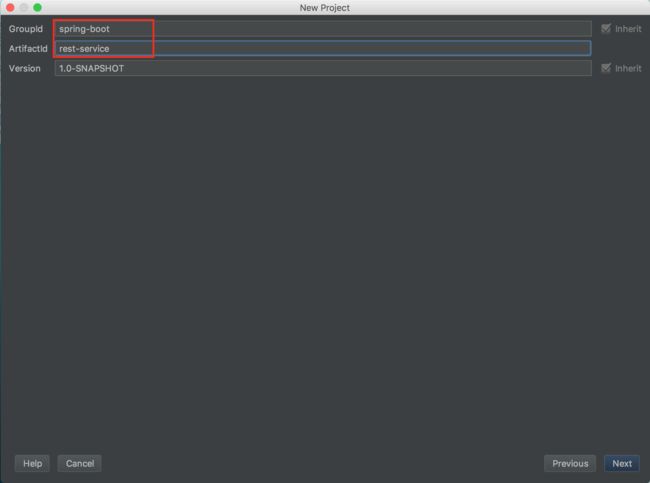 创建工程-3.png
 - 最后一步可以手动修改工程名称以及存储位置。点击Finish。
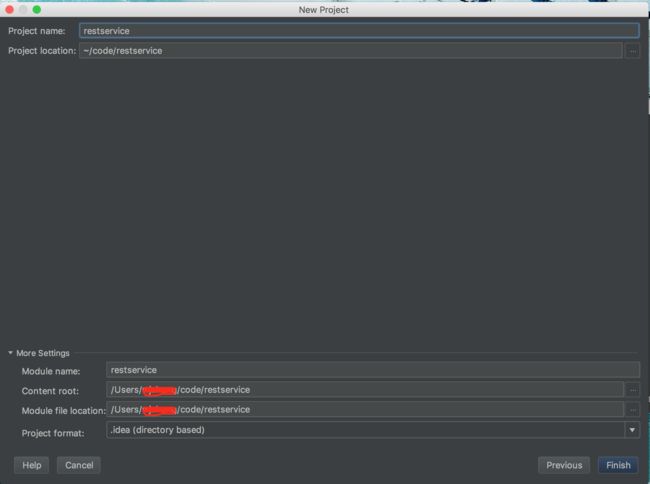 创建工程-4.png
 - 修改
pom.xml文件,引入依赖:
    4.0.0
    org.springframework
    gs-rest-service
    0.1.0

        org.springframework.boot
        spring-boot-starter-parent
        1.5.1.RELEASE


            org.springframework.boot
            spring-boot-starter-web


            org.springframework.boot
            spring-boot-starter-test
            test


            com.jayway.jsonpath
            json-path
            test


        1.8


                org.springframework.boot
                spring-boot-maven-plugin


            spring-releases
            https://repo.spring.io/libs-release


            spring-releases
            https://repo.spring.io/libs-release
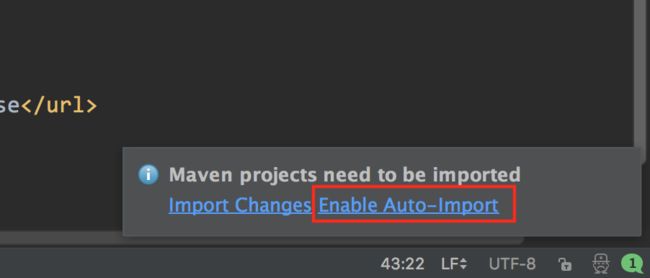
- 此时IDEA会出现如下提示,选择
Enable Auto-Import。(或者在工程根目录命令行输入mvn compile)
 创建工程-5.png
书写代码
创建Model
我们将Greeting的主要逻辑实现在Greeting中:
src/main/java/hello/Greeting.java
package hello;

public class Greeting {

    private final long id;
    private final String content;

    public Greeting(long id, String content) {
        this.id = id;
        this.content = content;
    }

    public long getId() {
        return id;
    }

    public String getContent() {
        return content;
    }
}
创建Controller
在Spring中,请求由controller来处理。Spring通过@RestController
注解轻松识别controller。
我们实现的GreetingController处理对greeting的请求,并返回Greeting类的新实例。
src/main/java/hello/GreetingController.java
package hello;

import java.util.concurrent.atomic.AtomicLong;
import org.springframework.web.bind.annotation.RequestMapping;
import org.springframework.web.bind.annotation.RequestParam;
import org.springframework.web.bind.annotation.RestController;

@RestController
public class GreetingController {

    private static final String template = "Hello, %s!";
    private final AtomicLong counter = new AtomicLong();

    @RequestMapping("/greeting")
    public Greeting greeting(@RequestParam(value="name", defaultValue="World") String name) {
        return new Greeting(counter.incrementAndGet(),
                            String.format(template, name));
    }
}
其中:
-
@RequestMapping注解将发送到/greeting的http请求映射到greeting()方法。 -
@RequestParam将请求中name参数的值映射到greeting()方法的name参数,并提供了defaultValue.
创建应用入口
按照传统方式,我们已经可以将上述内容打包为war文件,并上传至tomcat运行。但Spring Boot可以帮助我们快速创建包含内嵌tomcat的独立应用。
src/main/java/hello/Application.java
package hello;

import org.springframework.boot.SpringApplication;
import org.springframework.boot.autoconfigure.SpringBootApplication;

@SpringBootApplication
public class Application {

    public static void main(String[] args) {
        SpringApplication.run(Application.class, args);
    }
}
其中:
-
@SpringBootApplication注解用以标注SpringBoot应用。 -
SpringApplication.run()方法启动应用。
运行程序
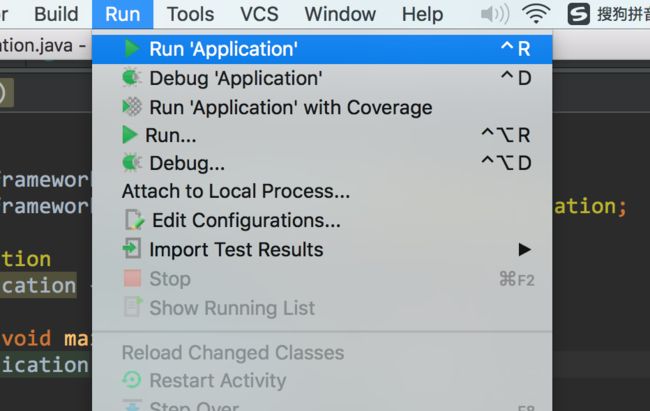
此时程序已经可以运行了。如果用IDEA,直接点击run;如果不用,在命令行输入mvn spring-boot:run。
Paste_Image.png
运行结果
Result-1.png
Result-2.png
可以注意到id从1变化为2,可以说明即使有多个请求,GreetingController也只有一个实例,counter根据每次请求增长。
总结
以上,我们已经成功使用Spring Boot建立了一个Restful web service。
参考:http://spring.io/guides/gs/rest-service/