前言
“一次构建,多处运行”,跨平台APP带着这股风潮把火烧到了前端,为开发者带来无尽的遐想。现有的流行跨平台框架有以下:
- 基于单WebView的开发框架。开发者可以使用现有的最新web技术,开发出单页面web应用。同时利用JSBridge,又能获取原生的API,从而使web应用具有了原生应用的功能。Cordova+IONIC可以说是这个潮流的代表,也是跨平台APP的先锋。然而这类跨平台应用的缺点是不流畅,在安卓手机上体验较差。
- Hybrid方向。也就是原生应用配合HTML5技术,让APP具有了部分跨平台的功能。Hybrid也是现在各大互联网企业采用较多的跨平台开发方式。这类APP在体验上优于单WebView的APP,并且能够极大提高开发效率。然而这种方式离“一次构建,多处运行”的设想还是有很大距离,毕竟依然需要针对不同的移动平台进行原生开发。
- 使用Javascript开发纯原生应用。既然单WebView性能有缺憾,Hybrid技术栈又比较高,那么Javascript开发纯原生应用就孕育而生。这个方向的代表有ReactNative, Weex和我们今天的主角--Nativescript。
和ReactNative相比,Nativescript最大的特点是可以获得100%的原生API。也就是说,开发者可以通过Javascript获取和原生开发语言同样多的原生接口。下面,我们通过实现一个简单的计算器,来体会一下Nativescript的开发思想。同时,我们能体会到“获取所有原生API”带来的巨大好处。
你可以先在这里看到最终的结果。 注意输入的数字的字体会随着文本长度逐渐变小,想想这个功能怎么实现。

Why Nativescript?
大家定会好奇,ReactNative这么火,大家都在谈论它,大有一统天下的感觉,为什么还要讨论Nativescript呢?这是因为ReactNative依然不能真正统一编程语言。ReactNative基于平台抽象,不可能暴露100%的原生API,因此需要使用原生编程语言进行扩展,提高了技术栈。所以,一个ReactNative的开发团队里面必须同时具备Javascript,Java还有ObjectiveC开发技术。
相比之下,Nativescript的技术栈则要简单的多,开发者只需要使用Javascript就能进行开发。这里列出了几个Nativescript的核心功能:
- 使用Javascript直接访问所有原生API
- 系统新功能0延时支持
- 第三方原生库全部支持
准备
首先需要搭建开发环境,请参考官方的文档。你可以使用下面的命令来检测Nativescript是否安转完成:
tns doctor
Nativescript支持纯Javascript,同时也支持Angular2。我们选择Angular2和Typescript进行开发,体会一下Angular2带来的开发便利。
创建我们的项目
tns create NSCalculator --ng
这个命令会在当前目录下新建NSCalculator文件夹,同时安装好所需的第三方依赖。其实这个命令还给你新建一个Demo,运行下面的命令,你就会看到你的第一个Nativescript应用
tns platform add ios
tns run ios --emulator
拆分
使用Visual Studio Code打开文件,有如下的文件夹结构

我们的代码将会组织在app目录下,所以只需考虑这个文件夹。main.ts是整个应用的启动文件,我们现在不需要更改它。我们看到main.ts里面引入了app.component模块,app.component将会被改造成我们的计算器组件。在改造app.component.ts前,我们先考虑一下如何将计算器拆分成一个个组件。
首先从功能上对计算器进行拆分。计算器由Displayer和Keyboard两个部分,Keyboard由Button组成。基于此,我们在app目录下新增三个文件夹:Displayer,Keyboard,NSButton。
布局
组件化开发有两种常用方式,一种是由大到小开发,也就是Calculator -> Displayer -> Keyboard -> Button,一种是由小到大开发,也就是 Button -> Keyboard -> Displayer -> Calculator。当然你也可以混合开发。本例采用由大到小的开发方式。
删除app.component.ts里面的内容,用以下代替:
// app.component.ts

import {
    Component,
} from "@angular/core";

@Component({
    selector: "calculator",
    template: `


`,
})
export class AppComponent {
    public counter: string = '';
}
运行以下命令,你就能看到效果
tns livesync ios --emulator --watch
和 tns run ios命令不同,这个命令会监视你的文件变化并自动构建部署新的应用。

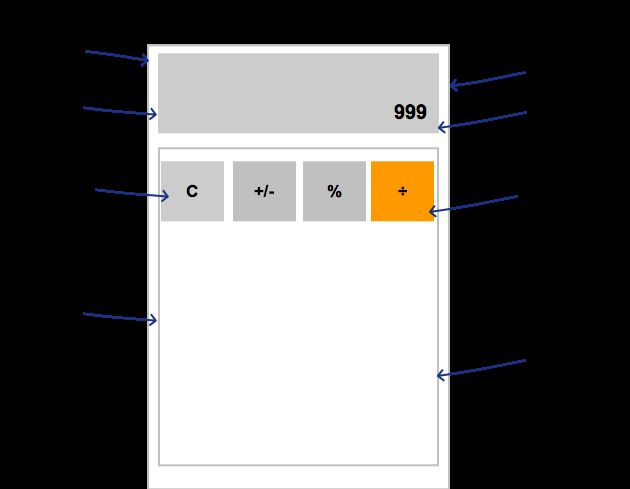
Nativescript的布局方式和安卓原生的布局方式非常类似。对于计算器,我们的Displayer需要一个固定的高度,Keyboard需要占据全部剩余的空间。因此,Calculator的第一级布局使用了 GridLayout。rows="auto,*" 表示Gridlayout为两行,第一行高度由内容(auto)决定,第二行高度占据全部剩余空间(*)。columns="*"表示Gridlayout分为一列布局,这一列的宽度占据全部空间。
我们为Displayer选择了StackLayout布局,这是因为我们需要把Label靠右下角对齐。我们为Keyboard选择了GridLayout布局,这很好理解,因为我们需要一个5x4的格子用来放置计算器的按钮。
熟悉ReactNative的同学可能知道,ReactNative使用Flex布局,非常便于web开发者掌握。Nativescript则使用和原生开发非常相似的布局方式,然而这种布局方式其实也很容易掌握。
注意我们还使用了行内CSS来装饰Nativescript的组件。Nativescript支持的CSS属性是web CSS属性的一个子集。你可以在 这里看到Nativescript支持的CSS种类,总的来说,有限但是够用。
组件
目前为止我们的APP只有一个组件AppComponent,这非常不利于项目的扩展。幸运的是Nativescript支持Angular2.0的全部功能,我们可以使用Angular来实现Displayer和Keyboard组件。
在app目录下新建Keyboard文件夹,在Keyboard文件里新增keyboard.component.ts,keyboard.html,以及keyboard.css文件。内容如下:
//keyboard.component.ts
import {
  Component,
} from '@angular/core';

@Component({
  selector:'keyboard',
  templateUrl:'Keyboard/keyboard.html',
  styleUrls:['Keyboard/keyboard.css']
})

export class Keyboard{
}
// keyboard.css
.keyboard-item {
  border-width: 0.5;
  border-color: rgb(123,123,123);
  font-family: monospace;
  width:100%;
  height: 100%;
  text-align: center;
}

.gray {
  background-color: rgb(205,205,205);
  color:rgb(22,22,22);
  font-size: 25;
}

.yellow {
  background-color:rgb(242,127,38);
  color:#fff;
  font-size: 30;
}
在Keyboard组件里,我们把HTML模板和CSS都拆分到了独立文件里面,又回到了那个干干净净的web世界。而这两者ReactNative都不能支持!所以在组件复用性和易用性上,Nativescript其实技高一筹。
然而现在应用界面并没有任何变化,我们还需要在app.component.ts中引入Keyboard组件。修改后的app.component.ts文件如下
//app.component.ts
import {
    Component,
} from "@angular/core";
//引入外部组件
import {
    Keyboard
} from './Keyboard/keyboard.component';

@Component({
    selector: "calculator",
    template: `


`,
directives:[Keyboard] //声明对Keyboard组件的依赖
})
export class AppComponent {
    public counter: string = '';
}
现在我们的计算器有点样子了:

似乎有点简单。但是请注意,这个界面是完全的 原生界面,完全由原生组件构成。然而,由于Nativescript的支持,我们确可以像开发web应用一般轻松的开发原生应用了。
但是现在的Keyboard还不能提供任何功能,Keyboard不能响应点击事件,也不能把数据传递给Displayer。接下来我们就要为Keyboard加上这些功能。
交互
Nativescript提供了原生的手势事件,你可以在应用中直接使用。由于touch事件会返回手指的状态:向下,移动,向上等,满足键盘交互的需求,因此我们监听touch事件。
要监听Keyboard的点击事件,最直观的答案就是为每个按钮设置touch事件监听器,在这个计算器应用中我们需要设置19次!而且我们的监听逻辑不能复用,虽然他们的功能很相似!这是不可接受的。所以,我们应该把按钮也做成一个Angular组件,因为组件是可以复用的。
那么这个按钮组件需要哪些功能呢? 当点击按钮时,按钮的背景色需要改变,并且需要把这个点击事件告知其他组件。
在app目录下新建NSButton文件夹,同时在NSButton文件夹里新增一下文件: nsbutton.component.ts, nsbutton.css。
//nsbutton.component.ts
import {
Component,
ElementRef,
ViewChild,
AfterViewInit,
Input,
OnInit
} from '@angular/core';
import {
Label
} from 'ui/label';
import {
GestureTypes,
TouchGestureEventData
} from 'ui/gestures';
import {
Color
} from 'color';
@Component({
selector: 'nsbutton',
template: ``,
styleUrls:['NSButton/nsbutton.css']
})
export class NSButton implements AfterViewInit{
@ViewChild('nsbutton') nsBtnRef : ElementRef;
@Input('text') text: string;
@Input('normalBg') normalBg:string;
@Input('activeBg') activeBg:string;
private nsBtnView : Label;
ngAfterViewInit() {
this.nsBtnView = 请注意,这里我们没有使用ngStyle的方式来改变按钮的背景,而是用了更底层一级的API。主要是为了像你展示在Nativescript中使用原生API是多么轻松的一件事。
//nsbutton.css
.keyboard-item {
  border-width: 0.5;
  border-color: rgb(123,123,123);
  font-family: monospace;
  width:100%;
  height: 100%;
  text-align: center;
  font-size: 25;
}
然后,需要在Keyboard组件里引入NSButton。修改keyboard.component.ts和keyboard.html文件如下:
//keyboard.component.ts
import {
  Component,
} from '@angular/core';
import {
  NSButton
} from '../NSButton/nsbutton.component';

@Component({
  selector:'keyboard',
  templateUrl:'Keyboard/keyboard.html',
  styleUrls:['Keyboard/keyboard.css'],
  directives:[NSButton],
})

export class Keyboard{
}
//keyboard.html
现在,我们的按钮组件就有了一个漂亮的点击动画。
不过Keyboard的点击事件还不能通知给Displayer,我们接着来增加这个功能,修改nsbuttom.component.ts, keyboard.component.ts, app.component.ts如下:
//nsbuttom.component.ts
import {
Component,
ElementRef,
ViewChild,
AfterViewInit,
Input,
OnInit
} from '@angular/core';
import {
Label
} from 'ui/label';
import {
GestureTypes,
TouchGestureEventData
} from 'ui/gestures';
import {
Color
} from 'color';
@Component({
selector: 'nsbutton',
template: ``,
styleUrls:['NSButton/nsbutton.css']
})
export class NSButton implements AfterViewInit{
@ViewChild('nsbutton') nsBtnRef : ElementRef;
@Input('text') text: string;
@Input('normalBg') normalBg:string;
@Input('activeBg') activeBg:string;
@Input('onBtnClicked') onBtnClicked: Function;
private nsBtnView : Label;
ngAfterViewInit() {
this.nsBtnView = //keyboard.component.ts
import {
Component,
Input,
OnInit
} from '@angular/core';
import {
NSButton
} from '../NSButton/nsbutton.component';
@Component({
selector:'keyboard',
templateUrl:'Keyboard/keyboard.html',
styleUrls:['Keyboard/keyboard.css'],
directives:[NSButton],
})
export class Keyboard implements OnInit{
@Input('onKeyBoardClicked') onKeyBoardClicked: Function;
ngOnInit() {
this.onBtnClicked = this.onBtnClicked.bind(this);
}
public onBtnClicked(text:string):void {
this.onKeyBoardClicked && this.onKeyBoardClicked(text);
}
}
//app.component.ts
import {
    Component,
    OnInit,
    ElementRef,
    ViewChild,
    AfterViewInit,
} from "@angular/core";
import {
    Label
} from 'ui/label';
import {
  Keyboard
} from './Keyboard/keyboard.component';
import {
  device,
  platformNames
} from 'platform';

@Component({
    selector: "calculator",
    template: `


    `,
    directives:[Keyboard]
})
export class AppComponent implements OnInit{
    public counter: string = '';
    @ViewChild('displayer') displayerRef: ElementRef;
    private displayerView : Label;

    ngOnInit() {
            this.onKeyBoardClicked = this.onKeyBoardClicked.bind(this);
    }

    public onKeyBoardClicked(text:string):void {
            this.counter += text;
    }
}
这样我们的Keyboard点击就能实时显示在Disapler上面了。
这个交互我们完全依赖于Angular2为我们提供的单向绑定。再强调一次,Nativesript支持所有的Angular2功能,这真的会简化我们的开发。

原生API
对比我们的计算器和ios原生计算器,我们发现原生计算器的Displayer会自动调整字体大小,以保证显示的数字完全展示。得益于Nativescript,我们也能通过Javascript调用这套API,实现相同的效果。修改app.comonent.ts如下:
//app.component.ts
import {
Component,
OnInit,
ElementRef,
ViewChild,
AfterViewInit,
} from "@angular/core";
import {
Label
} from 'ui/label';
import {
Keyboard
} from './Keyboard/keyboard.component';
import {
device,
platformNames
} from 'platform';
@Component({
selector: "calculator",
template: `
`,
directives:[Keyboard]
})
export class AppComponent implements OnInit, AfterViewInit{
public counter: string = '';
@ViewChild('displayer') displayerRef: ElementRef;
private displayerView : Label;
ngAfterViewInit() {
this.displayerView = elem.ios.numberOfLines = 1, elem.ios.minimumFontSize = 20, elem.ios.adjustsFontSizeToFitWidth = true 是三个IOS的UILabel原生的api。在Nativescript中,我们可以使用Javascript直接调用他们,Nativescript会帮我们处理好Javascript到原生的映射,包括数据类型的转换,不需要写任我的ObjectiveC代码。
如此,我们就实现了在文章最开始展示的交互。** 这个交互,在ReactNative中,是无法直接实现的! **这也是Nativescript相比于ReactNative的强大之处
总结
得益于Nativescript可以访问100%的原生API, 我们不需要写任何原生代码,就能获得和原生代码一样的能力。这可以说是Nativescript相比于其他平台,比如React Native, 最大的优势。在现阶段,Nativescript应该是最成熟的,性能最好的跨平台APP构建方案。
github代码在这里:https://github.com/eeandrew/NSCalculator