看到一个大牛的blog,点击屏幕击打物品,做了一点研究,和大家分享一下,屏幕截图如下:
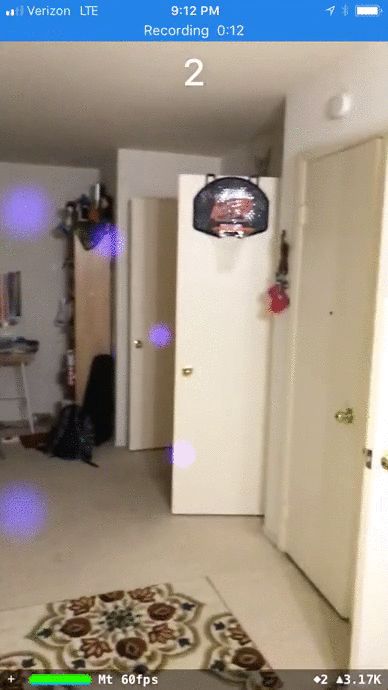
image.png
首先,需要一个被击打对象
暂时先用一个BOX吧(就是因为简单),给这个BOX设置属性,具体可以参看基本碰撞测试,有几个需要注意的点:
- isAffectedByGravity表示当前物体不受重力影响。
- categoryBitMask标示自己。
- contactTestBitMask标示可以和自己碰撞的物体。
let box = SCNBox(width: 0.1, height: 0.1, length: 0.1, chamferRadius: 0)
self.geometry = box
let shape = SCNPhysicsShape(geometry: box, options: nil)
self.physicsBody = SCNPhysicsBody(type: .dynamic, shape: shape)
self.physicsBody?.isAffectedByGravity = false
//标识自己和碰撞的对方
self.physicsBody?.categoryBitMask = CollisionCategory.ship.rawValue
self.physicsBody?.contactTestBitMask = CollisionCategory.bullets.rawValue
//加上纹理
let material = SCNMaterial()
material.diffuse.contents = UIImage(named: "galaxy")
self.geometry?.materials  = [material, material, material, material, material, material]
为了放在正前方,x,y轴在(-0.5~0.5)之间,z轴为-1。
let posX = floatBetween(-0.5, and: 0.5)
let posY = floatBetween(-0.5, and: 0.5  )
cubeNode.position = SCNVector3(posX, posY, -1) // SceneKit/AR coordinates
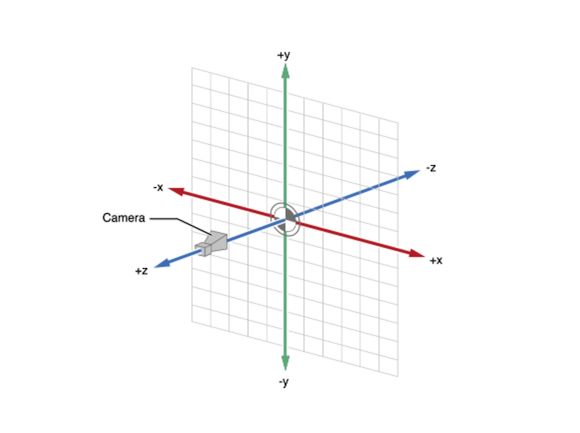
image.png
其次,点击屏幕,新建一枚子弹
增加点击事件
let tapGesture = UITapGestureRecognizer(target: self, action: #selector(ViewController.handleTapGesture))
        //设置手势点击数,双击:点1下
tapGesture.numberOfTapsRequired = 1
self.view.addGestureRecognizer(tapGesture)
新建一枚子弹,和被打击对象差不多,唯一的区别是categoryBitMask和contactTestBitMask刚好相反。
let sphere = SCNSphere(radius: 0.025)
        self.geometry = sphere
        let shape = SCNPhysicsShape(geometry: sphere, options: nil)
        self.physicsBody = SCNPhysicsBody(type: .dynamic, shape: shape)
        self.physicsBody?.isAffectedByGravity = false

        // see http://texnotes.me/post/5/ for details on collisions and bit masks
        self.physicsBody?.categoryBitMask = CollisionCategory.bullets.rawValue
        self.physicsBody?.contactTestBitMask = CollisionCategory.ship.rawValue

        // add texture
        let material = SCNMaterial()
        material.diffuse.contents = UIImage(named: "bullet_texture")
        self.geometry?.materials  = [material]
发射子弹
首先需要知道当前摄像头的位置,根据ARCamera的位置可以计算出从摄像头发射子弹的位置和方向:
位置比较好理解:就是 SCNVector3(mat.m41, mat.m42, mat.m43),这个是世界坐标系的位置。
方向就需要好好理解一下,其实是原点(0,0,0)到摄像头点的方向。
func getUserVector() -> (SCNVector3, SCNVector3) { // (direction, position)
if let frame = self.sceneView.session.currentFrame {
let mat = SCNMatrix4FromMat4(frame.camera.transform) // 4x4 transform matrix describing camera in world space
let dir = SCNVector3(-1 * mat.m31, -1 * mat.m32, -1 * mat.m33) // orientation of camera in world space
let pos = SCNVector3(mat.m41, mat.m42, mat.m43) // location of camera in world space
        return (dir, pos)
}
return (SCNVector3(0, 0, -1), SCNVector3(0, 0, -0.2))
}
发射子弹,其实就是对子弹作用力,力的位置就是摄像头的位置,方向就是摄像头的方向。
let (direction, position) = self.getUserVector()
bulletsNode.position = position // SceneKit/AR coordinates are in meters
let bulletDirection = direction
 bulletsNode.physicsBody?.applyForce(bulletDirection, asImpulse: true)
 sceneView.scene.rootNode.addChildNode(bulletsNode)
子弹击中方块效果
基本碰撞测试里介绍过可以用代理处理碰撞的过程。
 func physicsWorld(_ world: SCNPhysicsWorld, didBegin contact: SCNPhysicsContact) {
 if contact.nodeA.physicsBody?.categoryBitMask == CollisionCategory.ship.rawValue || contact.nodeB.physicsBody?.categoryBitMask == CollisionCategory.ship.rawValue {
 print("Hit ship!")
//移除子弹
self.removeNodeWithAnimation(contact.nodeB, explosion: false)
DispatchQueue.main.asyncAfter(deadline: .now() + 0.5, execute: {
    //移除方块,带爆炸效果
    self.removeNodeWithAnimation(contact.nodeA, explosion: true)
    //新的方块
    self.addNewShip()
            })
        }
}
爆炸效果的实现如下,这里通过一个SCNP文件new一个SCNParticleSystem对象,该对象负责SCNNode的动画效果。
func removeNodeWithAnimation(_ node: SCNNode, explosion: Bool) {
        if explosion {
            let particleSystem = SCNParticleSystem(named: "explosion", inDirectory: nil)
            let systemNode = SCNNode()
            systemNode.addParticleSystem(particleSystem!)
            // place explosion where node is
            systemNode.position = node.position
            sceneView.scene.rootNode.addChildNode(systemNode)
        }

        // remove node
        node.removeFromParentNode()
    }
废话不说了,直接看代码,希望喜欢的人star支持一下。
demo地址