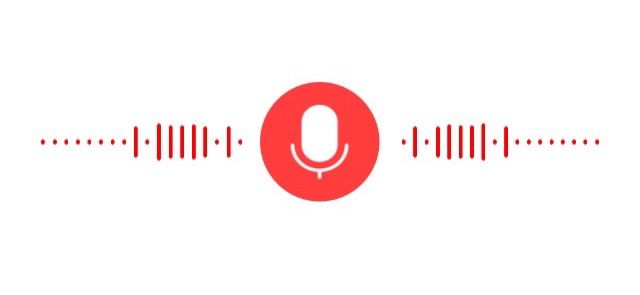
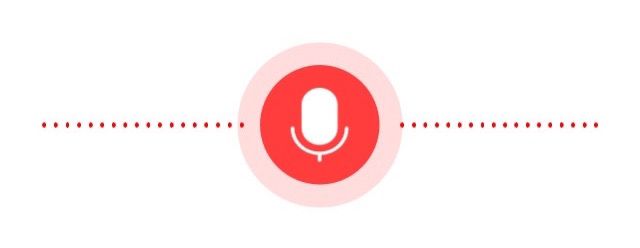
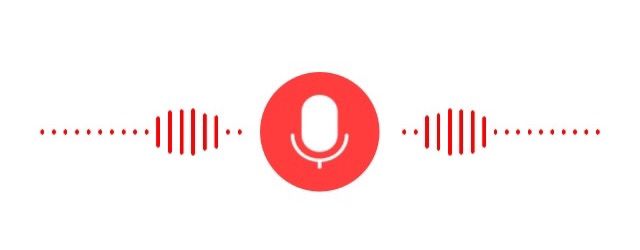
由于这个动画只有在真机上才可以看到gif效果,所以贴上几张图让各位看看运行的效果。
从效果图上可以看出,此动画需要的组件有:
1.好看的话筒
2.两边向外延伸的线条
3.中间的波纹的延伸
此动画需要用到的知识有:
1.UIView 的Animation
2.开启和关闭系统的麦克风
注意:该动画在真机上可以运行,如果在模拟器上的话,会运行不起。
在写代码之前记住引入,当然你得添加那个AVFoundation框架
#import
定义视图上的组件:
//话筒的视图
@property (nonatomic, strong) UIImageView *imageView;
//话筒右侧的延伸线条
@property (nonatomic, strong) DyLineView *lineView;
//话筒左侧的延伸线条
@property (nonatomic, strong) DyLineView *leftLineView;
//记录语音的对象
@property (nonatomic, strong) AVAudioRecorder *recorder;
//向外延伸的波纹视图
@property (nonatomic, strong) UIView *RippleView;
各组件对象的创建:
- (void)configView
{
    self.RippleView = [[UIView alloc] initWithFrame:(CGRect){0,0,90,90}];
    self.RippleView.backgroundColor = [[UIColor redColor] colorWithAlphaComponent:0.8];
    self.RippleView.layer.cornerRadius = 45;
    self.RippleView.center = self.view.center;
    self.RippleView.layer.masksToBounds=true;
    self.RippleView.alpha=0;
    [self imageWithPoint:self.view.center];

    self.imageView = [UIImageView new];
    self.imageView.size = CGSizeMake(60, 60);
    self.imageView.image = [UIImage imageNamed:@"input_btn_recording"];
    [self.view addSubview:self.imageView];
    self.imageView.center = self.view.center;

    self.lineView = [[DyLineView alloc] initWithFrame:CGRectMake(self.view.centerX + 40, 0 , 100, 60)];
    self.lineView.centerY = self.view.centerY;
    [self.view addSubview:self.lineView];

    self.leftLineView = [[DyLineView alloc] initWithFrame:CGRectMake(0, 0 , 100, 60)];
    self.leftLineView.right = self.imageView.left - 10;
    self.leftLineView.centerY = self.view.centerY;
    [self.view addSubview:self.leftLineView];

    NSError *setCategoryError = nil;
    [[AVAudioSession sharedInstance] setActive:YES error:nil];
    [[AVAudioSession sharedInstance] setCategory:AVAudioSessionCategoryPlayAndRecord error: &setCategoryError];

    NSDictionary *settings = [NSDictionary dictionaryWithObjectsAndKeys:
                              [NSNumber numberWithFloat: 44100.0],                 AVSampleRateKey,
                              [NSNumber numberWithInt: kAudioFormatAppleLossless], AVFormatIDKey,
                              [NSNumber numberWithInt: 1],                         AVNumberOfChannelsKey,
                              [NSNumber numberWithInt: AVAudioQualityMax],         AVEncoderAudioQualityKey,
                              nil];
    NSError *error;
    self.recorder = [[AVAudioRecorder alloc] initWithURL:[NSURL fileURLWithPath:@"dev/null"] settings:settings error:&error];
    if (self.recorder) {
        [self.recorder prepareToRecord];
        self.recorder.meteringEnabled = YES;
    }
    else{
        NSLog(@"init recorder failed");
    }

    [self startRecordIfMicrophoneEnabled];
}
下面就开启麦克风操作
- (void)startRecordIfMicrophoneEnabled
{
    if ([[AVAudioSession sharedInstance] respondsToSelector:@selector(requestRecordPermission:)]) {
        __weak typeof(self) wself = self;
        [[AVAudioSession sharedInstance] performSelector:@selector(requestRecordPermission:) withObject:^(BOOL granted) {
            if (granted) {
                // Microphone enabled code
                NSLog(@"Microphone is enabled..");

                [wself startRecord];
            }
            else {
                // Microphone disabled code
                NSLog(@"Microphone is disabled..");

                // We're in a background thread here, so jump to main thread to do UI work.
                dispatch_async(dispatch_get_main_queue(), ^{
                    UIAlertView *alertView = [[UIAlertView alloc] initWithTitle:@"麦克风不可用" message:@"该应用需要访问您的麦克风,请到设置/隐私/麦克风,开启" delegate:nil cancelButtonTitle:nil otherButtonTitles:nil, nil];
                    [alertView show];
                });
            }
        }];
    }
    else{
        [self startRecord];
    }
}
开启录音并根据麦克风的声音的分贝来控制话筒两侧的线条的高度
- (void)startRecord
{
    [self.recorder record];
    [self performSelector:@selector(getDecibelValue) withObject:nil afterDelay:0];
}

- (void)getDecibelValue
{

    [self.recorder updateMeters];

    float   level;                // The linear 0.0 .. 1.0 value we need.

    float   minDecibels = -60; // Or use -60dB, which I measured in a silent room.

    float   decibels = [self.recorder averagePowerForChannel:0];

    if (decibels < minDecibels)
    {
        level = 0.0f;
    }

    else if (decibels >= 0.0f)
    {
        level = 1.0f;
    }
    else
    {
        float   root            = 2.0f;

        float   minAmp          = powf(10.0f, 0.05f * minDecibels);

        float   inverseAmpRange = 1.0f / (1.0f - minAmp);

        float   amp             = powf(10.0f, 0.05f * decibels);

        float   adjAmp          = (amp - minAmp) * inverseAmpRange;

        level = powf(adjAmp, 1.0f / root);
    }
    [self.lineView addWaveWithDecibelValue:level * 100 directionLeft:NO];
    [self.leftLineView addWaveWithDecibelValue:level * 100 directionLeft:YES];
    [self performSelector:@selector(getDecibelValue) withObject:nil afterDelay:0.1];
    NSLog(@"平均值 %f", level * 120);
}
接着是话筒的波纹动画,利用UIView的Animation和视图的alpha来进行实现。
- (void)imageWithPoint:(CGPoint)point
{
    CGPoint location = self.view.center;
    [self.view addSubview:self.RippleView];
    self.RippleView.layer.zPosition = -1;
    self.RippleView.center = location;
    self.RippleView.transform = CGAffineTransformMakeScale(0.5, 0.5);
    [UIView animateWithDuration:1.0
                     animations:^{
                         self.RippleView.alpha=1;

                     }];
    [UIView animateWithDuration:1.0
                          delay:0
                        options:UIViewAnimationOptionCurveEaseInOut
                     animations:^{
                         self.RippleView.transform = CGAffineTransformMakeScale(1,1);
                         self.RippleView.alpha=0;
                         self.view.alpha=1;
                     } completion:^(BOOL finished) {
                         [self.RippleView removeFromSuperview];
                         [self performSelector:@selector(imageWithPoint:) withObject:nil afterDelay:1.0];
                     }];

}
最后是关闭录音对象,如果不关闭就会发生内存泄露。
- (void)viewDidDisappear:(BOOL)animated
{
    [super viewDidDisappear:animated];
    [self.recorder stop];
    [NSObject cancelPreviousPerformRequestsWithTarget:self];
}
这个类中用到了DyLineView这个类,现在就看看这个线条的延伸是怎么实现的。
在这个类中一个公有方法:
- (void)addWaveWithDecibelValue:(NSInteger)decibel directionLeft:(BOOL)left
{
    NSInteger level = ceilf(decibel / 20.0);
    if (level > 0) {
        if (level > 5) {
            level = 5;
        }
        if (decibel > self.height) {
            decibel = decibel * 0.9;
            if (decibel > self.height) {
                decibel = self.height;
            }
        }else if (decibel < 15) {
            decibel = 3;
        }

        UIView *lineView = [[UIView alloc] initWithFrame:CGRectMake(0, 0, 2.0, decibel)];
        lineView.layer.cornerRadius = 1.5;
        lineView.clipsToBounds = YES;
        if (left) {
            lineView.left = self.width;
        }
        lineView.backgroundColor = [UIColor redColor];
        lineView.centerY = self.height/2.0;
        [self addSubview:lineView];
        [UIView transitionWithView:lineView duration:1.8 options:UIViewAnimationOptionCurveLinear animations:^{
            if (left) {
                lineView.centerX = 0;
            }else {
                lineView.centerX = self.width;
            }
        } completion:^(BOOL finished) {
            [lineView removeFromSuperview];
        }];
    }
}
这样题目的那个动画效果就实现了。
下面给出的github上得地址,是我之前博客中的所有代码,并且有一些是没有写出来的。如果你需要的话,可以看看。
地址


