前言:最近因为工作忙,没抽出时间来继续文章的下半部分,现在手头忙的差不多,便抽时间写了这篇文章!
- 上篇文章只是简单的介绍了,rabbitmp的搭建和基础发送队列,封装了一个公用类。
connection = new AMQPStreamConnection($config['host'], $config['port'], $config['user'], $config['pass']);
        $this->queue_key = $queue_name;
        $this->exchange_suffix = $config['exchange'];
        $this->priority=$priority;
        $this->channel = $this->connection->channel();

        $this->bind_exchange();
        return $this->connection;
    }
    /**
     * 绑定交换机
     * @return mixed|null
     */
    protected function bind_exchange() {
        $queue_key=$this->queue_key;
        $exchange_key = $this->exchange_suffix;
        $this->exchange_key = $exchange_key;
        $channel = $this->channel;

        if(!empty($this->priority)){
            $priorityArr = array('x-max-priority' => array('I', $this->priority));
            $size = $channel->queue_declare($queue_key, false, true, false, false,false,$priorityArr);
        }else{
            $size = $channel->queue_declare($queue_key, false, true, false, false);
        }
        $channel->exchange_declare($exchange_key, 'topic', false, true, false);
        $channel->queue_bind($queue_key, $exchange_key,$queue_key);
        $this->channel=$channel;
        return $size ;
    }
    /**
     * 发送数据到队列
     * @param $data = array('key'=>'val')
     */
    public function put($data)
    {
        $channel = $this->channel;
        $value = json_encode($data);
        $toSend = new AMQPMessage($value, array('content_type' => 'application/json', 'delivery_mode' => 2));
        $channel->basic_publish($toSend, $this->exchange_key,$this->queue_key);
    }

    /**
     * 获取数据
     * @return mixed
     */
    public function get()
    {
        $channel = $this->channel;
        $message = $channel->basic_get($this->queue_key);
        if (!$message) {
            return  array(null,null);
        }
        $ack = function() use ($channel,$message) {
            $channel->basic_ack($message->delivery_info['delivery_tag']);
        };
        $result = json_decode($message->body,true);
        return array($ack,$result);
    }

    /**
     * 关闭链接
     */
    public function close() {
        $this->channel->close();
        $this->connection->close();
    }

    /**
     * 获得队列长度
     * @return int
     */
    public function length(){
        $info =  $this->bind_exchange();
        return $info[1];
    }
}
- 发送队列简单demo
 'web',//自己手动添加交换机,这里就不做描述
            'host' => '172.17.0.6',//填写自己的容器ip
            'port' => '5672',
            'user' => 'guest',
            'pass' => 'guest',
        ];
        $queue = new RabbitMq($rabbitMqConfig, $queueName);
        $data = ['uuid' => rand(100,99999999)];
        $queue->put($data);
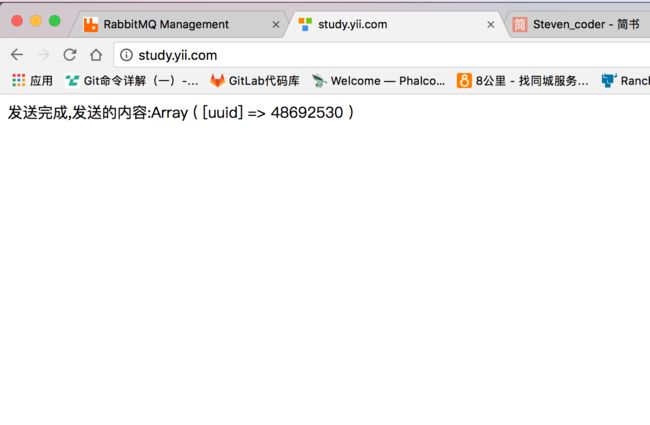
        echo '发送完成,发送的内容:'.print_r($data,1);
        exit();
    }
}
-
查看发送队列数据
编写消耗队列脚本
 'web',//自己手动添加交换机,这里就不做描述
            'host' => '172.17.0.6',//填写自己的容器ip
            'port' => '5672',
            'user' => 'guest',
            'pass' => 'guest',
        ];
        $queue = new RabbitMq($rabbitMqConfig, $queueName);
        $cnt = 0;
        while (1) {
            list($ack,$data) = $queue->get();
            if(!$data){
                $cnt++;
                if($cnt > 20){
                    $queue->close();
                    exit();
                }
                echo "no data:$cnt \n";
                sleep(1);
                continue;
            }

            //逻辑处理
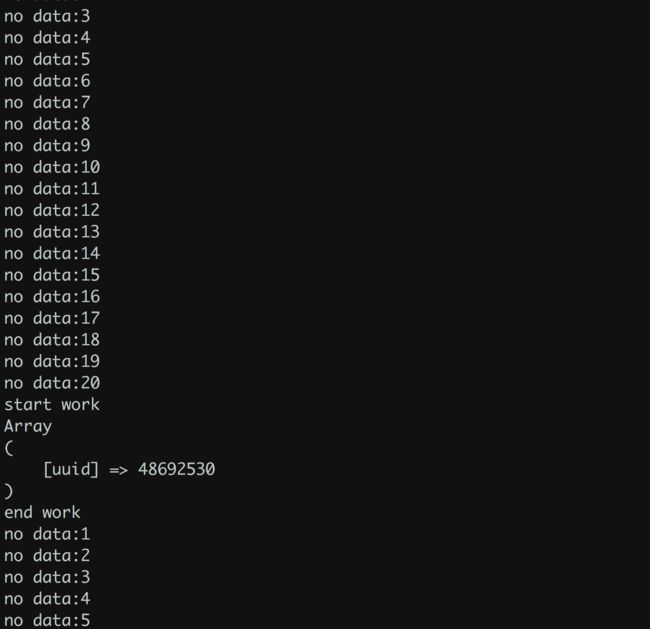
            echo "start work \n";
            print_r($data);
            echo "end work \n";
            //确认消耗
            $ack();
        }
    }
}
- 配置supervisor的消耗队列进程(PS:我的demo.ini是放在我创建的docker项目容器里的,不熟悉的小伙伴可以看看我的关于创建容器的文章)
a. 创建文件
vim demo.ini
b. 编写配置(PS:注意这里用的是yii的console,请根据你们的使用来进行更改)
;测试demo
[program:demo]
command= /usr/share/nginx/html/advanced/yii test/test
directory=/usr/share/nginx/html/advanced/
stdout_logfile=/tmp/demo.log
redirect_stderr=true
autostart=false
autorestart=false
c. 增加进程
supervisorctl update
d. 成功添加,demo进程已启动,通过supervisorctl tail -f demo 看进程消耗
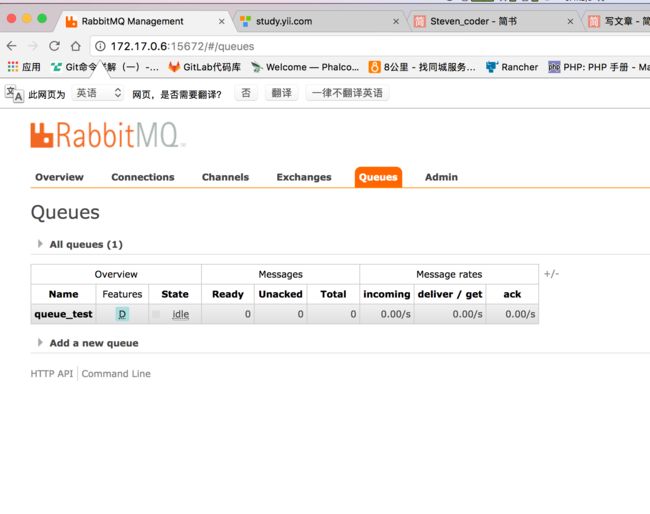
e. 再查看队列状态,显示队列已被消耗
结尾
好了,到此为止,简单的队列消耗已经完成,可能有些地方不是说的太清楚,毕竟自己也在摸索中,文章中的如果有不对的地方欢迎指正,共同学习~
PS.搭建supervisor的docker容器文章:http://www.jianshu.com/p/40418711cf8aTask


