一、vue路由
vue路由:vue-router
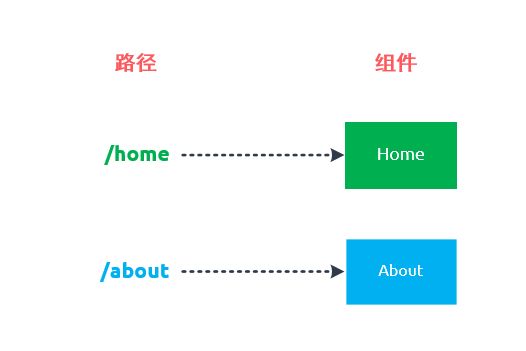
vue-router是Vue.js官方的路由插件,它和vue.js是深度集成的,适合用于构建单页面应用。vue的单页面应用是基于路由和组件的,路由用于设定访问路径,并将路径和组件映射起来。传统的页面应用,是用一些超链接来实现页面切换和跳转的。在vue-router单页面应用中,则是路径之间的切换,也就是组件的切换。
https://router.vuejs.org/zh/installation.html
安装:
D:\vue-project>npm install vue-router
单页面应用有两个路径:/home和/about,与这两个路径对应的是两个组件Home和About。
二、创建路由
- 引入路由
//导入路由
import Router from 'vue-router'
 //使用/注册
Vue.use(Router)
- 创建路由对象
//创建路由对象
export default new Router({
  routes: [
    {
      path: '/',
      name: 'HelloWorld',
      component: HelloWorld
    }
  ]
})
- 创建组件,并配置路由
创建Home组件:
//Home.vue
Home
// router/index.js
import Vue from 'vue'
import Router from 'vue-router'
import Home from '@/components/Home'
Vue.use(Router)
//创建路由对象
export default new Router({
routes: [
{
path: '/Home',
name: 'Home',
component: Home
}
]
})
注: @指向src目录
- 路由切换 router-link
  Home

 User
- router-view
主要是构建 SPA (单页应用) 时,方便渲染你指定路由对应的组件。可以 router-view 当做是一个容器,它渲染的组件是你使用 vue-router 指定的。
//app.vue
- 动态路由匹配
我们经常需要把某种模式匹配到的所有路由,全都映射到同个组件。例如,我们有一个 User 组件,对于所有 ID 各不相同的用户,都要使用这个组件来渲染。那么,我们可以在 vue-router 的路由路径中使用“动态路径参数”(dynamic segment) 来达到这个效果:
 routes: [
    // 动态路径参数 以冒号开头
    { path: '/user/:id', component: User }
  ]
一个“路径参数”使用冒号 : 标记。当匹配到一个路由时,参数值会被设置到 this.$route.params,可以在每个组件内使用。于是,我们可以更新 User 的模板,输出当前用户的 ID:
# $route一定不要加this。
{{ $route.params.id }}
菜单管理
用户管理
可以在一个路由中设置多段“路径参数”,对应的值都会设置到 $route.params 中。例如:
| 模式 | 匹配路径 | $route.params |
|---|---|---|
| /user/:username | /user/evan | { username: 'evan' } |
| /user/:username/post/:post_id | /user/evan/post/123 | { username: 'evan', post_id: '123' } |
除了$route.params 外,$route 对象还提供了其它有用的信息,例如,$route.query (如果 URL 中有查询参数)、$route.hash 等等。
三、嵌套路由
实际应用界面,通常由多层嵌套的组件组合而成。
比如,我们 “首页”组件中,还嵌套着 “登录”和 “注册”组件,那么URL对应就是/home/login和/home/reg。
            首页
             登录
            注册
模板
新闻

        新闻

登录

        登录界面

注册

        注册界面
定义路由
  // 2. 定义路由
        const routes = [
            //重定向
             { path: '/', redirect: '/home' },
            {
                path: '/home',
                component: Home,
                children:[
                    { path: 'login', component: Login},
                    { path: 'reg', component: Reg}
                ]
            },
            { path: '/news', component: News}
        ]
四、重定向
{ path: '/', redirect: '/home' },
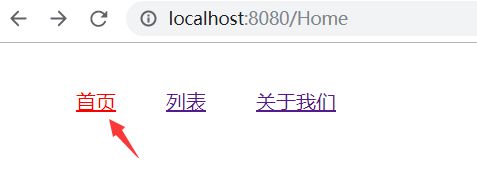
五、路由高亮
在index.js 中, 添加 路由选中class名
默认是 router-link-active, 更改
active-class是vue-router模块的router-link组件中的属性,用来做选中样式的切换;
https://router.vuejs.org/zh/api/#active-class
- 组件:Home.vue
        首页
        列表
        关于我们
- 路由:index.js
Vue.use(Router)
//创建路由对象
export default new Router({
  mode: 'history',  // 去掉路由地址的#
  linkActiveClass: "active",
  // linkExactActiveClass:"active",
  routes: [
    {
      path: '/',
      name: 'Home',
      component: Home,
      children:[
        {
          path: '/List',
          name: 'List',
          component: List
        },
        {
          path: '/About',
          name: 'About',
          component: About
        }
      ]
    }]
})
- 在全局中配置, css 样式:
 .active {
    color: red
  }
对于匹配 / 的, 会始终显示高亮, 需要添加 exact 属性;
首页 六、参数传递
(一) 在 router-link 中, 使用 :to={} 的形式进行传递参数
#使用对象传参
用户列表 在 master 页面, 接受参数
用户: {{ $route.params.count }} - {{ $route.params.obj.name }}
(二)this.$route.query和this.$route.params的使用与区别
1. this.$route.query
1)路由 index.js
Vue.use(Router)
//创建路由对象
export default new Router({
  routes: [
    {
      path: '/',
      name: 'Home',
      component: Home,
      children: [
        {
          path: '/List',
          name: 'List',
          component: List
        },
        {
          path: '/About',
          name: 'About',
          component: About
        }
      ]
    }, {
      path: '/ListTest',
      name: 'ListTest',
      component: List
    }
  ]}
)
2) 声明式导航传参
-
列表
3) 编程式导航:
4) 编程式导航传参:
3) 获取参数
组件:List.vue
    列表

    {{ $route.params.name }}

    {{$route.query.queryId}}
4) url的表现形式(url中带有参数)
http://localhost:8080/ListTest?queryId=1
2. params传参和query传参有什么区别?
1、用法上的
刚query要用path来引入,params要用name来引入,接收参数都是类似的,分别是this.route.params.name。
注意接收参数的时候,已经是router。
2、展示上的
query更加类似于我们ajax中get传参,params则类似于post,说的再简单一点,前者在浏览器地址栏中显示参数,后者则不显示。
3、params是路由的一部分,必须要有。query是拼接在url后面的参数,没有也没关系。
params一旦设置在路由,params就是路由的一部分,如果这个路由有params传参,但是在跳转的时候没有传这个参数,会导致跳转失败或者页面会没有内容。
比如:跳转/router1/:id
正确
错误
七、多视图(命名视图)
https://router.vuejs.org/zh/guide/essentials/named-views.html
有时候想同时 (同级) 展示多个视图,而不是嵌套展示,例如创建一个布局,有 sidebar (侧导航) 和 main (主内容) 两个视图,这个时候命名视图就派上用场了。你可以在界面中拥有多个单独命名的视图,而不是只有一个单独的出口。如果 router-view 没有设置名字,那么默认为 default。
- app.vue
- 路由index.js
// 使用组件
Vue.use(Router)
// 导出一个默认的组件
export default new Router({
  routes: [
    {
      path: '/layout',
      components: {
        default: Main,
        top: Top,
        left: Left
      }
    }]
})
- 分别创建3个组件
left.vue
菜单视图
main.vue
内容视图
top.vue
顶部导航视图
this.$router.push()
跳转到不同的url,但这个方法会向history栈添加一个记录,点击后退会返回到上一个页面。
this.router.replace
跳转到指定url路径,但是history栈中不会有记录,点击返回会跳转到上上个页面
八、路由常用属性
1.$route.path
字符串,等于当前路由对象的路径,会被解析为绝对路径,如 "/home/news" 。
2.$route.params
对象,包含路由中的动态片段和全匹配片段的键值对。
3.$route.query
对象,包含路由中查询参数的键值对。例如,对于 /home/news/detail/01?favorite=yes ,会得到$route.query.favorite == ‘yes‘ 。
4.$route.router
路由规则所属的路由器(以及其所属的组件)。
5.$route.matched
数组,包含当前匹配的路径中所包含的所有片段所对应的配置参数对象。
6.$route.name
当前路径的名字,如果没有使用具名路径,则名字为空。
九、Vue:router的beforeEach与afterEach钩子函数
在路由跳转的时候,我们需要一些权限判断或者其他操作。这个时候就需要使用路由的钩子函数。
定义:路由钩子主要是给使用者在路由发生变化时进行一些特殊的处理而定义的函数。
总体来讲vue里面提供了三大类钩子,两种函数
1、全局钩子
2、某个路由的钩子
3、组件内钩子
两种函数:
1、在跳转之前执行
/*在跳转之前执行*/
Vue.beforeEach(function(to,form,next){})
- 在跳转之后判断
/*在跳转之后判断*/
Vue.afterEach(function(to,form))
全局钩子函数:
router.beforeEach((to, from, next) => {
    let token = router.app.$storage.fetch("token");
    let needAuth = to.matched.some(item => item.meta.login);
    if(!token && needAuth) return next({path: "/login"});
    next();
});
beforeEach函数有三个参数:
to:router即将进入的路由对象
from:当前导航即将离开的路由
next:Function,进行管道中的一个钩子,如果执行完了,则导航的状态就是 confirmed (确认的);否则为false,终止导航。
afterEach函数不用传next()函数
某个路由的钩子函数
顾名思义,它是写在某个路由里头的函数,本质上跟组件内函数没有区别。
const router = new VueRouter({
  routes: [
    {
      path: '/login',
      component: Login,
      beforeEnter: (to, from, next) => {
        // ...
      },
      beforeLeave: (to, from, next) => {
        // ...
      }
    }
  ]
})
路由组件的钩子
注意:这里说的是路由组件!
路由组件属于组件,但组件不等同于路由组件!所谓的路由组件:直接定义在router中component处的组件。如
var routes = [
    {
    path:'/home',
    component:home,
    name:"home"
    }
]
在子组件中调用路由的钩子函数时无效的。
示例:
permission.js
/**
 * 全站权限配置
 */
import router from '@/router.js'

// 最先执行的是 beforeEach钩子,所有路由开始的时候最先执行
router.beforeEach((to, from, next) => {
    console.log("跳转路径:"+to);
    console.log("当前路径:"+from);
    // 继续执行
    next();
});

// 在跳转之后判断
router.afterEach(() => {
    console.log("路由执行完毕");
});
main.js
// 导入权限文件
import  "@/utils/permission.js";
十、router-view组件间传值
- router-view 子组件传父组件
父组件:
一个简单的测试
子组件:
测试:
- 父传子
父组件:
一个简单的测试
子组件:
{{user}}
路由:router.js
import Vue from 'vue'
import Router from 'vue-router'


Vue.use(Router)

export default new Router({
  mode: 'history',
  base: process.env.BASE_URL,
  routes: [
    {
      path: '/home',
      name: 'home',
      component: () => import(/* webpackChunkName: "about" */ './views/Home.vue')
    },
    {
      path: '/about',
      name: 'about',
      component: () => import(/* webpackChunkName: "about" */ './views/About.vue')
    }
  ]
})
测试:
- 示例
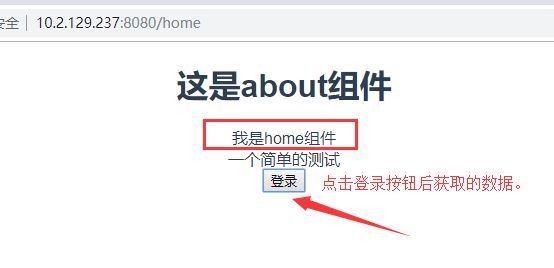
使用router-view将子组件home.vue数据传给app.vue,app.vue再将数据传给一个子组件about.vue。
home.vue
app.vue
about.vue
这是about组件
{{userInfo}}
路由:router.js
import Vue from 'vue'
import Router from 'vue-router'


Vue.use(Router)

export default new Router({
  mode: 'history',
  base: process.env.BASE_URL,
  routes: [
    {
      path: '/home',
      name: 'home',
      component: () => import(/* webpackChunkName: "about" */ './views/Home.vue')
    },
    {
      path: '/about',
      name: 'about',
      component: () => import(/* webpackChunkName: "about" */ './views/About.vue')
    }
  ]
})
测试:
十一、常见问题
- NavigationDuplicated {_name: "NavigationDuplicated", name: "NavigationDuplicated", message: "Navigating to current location ("/welcome/index") is not allowed"
原因:在路由中添加了相同的路由。
解决:
重写路由的push方法:
/**
 * 重写路由的push方法
 */
const routerPush = Router.prototype.push
Router.prototype.push = function push(location) {
  return routerPush.call(this, location).catch(error=> error)
}


