浅谈 Android L 的 Tint(着色)
Tint 是什么?
Tint 翻译为着色。
着色,着什么色呢,和背景有关?当然是着背景的色。当我们开发 App 的时候,如果使用了 Theme.AppCompat 主题的时候,会发现 ActionBar 或者 Toolbar 及相应的控件的颜色会相应的变成我们在 Theme 中设置的 colorPrimary, colorPrimaryDark, colorAccent 这些颜色,这是为什么呢,这就全是 Tint 的功劳了!
这样做有什么好处呢?好处就是你不必再老老实实的打开 PS 再制作一张新的资源图。而且大家都知道 apk 包最大的就是图片资源了,这样减少不必要资源图,可以极大的减少了我们的 apk 包的大小。
实现的方式就是用一个颜色为我们的背景图片设置 Tint(着色)。
例子:
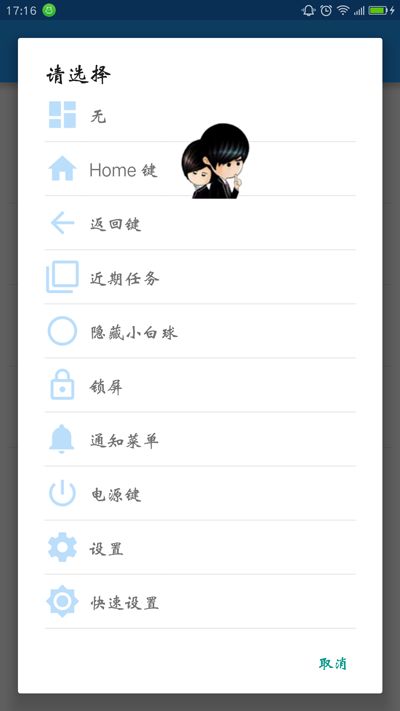
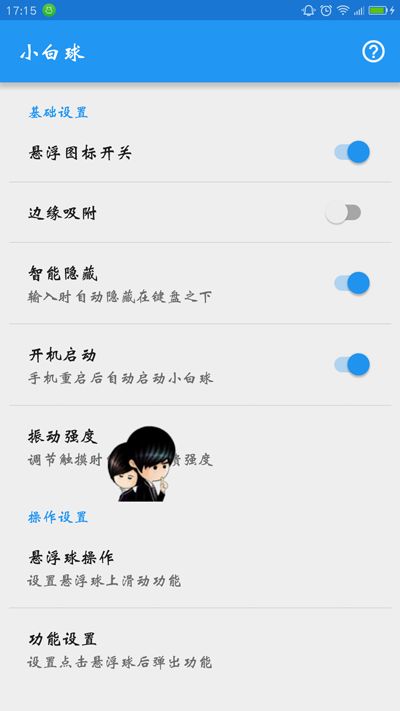
大家可以看上面再张图,这个是做的一个应用“小白球”,如图 1 的小图片本来都是白色的(圆背景的单独设的),但是经过 Tint 着色后就变成了图 2 中的浅蓝色了。
好了,既然理解了tint的含义,我们赶紧看下这一切是如何实现的吧。
其实底层特别简单,了解过渲染的同学应该知道PorterDuffColorFilter这个东西,我们使用SRC_IN的方式,对这个Drawable进行颜色方面的渲染,就是在这个Drawable中有像素点的地方,再用我们的过滤器着色一次。
实际上如果要我们自己实现,只用获取View的backgroundDrawable之后,设置下colorFilter即可。
看下最核心的代码就这么几行
if (filter == null) {
    // Cache miss, so create a color filter and add it to the cache
    filter = new PorterDuffColorFilter(color, mode);
}

d.setColorFilter(filter);
通常情况下,我们的mode一般都是SRC_IN,如果想了解这个属性相关的资料,这里是传送门: http://blog.csdn.net/t12x3456/article/details/10432935 (中文)
由于API Level 21以前不支持background tint在xml中设置,于是提供了ViewCompat.setBackgroundTintList方法和ViewCompat.setBackgroundTintMode用来手动更改需要着色的颜色,但要求相关的View继承TintableBackgroundView接
源码解析
以 EditText 为例,其它的基本一致
public AppCompatEditText(Context context, AttributeSet attrs, int defStyleAttr) {
    super(TintContextWrapper.wrap(context), attrs, defStyleAttr);

    ...

    ColorStateList tint = a.getTintManager().getTintList(a.getResourceId(0, -1)); //根据背景的resource id获取内置的着色颜色。
    if (tint != null) {
        setInternalBackgroundTint(tint); //设置着色
    }

    ...
}

private void setInternalBackgroundTint(ColorStateList tint) {
    if (tint != null) {
        if (mInternalBackgroundTint == null) {
            mInternalBackgroundTint = new TintInfo();
        }
        mInternalBackgroundTint.mTintList = tint;
        mInternalBackgroundTint.mHasTintList = true;
    } else {
        mInternalBackgroundTint = null;
    }
    //上面的代码是记录tint相关的信息。
    applySupportBackgroundTint();  //对背景应用tint
}


 private void applySupportBackgroundTint() {
    if (getBackground() != null) {
        if (mBackgroundTint != null) {
            TintManager.tintViewBackground(this, mBackgroundTint);
        } else if (mInternalBackgroundTint != null) {
            TintManager.tintViewBackground(this, mInternalBackgroundTint); //最重要的,对tint进行应用
        }
    }
}
然后我们进入tintViewBackground看下TintManager里面的源码
 public static void tintViewBackground(View view, TintInfo tint) {
    final Drawable background = view.getBackground();
    if (tint.mHasTintList) {
        //如果设置了tint的话,对背景设置PorterDuffColorFilter
        setPorterDuffColorFilter(
                background,
                tint.mTintList.getColorForState(view.getDrawableState(),
                        tint.mTintList.getDefaultColor()),
                tint.mHasTintMode ? tint.mTintMode : null);
    } else {
        background.clearColorFilter();
    }

    if (Build.VERSION.SDK_INT <= 10) {
        // On Gingerbread, GradientDrawable does not invalidate itself when it's ColorFilter
        // has changed, so we need to force an invalidation
        view.invalidate();
    }
}


private static void setPorterDuffColorFilter(Drawable d, int color, PorterDuff.Mode mode) {
    if (mode == null) {
        // If we don't have a blending mode specified, use our default
        mode = DEFAULT_MODE;
    }

    // First, lets see if the cache already contains the color filter
    PorterDuffColorFilter filter = COLOR_FILTER_CACHE.get(color, mode);

    if (filter == null) {
        // Cache miss, so create a color filter and add it to the cache
        filter = new PorterDuffColorFilter(color, mode);
        COLOR_FILTER_CACHE.put(color, mode, filter);
    }

    // 最最重要,原来是对background drawable设置了colorFilter 完成了我们要的功能。
    d.setColorFilter(filter);
}

private void applySupportBackgroundTint() {
    if (getBackground() != null) {
        if (mBackgroundTint != null) {
            TintManager.tintViewBackground(this, mBackgroundTint);
        } else if (mInternalBackgroundTint != null) {
            TintManager.tintViewBackground(this, mInternalBackgroundTint); //最重要的,对tint进行应用
        }
    }
}
以上是对API21以下的兼容。
如果我们要实现自己的AppCompat组件实现tint的一些特性的话,我们就可以指定好ColorStateList,利用TintManager对自己的背景进行着色,当然需要对外开放设置的接口的话,我们还要实现TintableBackgroundView接口,然后用ViewCompat.setBackgroundTintList进行设置,这样能完成对v7以上所有版本的兼容。
自定义控件的着色
public class AppCompatView extends View implements TintableBackgroundView {

    private TintInfo mTintInfo;

    public AppCompatView(Context context) {
        this(context, null);
    }

    public AppCompatView(Context context, AttributeSet attrs) {
        this(context, attrs, 0);
    }

    public AppCompatView(Context context, AttributeSet attrs, int defStyleAttr) {
        super(context, attrs, defStyleAttr);
        EmBackgroundTintHelper.loadFromAttributes(this, attrs, defStyleAttr);
        init();
    }

    private void init() {
        mTintInfo = new TintInfo();
        mTintInfo.mHasTintList = true;
    }

    @Override
    public void setSupportBackgroundTintList(ColorStateList tint) {
        EmBackgroundTintHelper.setSupportBackgroundTintList(this, mTintInfo,tint);
    }

    @Nullable
    @Override
    public ColorStateList getSupportBackgroundTintList() {
        return EmBackgroundTintHelper.getSupportBackgroundTintList(mTintInfo);
    }

    @Override
    public void setSupportBackgroundTintMode(@Nullable PorterDuff.Mode tintMode) {
        EmBackgroundTintHelper.setSupportBackgroundTintMode(this, mTintInfo, tintMode);
    }

    @Nullable
    @Override
    public PorterDuff.Mode getSupportBackgroundTintMode() {
        return EmBackgroundTintHelper.getSupportBackgroundTintMode(mTintInfo);
    }
}
最后
最后打个小广告,并附上 Github 及我的 Blog
- 小白球:http://www.wandoujia.com/apps/me.imli.whiteball
Github:https://github.com/iQuick/AndroidTint
Blog:http://imli.me


