最近因为需要,做了下哔哩哔哩动画这个应用。从数据、素材的抓取、分类、测试,到应用的基本功能实现,确实用了一段时间。下面是做哔哩哔哩动画的开机动画效果的实现。
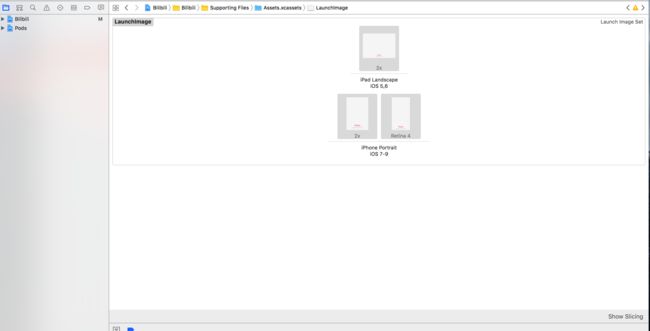
![Uploading LuanchImage设置_552569.png . . .]](http://upload-images.jianshu.io/upload_images/2023147-b27b7518b9e7f8c7.png?imageMogr2/auto-orient/strip%7CimageView2/2/w/1240)
从图一到图二,中间的人物从小到大,从透明到呈现的过程。
实现这个效果并不难,步骤如下
1.在LuanchImage设置开机图片
2.使用CABasicAnimationGroup实现动画效果
这里创建了一个视图控制器类LaunchViewController,用于实现动画效果。
设置两个属性,其中bgImageView是背景图,playImageView是做动画的图片。
@property (nonatomic,strong)UIImageView  *bgImageView;
@property (nonatomic,strong)UIImageView  *playImageView;
给这两个属性懒加载
- (UIImageView *)bgImageView{

   if(!_bgImageView){
       _bgImageView = [[UIImageView alloc] initWithFrame:CGRectMake(0, 0, ScreenWidth, ScreenHeight)];
       _bgImageView.image = [UIImage imageNamed:@"bilibili_splash_iphone_bg"];
   }
   return _bgImageView;
}

- (UIImageView *)playImageView{

   if(!_playImageView){
       _playImageView = [[UIImageView alloc] initWithFrame:CGRectMake(ScreenWidth/2, ScreenHeight/2-100, 1, 1.3)];
       _playImageView.image = [UIImage imageNamed:@"bilibili_splash_default"];
   }
   return _playImageView;
}
在viewDidLoad中把视图添加上去
    [self.view addSubview:self.bgImageView];
    [self.bgImageView addSubview:self.playImageView];
    [self performSelector:@selector(animationLunch) withObject:self afterDelay:0];
animationLunch中实现组合动画效果
- (void)animationLunch{

    CGFloat duration = 1.5;
    CABasicAnimation *scale = [CABasicAnimation animationWithKeyPath:@"transform.scale"];
    scale.fromValue = @1;
    scale.toValue = @(ScreenWidth - 40);
    scale.duration = duration;
    scale.repeatCount = 1;
    scale.timingFunction = [CAMediaTimingFunction functionWithName:kCAMediaTimingFunctionLinear];

    CABasicAnimation *opacity = [CABasicAnimation animationWithKeyPath:@"opacity"];
    opacity.fromValue = @0;
    opacity.toValue = @1;
    opacity.duration = duration;
    scale.repeatCount = 1;

    CAAnimationGroup *animationGroup = [CAAnimationGroup animation];
    animationGroup.animations = @[scale,opacity];
    animationGroup.duration = duration;
    animationGroup.repeatCount = 1;
    //如果是一个动画CAAnimation,则需要将其removedOnCompletion设置为NO,要不然fillMode不起作用
    animationGroup.removedOnCompletion = NO;
    //决定当前在非active时间段的行为,比如动画开始之前,动画结束之后
    animationGroup.fillMode =kCAFillModeForwards;
    animationGroup.delegate = self;
    [self.playImageView.layer addAnimation:animationGroup forKey:nil];
}
让LaunchViewController遵循代理,并实现CAAnimationDelegate协议
- (void)animationDidStop:(CAAnimation *)anim finished:(BOOL)flag{
    [NSThread sleepForTimeInterval:2.0];
    //移除开机动画
    [self.bgImageView removeFromSuperview];
}
这个类要做的事情完成了,回到AppDelegate中,导入刚创建的类头文件,在application: didFinishLaunchingWithOptions:中加入以下代码,把动画添加到场景中
  _launchVC = [[LaunchViewController alloc] init];
    //添加到场景
    [self.window addSubview:_launchVC.view];
    //放到最顶层
    [self.window bringSubviewToFront:_launchVC.view];
    [self performSelector:@selector(removeLunch) withObject:self afterDelay:2.0];
到此,哔哩哔哩动画的开机动画效果就实现了。


