一、基本配色
set number
set showcmd
set incsearch
set expandtab
set showcmd
set history=400
set autoread
set ffs=unix,mac,dos
set hlsearch
set shiftwidth=2
set wrap
set ai
set si
set cindent
set termencoding=unix
set tabstop=2
set nocompatible
set showmatch
set fileencodings=utf-8,ucs-bom,gb18030,gbk,gb2312,cp936
set termencoding=utf-8
set encoding=utf-8
set fileformats=unix
set ttyfast
syntax on
set imcmdline
set previewwindow
set showfulltag
set cursorline
set ruler
" set mouse=a
" 设置背景主题
color ron
"set guifont=Courier_New:h10:cANSI   " 设置字体
" 用浅色高亮当前行
" autocmd InsertLeave * se nocul
 " 用浅色高亮当前行
autocmd InsertEnter * se cul
" 显示标尺
set ruler
" 输入的命令显示出来,看的清楚些
set showcmd
" 光标移动到buffer的顶部和底部时保持3行距离
set scrolloff=3
 "状态行显示的内容
set statusline=%F%m%r%h%w\ [FORMAT=%{&ff}]\ [TYPE=%Y]\ [POS=%l,%v][%p%%]\ %{strftime(\"%d/%m/%y\ -\ %H:%M\")}
" 启动显示状态行(1),总是显示状态行(2)
set laststatus=2
" 设置tab键的空格数
set tabstop=4
" 设置tab空格数
set softtabstop=4
快捷键:
映射ff为esc键,esc太远了:
inoremap jj
让配置文件自动生效:
" 让配置变更立即生效
autocmd BufWritePost $MYVIMRC source $MYVIMRC
二、安装vundle来管理插件
- 在~/目录下面创建 .vim 目录,然后再创建 .vim/bundle
- cd ~/.vim/bundle 目录,然后执行 git clone https://github.com/gmarik/vundle.git 等待完成
三、配置vundle、安装插件
set nocompatible              " be iMproved, required
filetype off                  " required

" set the runtime path to include Vundle and initialize
set rtp+=~/.vim/bundle/vundle/
call vundle#rc()
" alternatively, pass a path where Vundle should install plugins
"let path = '~/some/path/here'
"call vundle#rc(path)

" let Vundle manage Vundle, required
Plugin 'gmarik/vundle'
Plugin 'scrooloose/nerdtree.git'  " 这里是添加的NERDTree
" The following are examples of different formats supported.
" Keep Plugin commands between here and filetype plugin indent on.
" scripts on GitHub repos
" Plugin 'tpope/vim-fugitive'  " 官方添加的,用不上就注释了
" Plugin 'Lokaltog/vim-easymotion'  " 官方添加的,用不上就注释了
" Plugin 'tpope/vim-rails.git'  " 官方添加的,用不上就注释了
" The sparkup vim script is in a subdirectory of this repo called vim.
" Pass the path to set the runtimepath properly.
" Plugin 'rstacruz/sparkup', {'rtp': 'vim/'}  " 官方添加的,用不上就注释了
" scripts from http://vim-scripts.org/vim/scripts.html
" Plugin 'L9'  " 官方添加的,用不上就注释了
" Plugin 'FuzzyFinder'  " 官方添加的,用不上就注释了
" scripts not on GitHub
" Plugin 'git://git.wincent.com/command-t.git'  " 官方添加的,用不上就注释了
" git repos on your local machine (i.e. when working on your own plugin)
"Plugin 'file:///home/gmarik/path/to/plugin'  " 官方添加的,用不上就注释了
" ...

filetype plugin indent on     " required
" To ignore plugin indent changes, instead use:
"filetype plugin on
"
" Brief help
" :PluginList          - list configured plugins
" :PluginInstall(!)    - install (update) plugins
" :PluginSearch(!) foo - search (or refresh cache first) for foo
" :PluginClean(!)      - confirm (or auto-approve) removal of unused plugins
"
" see :h vundle for more details or wiki for FAQ
" NOTE: comments after Plugin commands are not allowed.
" Put your stuff after this line
- 可以在配置中添加github中有的插件
Plugin 'scrooloose/nerdtree.git'
这里是添加的NERDTree,对应的github地址是:https://github.com/scrooloose/nerdtree.git 前面的https://github.com/ 可以不用填写,如果地址为非github官方的,则用完整的url。 - 随便开个窗口,从控制台打开vim , 执行 :PluginInstall,即可安装 Plugin 指定的插件
四、插件配置
1. NERDTree配置
" NERDTree的配置--------------------------------------
" 1.按F2键,打开或者关闭
nmap  :NERDTreeToggle
 " 启动vim,自动打开NERDtree
 autocmd vimenter * NERDTree
" 如果没有打开具体文件,自动加载
 autocmd StdinReadPre * let s:std_in=1
 autocmd VimEnter * if argc() == 0 && !exists("s:std_in") | NERDTree | endif
" 2.自动加载NERDTREE
" autocmd BufRead *  25vsp  ./

" 显示隐藏文件
let NERDTreeShowHidden=1

" NERDTress File highlighting
function! NERDTreeHighlightFile(extension, fg, bg, guifg, guibg)
  exec 'autocmd filetype nerdtree highlight ' . a:extension .' ctermbg='. a:bg .' ctermfg='. a:fg .' guibg='. a:guibg .' guifg='. a:guifg
  exec 'autocmd filetype nerdtree syn match ' . a:extension .' #^\s\+.*'. a:extension .'$#'
endfunction

call NERDTreeHighlightFile('jade', 'green', 'none', 'green', '#151515')
call NERDTreeHighlightFile('ini', 'yellow', 'none', 'yellow', '#151515')
call NERDTreeHighlightFile('md', 'blue', 'none', '#3366FF', '#151515')
call NERDTreeHighlightFile('yml', 'yellow', 'none', 'yellow', '#151515')
call NERDTreeHighlightFile('config', 'yellow', 'none', 'yellow','#151515')
call NERDTreeHighlightFile('conf', 'yellow', 'none', 'yellow', '#151515')
call NERDTreeHighlightFile('json', 'yellow', 'none', 'yellow', '#151515')
call NERDTreeHighlightFile('html', 'yellow', 'none', 'yellow', '#151515')
call NERDTreeHighlightFile('styl', 'cyan', 'none', 'cyan', '#151515')
call NERDTreeHighlightFile('css', 'cyan', 'none', 'cyan', '#151515')
call NERDTreeHighlightFile('coffee', 'Red', 'none', 'red', '#151515')
call NERDTreeHighlightFile('js', 'Red', 'none', '#ffa500', '#151515')
call NERDTreeHighlightFile('php', 'Magenta', 'none', '#ff00ff', '#151515')
" 映射tt为ctrl+ww 少按一次
map tt w

" NERDTree的配置结束--------------------------------
快捷键
h j k l移动光标定位
ctrl+w+w 光标在左右窗口切换
ctrl+w+r 切换当前窗口左右布局
ctrl+p 模糊搜索文件
gT 切换到前一个tab
g t 切换到后一个tab
ctrl+o,ctrl+i可以在最近打开的文件中切换
可以在.vimrc里为标签页进行的配置,映射ctrl+w为ctrl+ww 少按一次
map  w
o 打开关闭文件或者目录,如果是文件的话,光标出现在打开的文件中
O 打开结点下的所有目录
X 合拢当前结点的所有目录
x 合拢当前结点的父目录
i和s水平分割或纵向分割窗口打开文件
u 打开上层目录
t 在标签页中打开
T 在后台标签页中打开
p 到上层目录
P 到根目录
K 到同目录第一个节点
J 到同目录最后一个节点
m 显示文件系统菜单(添加、删除、移动操作)
? 帮助
:q 关闭
2.安装配色主题
Solarized
- 安装:Bundle 'altercation/vim-colors-solarized'
- 特点:护眼、舒适
- 注意:fedora系统中,除了在.vimrc中进行相应配置外,还需在终端的Profile Preferences->Colors->Background color中设置颜色为dark(与该主题的背景色相同),才能完全展现该主题的效果。
-
效果:
2. phpcomplete插件 - php自动补全配置
要使用php补全,参考https://github.com/shawncplus/phpcomplete.vim 说明
- 在
~/.vimrc中添加:Plugin 'shawncplus/phpcomplete.vim' - vi中执行:
:PluginInstall - 在
~/.vimrc中添加:
" php自动补全
set omnifunc=phpcomplete#CompletePHP
autocmd FileType php set omnifunc=phpcomplete#CompletePHP
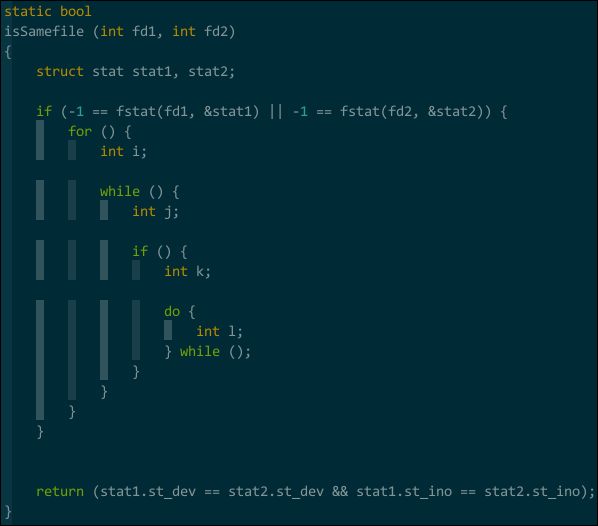
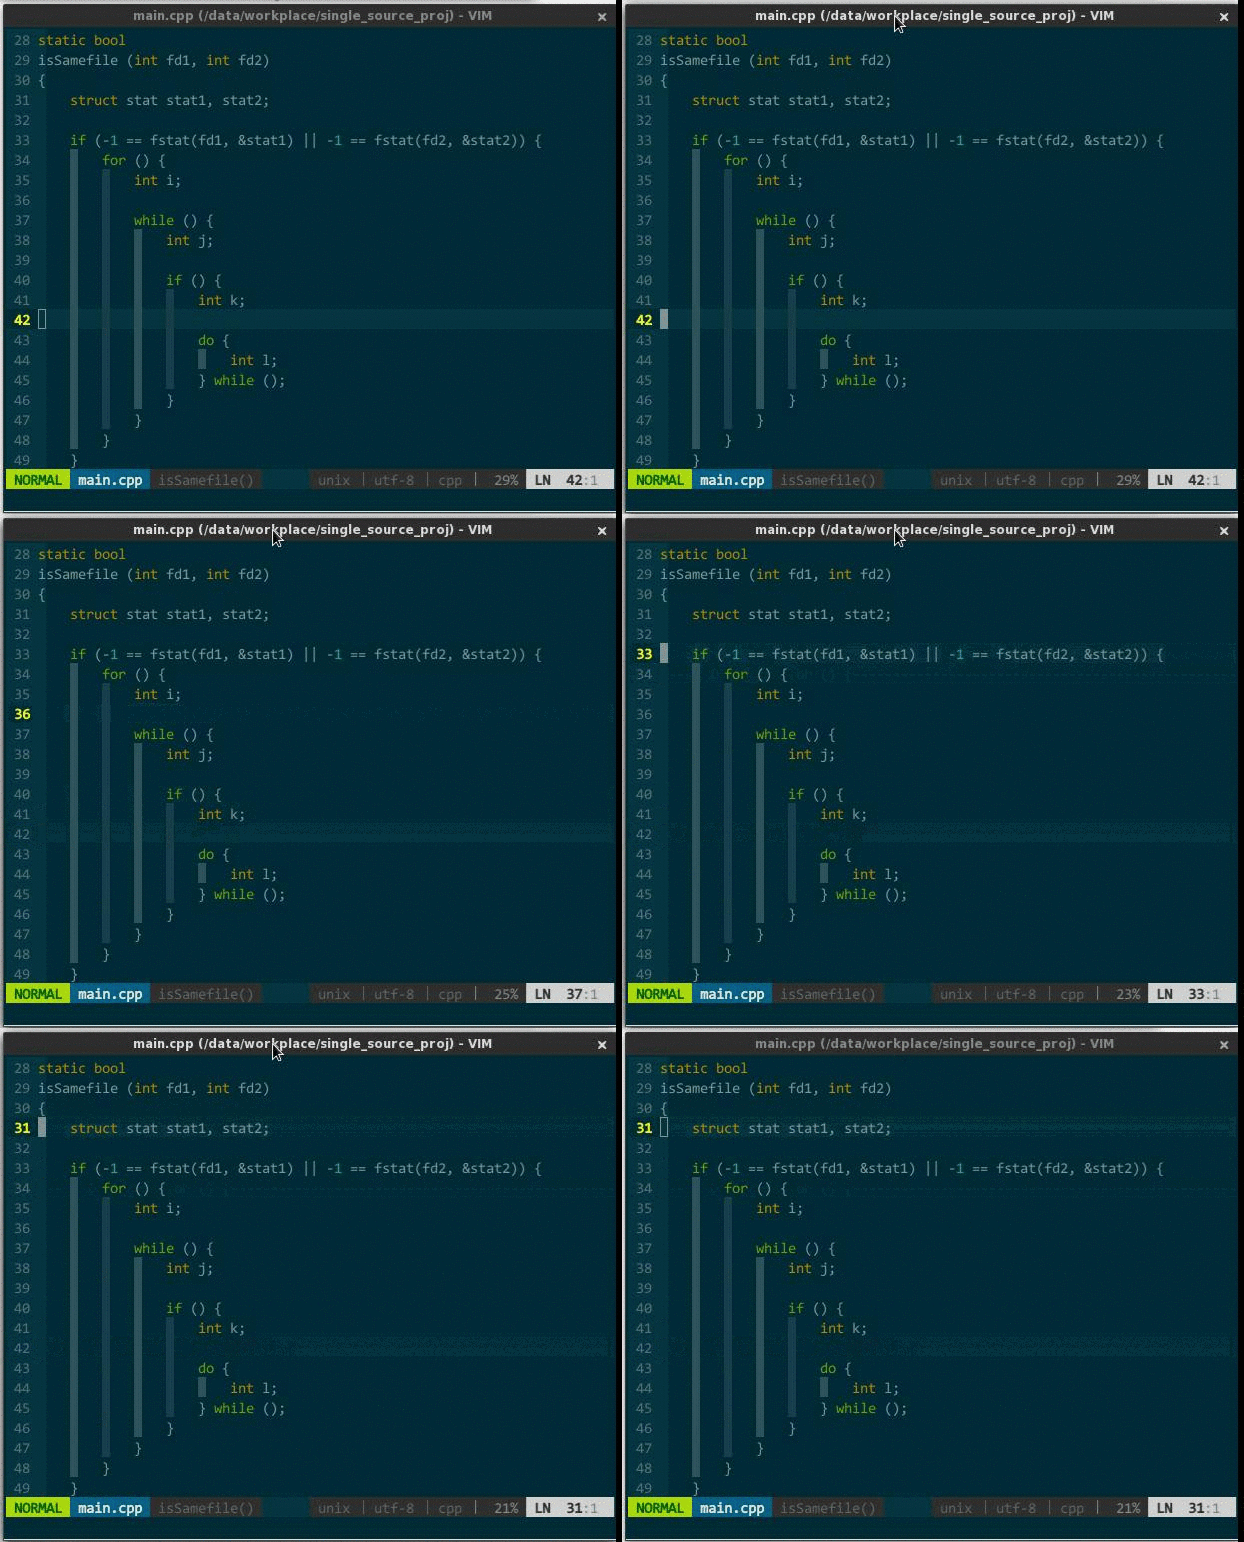
3. Indent Guides 可视化的方式能将相同缩进的代码关联起来
- Indent Guides(https://github.com/nathanaelkane/vim-indent-guides )
- 安装好该插件后,增加如下配置信息:
" 随 vim 自启动
let g:indent_guides_enable_on_vim_startup=1
" 从第二层开始可视化显示缩进
let g:indent_guides_start_level=2
" 色块宽度
let g:indent_guides_guide_size=1
" 快捷键 i 开/关缩进可视化:
nmap  i IndentGuidesToggle
重启 vim 效果如下:
4. Powerline状态栏
- Powerline(https://github.com/Lokaltog/vim-powerline )美化状态栏,在 .vimrc 中设定状态栏主题风格:
" 设置状态栏主题风格
let g:Powerline_colorscheme='solarized256'
5. 代码折叠
- 有时为了去除干扰,集中精力在某部分代码片段上,我会把不关注部分代码折叠起来。
- vim 自身支持多种折叠:手动建立折叠(manual)、基于缩进进行折叠(indent)、基于语法进行折叠(syntax)、未更改文本构成折叠(diff)等等,其中,indent、syntax 比较适合编程,按需选用。增加如下配置信息:
" 基于缩进或语法进行代码折叠
"set foldmethod=indent
set foldmethod=syntax
" 启动 vim 时关闭折叠代码
set nofoldenable
-
操作:za,打开或关闭当前折叠;zr, 关闭当前折叠;zM,关闭所有折叠;zR,打开所有折叠。效果如下:
6. taglist插件
- 插件地址:https://github.com/vim-scripts/taglist.vim
在.vimrc里加入:
Plugin 'vim-scripts/taglist.vim'
然后:PluginInstall安装。 - 配置:
let Tlist_Show_One_File = 1            "不同时显示多个文件的tag,只显示当前文件的
let Tlist_Exit_OnlyWindow = 1          "如果taglist窗口是最后一个窗口,则退出vim
let Tlist_Use_Right_Window = 1         "在右侧窗口中显示taglist窗口
- 快捷键:
:TlistOpen打开;:TlistClose关闭。
五、括号等格式自动补全
inoremap ( ()i
inoremap [ []i
inoremap { {}O
inoremap < <>i

autocmd Syntax html,vim inoremap < >i| inoremap > =ClosePair('>')
inoremap ) =ClosePair(')')
inoremap } =CloseBracket()
inoremap " =QuoteDelim('"')
inoremap ' =QuoteDelim("'")

function ClosePair(char)
 if getline('.')[col('.') - 1] == a:char
 return "\"
 else
 return a:char
 endif
endf

function CloseBracket()
 if match(getline(line('.') + 1), '\s*}') < 0
 return "\}"
 else
 return "\j0f}a"
 endif
endf

function QuoteDelim(char)
 let line = getline('.')
 let col = col('.')
 if line[col - 2] == "\\"
 return a:char
 elseif line[col - 1] == a:char
 return "\"
 else
 return a:char.a:char."\i"
 endif
endf


