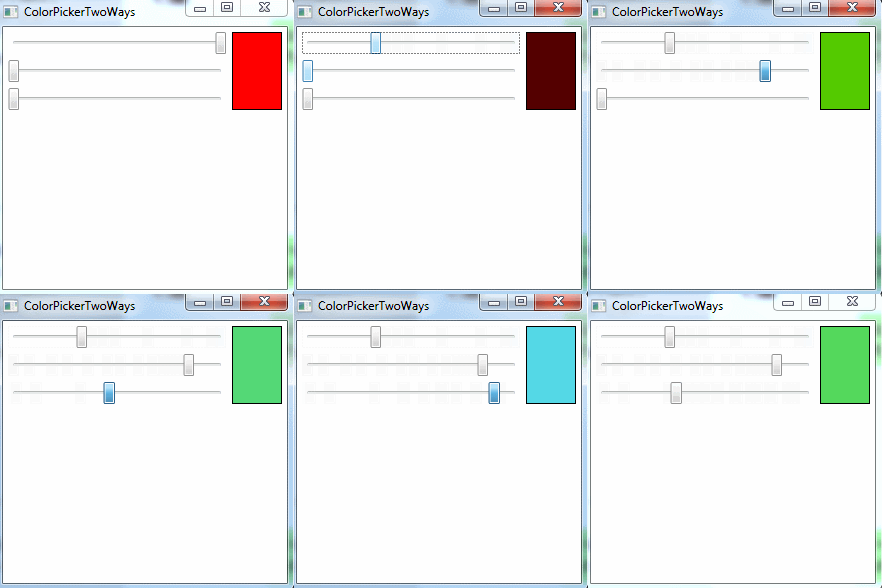
用户控件的目标是提供增补控件模板的设计表面,提供一种定义控件的快速方法,代价是失去了将来的灵活性。如果喜欢用户控件的功能,但需要修改使其可视化外观,使用这种方法就有问题了。例如,设想希望使用相同的颜色拾取器,但希望使用不同的“皮肤”,将其更好地融合到已有的应用程序窗口中。可以通过样式来改变用户控件的某些方面,但该控件的一些部分是在内部锁定,并硬编码到标记中。例如,无法将预览矩形移动到滑动条的左边。
解决方法是创建无外观控件——继承自控件基类,但没有设计表面的控件。相反,这个控件将其标记放到默认模板中,可替换默认模板而不会影响控件逻辑。
一、修改颜色拾取器的代码
将颜色拾取器改成无外观控件并不难。第一步很容易——只需要改变类的声明,如下所示:
public class ColorPicker:System.Windows.Controls.Control
    {

    }
在这个示例中,ColorPicker类继承自Control类。继承自FrameworkElement类是不合适的,因为颜色拾取器允许与用户进行交互,而且其他高级的类不能准确地描述颜色拾取器的行为。例如,颜色拾取器不允许在内部嵌套其他内容,所以继承自ContentControl类也是不合适的。
ColorPicker类中的代码与用于用户控件的代码是相同的(除了必须删除构造函数中的InitializeComponent()方法调用)。可使用相同的方法定义依赖项属性和路由事件。唯一的区别是需要通知WPF,将为控件类提供新样式。该样式将提供新的控件模板(如果不执行该步骤,将继续使用在基类中定义的模板)。
为通知WPF正在提供新的样式,需要在子弹女工艺控件类的静态构造函数中调用OverrideMetadata()方法。需要在DefaultStyleKeyProperty属性上调用该方法,该属性是为自定义控件定义默认样式的依赖性属性。需要的代码如下所示:
DefaultStyleKeyProperty.OverrideMetadata(typeof(ColorPicker), new FrameworkPropertyMetadata(typeof(ColorPicker)));
如果希望使用其他控件类的模板,可提供不同的类型,但几乎总是为每个自定义控件创建特定的样式。
二、修改颜色拾取器的标记
添加对OverrideMetadata()方法的调用后,只需要插入正确的样式。需要将样式放在名为generic.xaml的资源字典中,该资源字典必须放在项目文件夹的Themes子文件夹中。这样,该样式就会被识别为自定义控件的默认样式。下面列出添加generic.xaml文件的具体步骤:
(1)在Solution Explorer中右键类库项目,并选择Add|New Folder菜单项。
(2)将新建文件夹命名为Themes。
(3)右击Themes文件夹,并选择Add|New Item菜单项。
(4)在Add New Item对话框中选择资源字典,输入名称generic.xaml,并单击Add按钮。
下图显示了Themes文件夹中的generic.xaml文件。
通常,自定义控件库会包含几个控件。为了保持它们的样式相互独立以便编辑,generic.xaml文件通常使用资源字典合并功能。下面是标记显示了generic.xaml文件,该文件从ColorPicker.xaml资源字典中提取资源,该资源字典位于CustomControls控件库的Themes文件夹中:
<ResourceDictionary xmlns="http://schemas.microsoft.com/winfx/2006/xaml/presentation"
                    xmlns:x="http://schemas.microsoft.com/winfx/2006/xaml">
    <ResourceDictionary.MergedDictionaries>
        <ResourceDictionary Source="/CustomControls;component/Themes/ColorPicker.xaml">
        ResourceDictionary>
    ResourceDictionary.MergedDictionaries>
ResourceDictionary>
自定义的控件样式必须使用TargetType特性来将自身自动关联到颜色拾取器。下面是ColorPicker.xaml文件中标记的基本结构:
<ResourceDictionary xmlns="http://schemas.microsoft.com/winfx/2006/xaml/presentation"
                    xmlns:x="http://schemas.microsoft.com/winfx/2006/xaml"
                    xmlns:local="clr-namespace:CustomControls">
    <Style TargetType="{x:Type local:ColorPicker}">
        ...
    Style>
ResourceDictionary>
可使用样式设置控件类中的任意属性(无论是继承自基类的属性还是新增属性)。但在此,样式最有用的任务是应用新目标,新目标定义了控件的默认可视化外观。
很容易就能将普通标记(如颜色拾取器使用的标记)转换到控件目标中。但要注意以下几点:
- 当创建链接到父控件类属性的绑定表达式时,不能使用ElementName属性。而需要使用RelativeSource属性指示希望绑定到父控件。如果单向绑定完全能够满足需要,通常可以使用轻量级的TemplateBinding标记表达式,而不需要使用功能完备的数据绑定。
- 不能在控件模板中关联事件处理程序。相反,需要为元素提供能够识别的名称,并在控件构造函数中通过代码为他们关联处理程序。
- 除非希望关联事件处理程序或通过代码与它进行交互,否则不要在控件模板中命名元素。当命名希望使用的元素时,使用“PART_元素名”的形式进行命名。
遵循上面几点,可为颜色拾取器创建以下模板:
 <Style TargetType="{x:Type local:ColorPicker}">
        <Setter Property="Template">
            <Setter.Value>
                <ControlTemplate TargetType="{x:Type local:ColorPicker}">
                    <Grid>
                        <Grid.RowDefinitions>
                            <RowDefinition Height="Auto"/>
                            <RowDefinition Height="Auto"/>
                            <RowDefinition Height="Auto"/>
                        Grid.RowDefinitions>
                        <Grid.ColumnDefinitions>
                            <ColumnDefinition>ColumnDefinition>
                            <ColumnDefinition Width="Auto"/>
                        Grid.ColumnDefinitions>
                        <Slider Minimum="0" Maximum="255"
                                Margin="{TemplateBinding Padding}"
                                Value="{Binding Path=Red,
                             RelativeSource={RelativeSource TemplatedParent}}"/>
                        <Slider Grid.Row="1" Minimum="0" Maximum="255"
                                Margin="{TemplateBinding Padding}"
                                Value="{Binding Path=Green,
                             RelativeSource={RelativeSource TemplatedParent}}"/>
                        <Slider Grid.Row="2" Minimum="0" Maximum="255"
                                Margin="{TemplateBinding Padding}"
                                Value="{Binding Path=Blue,
                             RelativeSource={RelativeSource TemplatedParent}}"/>
                        <Rectangle Grid.Column="1" Grid.RowSpan="3"
                                   Margin="{TemplateBinding Padding}" Width="50"
                                   Stroke="Black" StrokeThickness="1">
                            <Rectangle.Fill>
                                <SolidColorBrush
                                    Color="{Binding Path=Color,RelativeSource={RelativeSource TemplatedParent}}">SolidColorBrush>
                            Rectangle.Fill>
                        Rectangle>
                    Grid>
                ControlTemplate>
            Setter.Value>
        Setter>
    Style>
正如上面看到的,本例已用TemplateBinding扩展提到一些绑定表达式。其他一些绑定表达式仍使用Binding扩展,但将RelativeSource设置为指向模板的父元素(自定义控件)。尽管TemplateBinding和将RelativeSource属性设置为TemplatedParent值得Binding的作用相同——从自定义控件的属性中提取数据——但是使用量级更轻的TemplateBinding总是合适的。如果需要双向绑定(与滑动条一样)或绑定到继承自Freezable的类(如SolidColorBrush类)的属性,TemplateBinding就不能工作了。
三、精简控件模板
通过上面设计,颜色拾取器控件模板填充了需要的全部内容,可按与使用颜色拾取器相同的方式来使用。然而,仍可通过移除一些细节来简化模板。
现在,所有希望提供自定义模板的控件使用这必须添加大量的绑定表达式,已确保控件能够继续工作。这并不难,但是很繁琐。另一种选择是,在控件自身的初始化代码中配置所有绑定表达式。这样,模板就不需要指定这些细节了。
1、添加部件名称
为了让这一系统能够工作,代码要能找到所需的元素。WPF控件通过名称定为它们需要的元素。所以,元素的名称变成自定义控件公有接口的一部分,而且需要恰当的描述性名称。根据约定,这些名称以PART_开头,后跟元素名称。元素名称的首字母要大写,就像数学名称。对于需要的元素名称,PART_RedSlider是合适的选择,而PART_sldRed、PART_redSlider以及RedSlider等名称都不合适。
例如,下面的标记演示了如何通过删除三个滚动条的Value数学的绑定表达式,并为三个滑动条添加PART_名称,从而为通过代码设置绑定做好准备。
<Slider Name="PART_RedSlider" Minimum="0" Maximum="255"
                                Margin="{TemplateBinding Padding}"
                               />
<Slider Name="PART_GreemSlider" Grid.Row="1" Minimum="0" Maximum="255"
                                Margin="{TemplateBinding Padding}"
                                />
<Slider Name="PART_BlueSlider" Grid.Row="2" Minimum="0" Maximum="255"
                                Margin="{TemplateBinding Padding}"
                                />
注意,Margin数学仍使用绑定表达式添加内边距,但这是一个可选的细节,可以很容易地从自定义模板中去掉该细节(可选择硬编码内边距或者使用不同的布局),
为确保获得更大的灵活性,这是没有为Rectangle元素提供名称,而是为其内部的SolidColorBrush指定了名称。这样,可根据模板为颜色预览功能使用任何形状或任意元素。
<Rectangle Grid.Column="1" Grid.RowSpan="3"
                                   Margin="{TemplateBinding Padding}" Width="50"
                                   Stroke="Black" StrokeThickness="1">
                            <Rectangle.Fill>
                                <SolidColorBrush
                                    x:Name="PART_PreviewBrush">SolidColorBrush>
                            Rectangle.Fill>
Rectangle>
2、操作模板部件
在初始化控件后,可连接绑定表达式,但有一种更好的方法。WPF有一个专用的OnApplyTemplate()方法,如果需要在模板中查找元素并关联事件处理程序或添加数据绑定表达式,应重写该方法。在该方法中,可以通过GetTemplateChild()方法查找所需的元素。
如果没有找到希望处理的元素,推荐的模式就不起作用。也可添加代码来检索该元素,如果元素存在,在检查类型是否正确;如果类型不正确,就引发异常。
下面的代码演示了OnApplyTemplate()方法使用:
        public override void OnApplyTemplate()
        {
            base.OnApplyTemplate();

            RangeBase slider = GetTemplateChild("PART_RedSlider") as RangeBase;
            if (slider != null)
            {
                Binding binding = new Binding("Red");
                binding.Source = this;
                binding.Mode = BindingMode.TwoWay;
                slider.SetBinding(RangeBase.ValueProperty, binding);
            }
            slider = GetTemplateChild("PART_GreenSlider") as RangeBase;
            if (slider != null)
            {
                Binding binding = new Binding("Green");
                binding.Source = this;
                binding.Mode = BindingMode.TwoWay;
                slider.SetBinding(RangeBase.ValueProperty, binding);
            }
            slider = GetTemplateChild("PART_BlueSlider") as RangeBase;
            if (slider != null)
            {
                Binding binding = new Binding("Blue");
                binding.Source = this;
                binding.Mode = BindingMode.TwoWay;
                slider.SetBinding(RangeBase.ValueProperty, binding);
            }

            SolidColorBrush brush = GetTemplateChild("PART_PreviewBrush") as SolidColorBrush;
            if (brush != null)
            {
                Binding binding = new Binding("Color");
                binding.Source = brush;
                binding.Mode = BindingMode.OneWayToSource;
                this.SetBinding(ColorPicker.ColorProperty, binding);
            }
        }
注意,上面代码使用的是System.Windows.Controls.Primitives.RangeBase类(Slider类继承自该类)而不是Slider类。因为RangeBase类提供了需要的最小功能——在本例中是中Value属性。通过尽可能提高代码的通用性,控件使用者可获得更大自由。例如,现在可提供自定义模板,使用不同的派生自RangeBase类的控件代替颜色滑动条。
绑定SolidColorBrush画刷的代码稍有区别,因为SolidColorBrush画刷美誉包含SetBinding()方法(该方法是在FrameworkElement类中定义的)。一个比较容易得变通方法是为ColorPicker.Color属性创建绑定表达式,使用指向源方向的单向绑定。这样,当颜色拾取器的颜色改变后,将自动更新画刷。
为查看这种设计变化的优点,需要创建一个使用颜色拾取器的控件,并提供一个新的控件模板。
3、记录模板部件
对于上面的示例,还有最后一处应予改进。良好的设计指导原则建议为控件声明添加TemplatePart特性,以记录在控件模板中使用了哪些部件名称,以及为每个部件使用了什么类型的控件。从技术角度看,这一步不是必须的,但该文档可为其他使用自定义类的用户提供帮助。
下面是应当为ColorPicker控件类添加的TemplatePart特性:
[TemplatePart(Name = "PART_RedSlider", Type = typeof(RangeBase))]
[TemplatePart(Name = "PART_BlueSlider", Type = typeof(RangeBase))]
[TemplatePart(Name = "PART_GreenSlider", Type = typeof(RangeBase))]
[TemplatePart(Name = "PART_PreviewBrush", Type = typeof(SolidColorBrush))]
public class ColorPicker:System.Windows.Controls.Control
{
}
本实例源码:CustomControlsV2.0.zip

