运用到的知识点:三层架构,mvc,easyui
工具:vs2010(此处有少许与教程有不同的地方),SqlServer2008
关于easyui部分,多参看demo。Jquery easyui 中文参考手册,从github里下载。
jq API参考网站:http://www.php100.com
传志博客教学视频链接:http://yun.itheima.com/course/c129.html
练习代码:https://github.com/956159241/CompanyManageFromItcast
第一步:创建三层架构
可参看:C#asp.net 三层架构简单理解
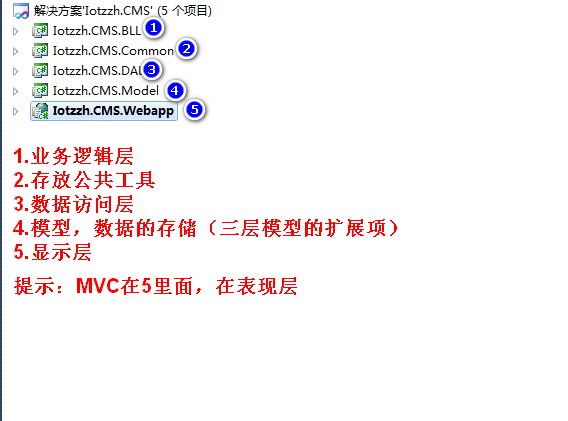
三层结构是一种严格分层方法,即数据访问层(DAL)只能被业务逻辑层(BLL)访问,业务逻辑层只能被表示层(USL)访问,用户通过表示层将请求传送给业务逻辑层,业务逻辑层完成相关业务规则和逻辑,并通过数据访问层访问数据库获得数据,然后按照相反的顺序依次返回将数据显示在表示层。有的三层结构还加了Factory、Model等其他层,实际都是在这三层基础上的一种扩展和应用.
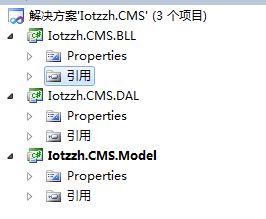
一个简单的三层结构程序一般包括DAL BLL WEB Model几个项目,它们的相互引用关系如下
- WEB引用 BLL,Model
2)BLL引用 DAL,Model
3)DAL引用Model
4)Model无引用
Model的作用:仅用于数据的存储而已,只不过它存储的是复杂的数据。所以如果你的项目中对象都非常简单,那么不用Model而直接传递多个参数也能做成三层架构。
注意:MVC只是在表现层。
这是我在完成了登录界面后做的一个三层架构的流程图,虽然很是片面,可以加深自己对该流程的理解,在接下来的学习中还会不断更正。推荐一个在线编辑历程图的网址:https://www.processon.com
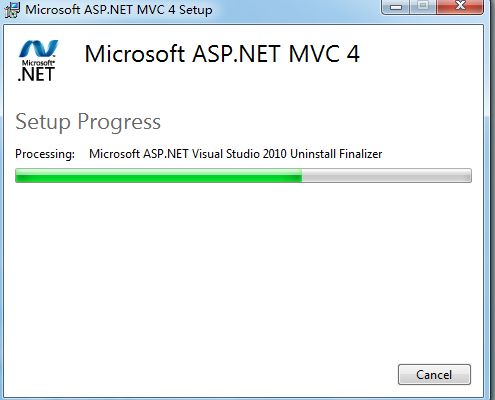
MVC4下载安装:https://docs.microsoft.com/en-us/aspnet/mvc/mvc4
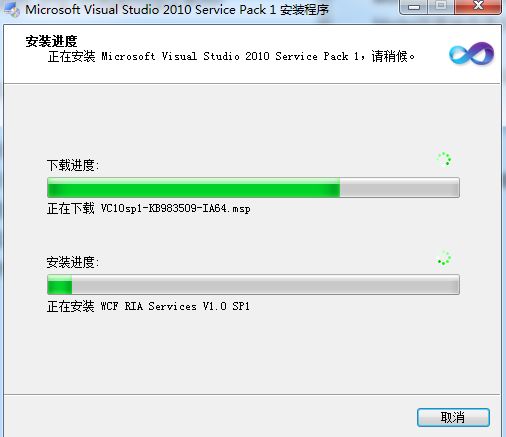
在安装MVC4之前需要安装一下:Microsoft Visual Studio 2010 Service Pack 1 (Installer)
安装好了,可是MVC4在新建项目里却不显示!!!奇怪!!!
更改一下.net framework 的版本再看看……
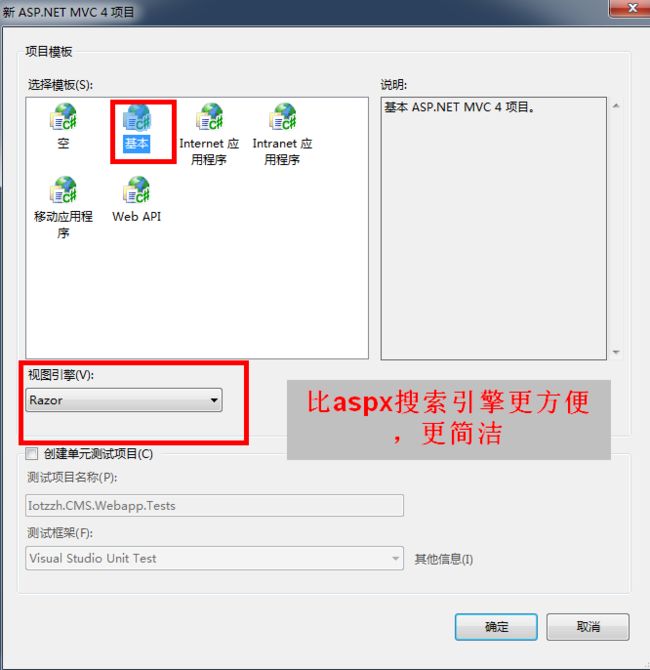
创建mvc4的web项目
再添加一个类库,存放公共工具。
ok,三层架构搭建完成了。
第二步:创建数据库
2.1 创建UserInfo表
设置Id为主键,自动增长;
并为RegTime添加自动添加为当前时间并且在 SQL Server中设置时间格式:
--为RegTime设置为当前时间
ALTER TABLE dbo.UserInfo
    ADD CONSTRAINT DFT_UserInfo_RegTime
    DEFAULT(CURRENT_TIMESTAMP) FOR RegTime;
查询语句:
--查询UserInfo里的数据
SELECT Id,UserName,UserPwd,UserMail,CONVERT(NVARCHAR(50),RegTime,111) AS RegTime
    FROM dbo.UserInfo;
2.2 创建News表
设置Id为主键,自动增长。 把Msg的text改成ntext。设置SubDateTime为当前时间。
2.3 创建NewsComments表
设置Id为主键,自动增长。设置CreateDateTime为当前时间。
其实这些当前时间也可以在插入数据的时候使用getdate()函数获取插入,我这么写之后便不用插入这一列,会默认插入。
第三步:为Model添加类
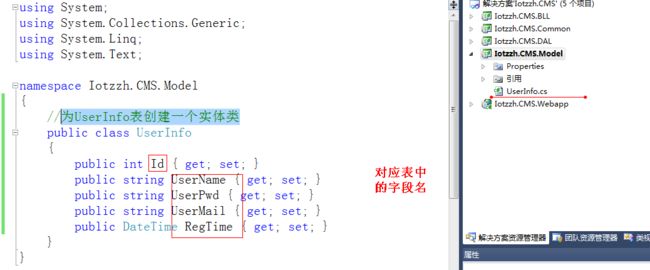
3.1 为UserInfo表创建一个实体类(可使用代码生成工具)
第四步:为数据层添加类
4.1 准备工作,添加连接数据库字符串和添加引用类
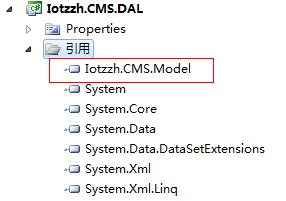
首先引用Iotzzh.CMS.Model类
然后在webconfig里添加链接字符串:
4.2 添加SqlHelper类
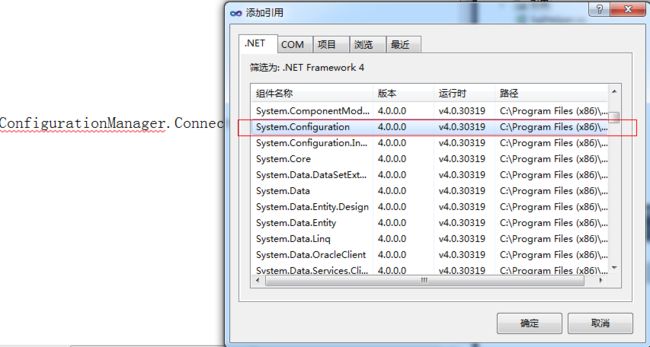
为ConfigurationManager添加引用类:
SqlHelper.cs
using System;
using System.Collections.Generic;
using System.Linq;
using System.Text;
using System.Configuration;
using System.Data;
using System.Data.SqlClient;


namespace Iotzzh.CMS.DAL
{
    //数据处理采用的ado.net
    public class SqlHelper
    {
        private static readonly string connString = ConfigurationManager.ConnectionStrings
            ["connStr"].ConnectionString;
        //添加一个查询
        public static DataTable GetTable(string sql, CommandType type, params SqlParameter[] pars)
        {
            using (SqlConnection conn = new SqlConnection(connString))
            {
                using (SqlDataAdapter apter = new SqlDataAdapter(sql, conn))
                {
                    apter.SelectCommand.CommandType = type;
                    if (pars != null)
                    {
                        apter.SelectCommand.Parameters.AddRange(pars);
                    }
                    DataTable da = new DataTable();
                    apter.Fill(da);
                    return da;
                }
            }
        }
        public static int ExecuteNonquery(string sql,CommandType type,params SqlParameter[] pars)
        {
            using(SqlConnection conn = new SqlConnection(connString))
            {
                using(SqlCommand cmd = new SqlCommand(sql,conn))
                {
                    cmd.CommandType = type;
                    if (pars != null)
                    {
                        cmd.Parameters.AddRange(pars);
                    }
                    conn.Open();
                    return cmd.ExecuteNonQuery();
                }
            }
        }
    }
}
第五步:添加登录界面
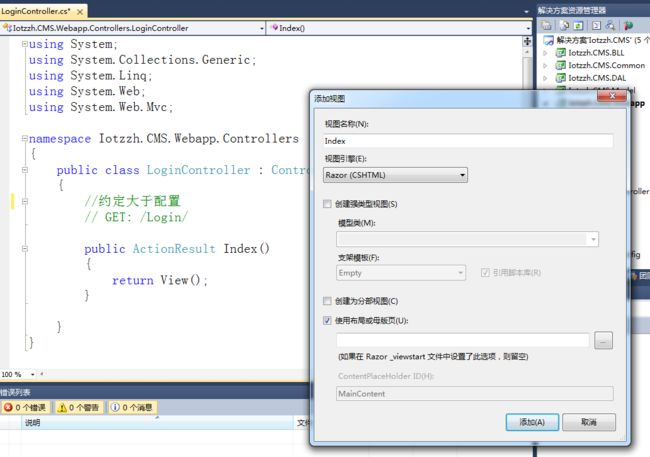
在Webapp下的Controlers下添加LoginController,注意此处在命名的时候,Controller不能去掉,体现出来约定大于配置的一种思想。
5.1 为index添加一个视图:
更改路由方式Iotzzh.Webapp-->Global.asax-->RoutConfig.cs然后修改Home为自己指定的路径。
注意:Images,css放置在content下:
由于此次的学习侧重点不同,涉及到的界面就不再自己布局。路由改好了,图片添加好了,运行下:
验证码功能放入到公共工具类库(Common)中:
为Common添加应用,System.Drawing和System.Web。
生成一下。
那如何调用这个方法呢?
找到webapp下的LoginControler:
- 1 在mvc这个项目里引用Common
- 2 添加引用方法
 //调用分装验证码的类
        public ActionResult ShowValidateCode()
        {
            Itcast.CMS.Common.ValidateCode validateCode = new Itcast.CMS.Common.ValidateCode();
            string code = validateCode.CreateValidateCode(4);//获取验证码.
            Session["code"] = code;
            byte[] buffer = validateCode.CreateValidateGraphic(code);
            return File(buffer, "image/jpeg");
        }
这个地方,教程用的Common,可是我用却不行,只能使用完整的应用路径。
5.2 Index.cshtml 详解
前台代码一:
前台代码二:
这段代码用于更换验证码的显示,每次点击,将img的src更换。
前台代码三:
 @*mvc提供的ajax异步表单*@

  function afterLogin(data) {
            var serverData = data.split(':');
            if (serverData[0] == "ok") {
                window.location.href = "/Home/Index";
            } else if (serverData[0] == "no") {
                $("#errorMsg").text(serverData[1]);
                changeCheckCode();
            } else {
                $("#errorMsg").text("系统繁忙!!");
            }

        }
代码三首先将后台(控制器中返回)返回的数据进行分割。获取到ok或no;如果是ok,则进行页面跳转,如果是no,则显示系统繁忙。
前台代码四(表单代码):
@using(Ajax.BeginForm("UserLogin",new{},new AjaxOptions(){ HttpMethod="post", OnSuccess="afterLogin"},new{id="loginForm"})){
请使用IotzzhCMS系统账号登录
账号:
密码:
验证码:

}
分解:

看不清,换一张
这个地方使用的调用更改验证码的一个方法,就不多说了。
@using(Ajax.BeginForm("UserLogin",new{},new AjaxOptions(){ HttpMethod="post", OnSuccess="afterLogin"},new{id="loginForm"})){
表单
}
这个是采用mvc提供的一个异步表单操作。把数据提交到后台的UserLogin方法里,前台的方法是afterLogin。
5.3 < UserLogin >通过接收到ajax传来的数据,LoginControler里的方法编写
5.3.1 首先在控制器里写UserLogin方法
//通过Ajax获取前台传入的数据
public ActionResult UserLogin()
{
//首先判断已给的验证处是否为空
string validateCode = Session["code"] == null? string.Empty:
Session["code"].ToString();
//如果已给的验证码为空,提示!
if (string.IsNullOrEmpty(validateCode))
{
return Content("no:验证码错误");
}
//此时的session已经赋值给了validateCode,所以可以清空了
Session["code"] = null;
//获取用户输入的验证码
string txtCode = Request["vCode"];
//判断,如果系统的验证码与用户输入的验证码不一致,则提示
if (!validateCode.Equals(txtCode, StringComparison.InvariantCultureIgnoreCase))
{
return Content("no:验证码错误");
}
string userName = Request["LoginCode"];
string userPwd = Request ["LoginPwd"];
注释:这里已经获取前台输入的数据;然后进入逻辑层,对数据进行操作-->5.3.2 UserInfoService.cs
UserInfoService userInfoService = new UserInfoService();
UserInfo userInfo = userInfoService.GetUserInfo(userName,userPwd);
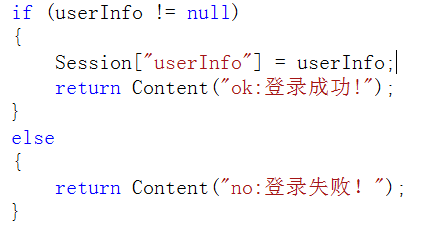
if (userInfo != null)
{
Session["userInfo"] = userInfo;
return Content("ok:登录成功!");
}
else
{
return Content("no:登录失败!");
}
}
5.3.2 逻辑层处理数据,UserInfoService.cs,返回用户名和密码--》Controler下的UserLogin
public class UserInfoService
{
DAL.UserInfoDal UserInfoDal = new DAL.UserInfoDal();
public UserInfo GetUserInfo(string userName, string userPwd)
{
注释:此处需要获取数据库里的数据;---》数据访问层DAL---》5.3.3 UserInfoDal
return UserInfoDal.GetUserInfo(userName,userPwd);
}
}
5.3.3 数据访问层 UserInfoDal(查询验证),如果验证成功,获取用户信息并返回——》UserInfoServices.cs
public UserInfo GetUserInfo(string userName,string userPwd)
{
string sql = "select * from UserInfo where UserName = @UserName" +
" and UserPwd = @UserPwd";
SqlParameter[] pars = {
new SqlParameter("@UserName",SqlDbType.NVarChar,50),
new SqlParameter("@UserPwd",SqlDbType.NVarChar,50)
};
pars[0].Value = userName;
pars[1].Value = userPwd;
DataTable da = SqlHelper.GetTable(sql, CommandType.Text, pars);
UserInfo userInfo = null;
if (da.Rows.Count > 0)
{
userInfo = new UserInfo();
LoadEntity(userInfo,da.Rows[0]);
}
return userInfo;
}
public void LoadEntity(UserInfo userInfo, DataRow row)
{
userInfo.Id = Convert.ToInt32(row["Id"]);
//判断是否为空,对于上面的Id也可以做此操作,由于设置了主键不会为空的
//就没有必要执行这一步了
userInfo.UserName = row["UserName"] != DBNull.Value?
row["UserName"].ToString():string.Empty;
userInfo.UserPwd = row["UserPwd"] != DBNull.Value ?
row["UserPwd"].ToString() : string.Empty;
userInfo.UserMail = row["UserMail"] != DBNull.Value ?
row["UserMail"].ToString() : string.Empty;
userInfo.RegTime = Convert.ToDateTime(row["RegTime"]);
}
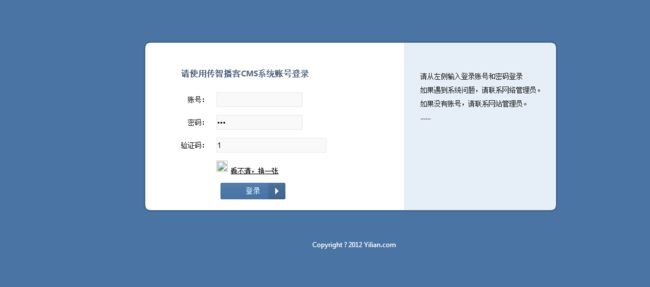
5.4 登录界面的运行展示
第六步 添加Home页面
6.1 先创建一个控制器HomeControler然后创建Home视图。
拷贝jq里面的theams到webapp下的content下(里面包含css样式和图标等):
添加jq和easyUI的引用,这里如果右侧的script里面没有需要自行下载导入:
看一下基本界面:
然后填充一下左侧和底部的内容。
6.2 在右侧区域(核心区域添加一个表格,显示新闻列表)
首先,为核心的新闻列表内容添加Controler(控制器)和view(视图)。
然后在区域内添加一个tabs,里面嵌入一个iframe,引入AdminNewList/Index。
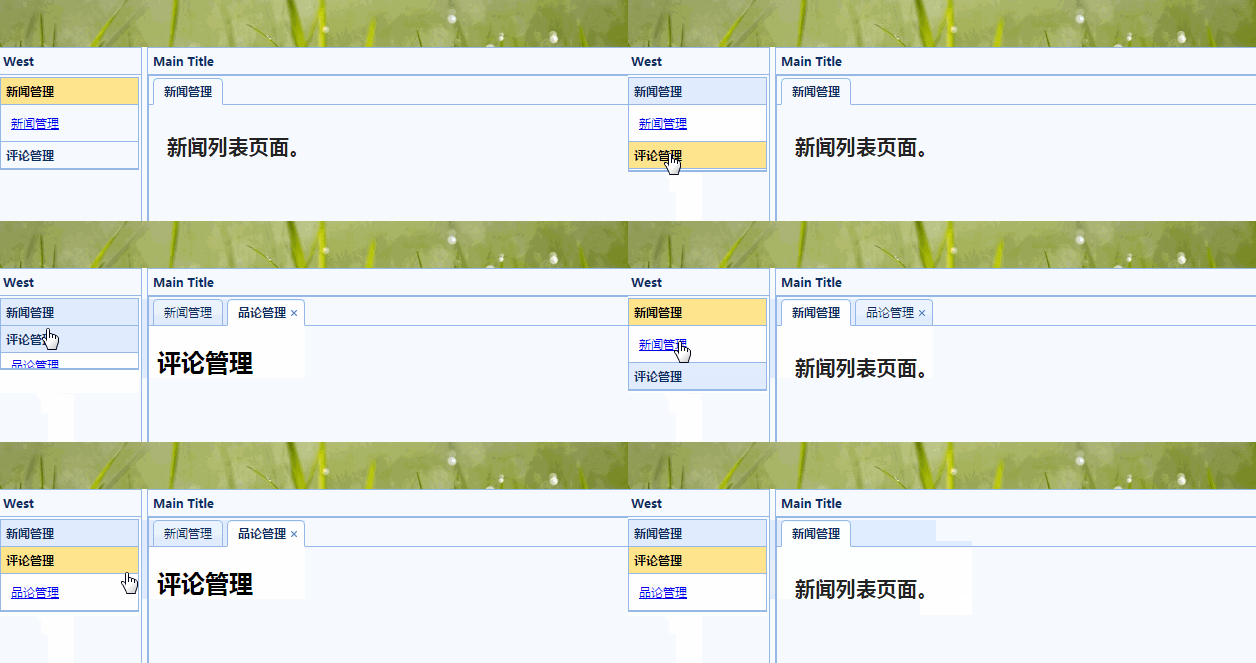
为左侧的超链接添加点击事件,右侧随左侧的点击更换iframe的地址。
js代码:
html代码:
最后就是为右侧添加分页的数据内容了:数据库查询——>分页
6.3 从数据库内获取数据,并进行分页
第一步:在Model层内添加实体类
NewInfo.cs
namespace Iotzzh.CMS.Model
{
public class NewInfo
{
public int Id { get; set; }
public string Title { get; set; }
public string Msg { get; set; }
public DateTime SubDateTime { get; set; }
public string Author { get; set; }
public string ImagePath { get; set; }
}
}
第二步:在DAL层内新建类(NewInfoDal),获取数据并进行分页
namespace Iotzzh.CMS.DAL
{
public class NewInfoDal
{
//定义一个集合,一个获取分页的方法,由BLL(业务逻辑)层传入start和end
public List GetPageList(int start, int end)
{
string sql = "select * from (select row_number() over (order by id) as" +
"num,* from News ) as t where t.num >=@start adn t.num <= @end";
SqlParameter[] pars = {
new SqlParameter("@start",SqlDbType.Int),
new SqlParameter("@end",SqlDbType.Int)
};
pars[0].Value = start;
pars[1].Value = end;
//进行查询
DataTable da = SqlHelper.GetTable(sql,CommandType.Text,pars);
//声明集合
List list = null;
if (da.Rows.Count > 0)
{
//把datatable里的数据放到list里返回就可以了
list = new List();
NewInfo newInfo = null;
//遍历所有的行
foreach (DataRow row in da.Rows)
{
newInfo = new NewInfo();
//加载一下
LoadEntity(row,newInfo);
//把newInfo放到list集合里面
list.Add(newInfo);
}
}
return list;
}
public void LoadEntity(DataRow row, NewInfo newInfo)
{
newInfo.Id = Convert.ToInt32(row["Id"]);
newInfo.Author = row["Author"] != DBNull.Value ?
row["Author"].ToString() : string.Empty;
newInfo.Title = row["Title"] != DBNull.Value ?
row["Title"].ToString() : string.Empty;
newInfo.Msg = row["Msg"] != DBNull.Value ?
row["Msg"].ToString() : string.Empty;
newInfo.SubDateTime = Convert.ToDateTime(row["SubDateTime"]);
newInfo.ImagePath = row["ImagePath"] != DBNull.Value ?
row["ImagePath"].ToString() : string.Empty;
}
///
/// 获取总的记录数
///
///
第三步:为BLL层添加类()
namespace Iotzzh.CMS.BLL
{
public class NewInfoService
{
DAL.NewInfoDal NewInfoDal = new DAL.NewInfoDal();
///
/// 获取分页数据
///
/// 当前页码值
/// 每页显示记录数
/// GetPageList(int pageIndex, int pageSize)
{
int start = (pageIndex - 1) * pageSize + 1;
int end = pageIndex * pageSize;
List list = NewInfoDal.GetPageList(start,end);
return list;
}
///
/// 获取总的页数
///
///
///
业务逻辑层和数据访问层都处理好了,现在可以在显示层(AdminNewListControler)调用了。
第四步:Controler调用BLL层并向View里传递数据
namespace Iotzzh.CMS.Webapp.Controllers
{
public class AdminNewListController : Controller
{
//
// GET: /AdminNewList/
BLL.NewInfoService NewInfoService = new BLL.NewInfoService();
public ActionResult Index()
{
int pageIndex = Request["pageIndex"]!= null?int.Parse(Request["pageIndex"]):1;
int pageSize = 5;
int pageCount = NewInfoService.GetPageCount(pageSize);
pageIndex = pageIndex < 1 ? 1 : pageIndex;
pageIndex = pageIndex > pageCount ? pageCount : pageIndex;
List list = NewInfoService.GetPageList(pageIndex,pageSize);
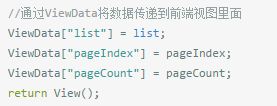
//通过ViewData将数据传递到前端视图里面
ViewData["list"] = list;
ViewData["pageIndex"] = pageIndex;
ViewData["pageCount"] = pageCount;
return View();
}
}
}
第五步:view获取数据并显示
AdminNewList/index
@using Iotzzh.CMS.Model
AdminNewList
@if (ViewData["list"] != null)
{
编号
标题
作者
时间
详细
@foreach (NewInfo newInfo in (List)ViewData["list"])
{
@newInfo.Id
@newInfo.Title
@newInfo.Author
@newInfo.SubDateTime
详细
}
}
else
{
暂无数据
}
第六步:添加分页方式与分页标签
首先,添加一个公共类:PageBar.cs
namespace Iotzzh.CMS.Common
{
public class PageBar
{
///
/// 产生数字页码条。
///
/// 当前页码值
/// 总的页数
///
然后再view/index里面引用
@MvcHtmlString.Create(PageBar.GetPageBar((int)ViewData["pageIndex"],(int)ViewData["pageCount"]))
这里的pageIndex和pageCount是由在Contoler里面获取的
6.4 为详情添加弹出信息框
这里可能很多是重复的,主要是为了加深个人对整个过程的理解。
第一步:相应的引入还是必须有的:
第二步:在table里添加一个标题列:
编号
标题
作者
时间
详细
删除
第三步:在信息内容里提添加一列:
@foreach (NewInfo newInfo in (List)ViewData["list"])
{
@newInfo.Id
@newInfo.Title
@newInfo.Author
@newInfo.SubDateTime
详细
删除
}
第四步:链接添加好了,把弹出框以及里面的内容布局一下
标题 作者 时间 内容
第五步:有了一个盒子,可是怎么把数据填充进来呢?这里就用到异步了:
首先,先将detailDiv进行隐藏,然后为详情添加点击事件:
$("#detailDiv").css("display", "none");
$(".details").click(function () {
showDetail($(this).attr("ids"));
});
接下来就是ShowDetail的方法代码编写了:
//显示详细信息
function showDetail(id) {
$.post("/AdminNewList/GetNewInfoModel", { "id": id }, function (data) {
$("#title").text(data.Title);
$("#author").text(data.Author);
$("#subDateTime").text(ChangeDateFormat(data.SubDateTime));
$("#msg").text(data.Msg);
});
$("#detailDiv").css("display", "block");
//EasyUI的弹出框样式的使用
$("#detailDiv").dialog({
modal: true,
resizable: true,
maximizable: true,
collapsible: true,
title: "新闻详细",
width: 400,
height: 200,
buttons: [{
text: '确定',
iconCls: 'icon-ok',
handler: function () {
alert('ok');
}
}, {
text: '取消',
handler: function () {
$('#detailDiv').dialog('close');
}
}]
});
}
这个方法里的核心代码:
$.post("/AdminNewList/GetNewInfoModel", { "id": id }, function (data) {
$("#title").text(data.Title);
$("#author").text(data.Author);
$("#subDateTime").text(ChangeDateFormat(data.SubDateTime));
$("#msg").text(data.Msg);
});
将数据赋值到每个指定的容器里,下面的代码是之前用的ajax获取异步请求的代码:
$.ajax({
url: "UsersManageHandler.ashx",
type: "POST",
data: { name: name, password: password },
success: function (data) {
if (data != '') {
alert(data);
} else {
location.reload();
}
}
}
);
可参看网站:http://www.php100.com/manual/jquery/ 进行更多的了解
貌似扯远了,通过上面的代码,很容易看出,将id传入到GetNewInfoModel(一般处理程序,Controler内,AdminNewList下的方法),简单说,就是传参获取数据库内的整行内容。
注意:这里的使用AdminNewList下的方法,"/AdminNewList/GetNewInfoModel"
第六步:编辑显示层的Controler下的AdminNewLIst里的GetNewInfoModel方法。由于在界面里面传入的data是id,所以首先先接收一下数据,然后对Model里的NewInfo实例化,获取BLL层GetModel方法,并处理id参数。最后经过Json序列化返回。
#region 获取详细信息
public ActionResult GetNewInfoModel()
{
int id = int.Parse(Request["id"]);
NewInfo newInfo = NewInfoService.GetModel(id);
//把数据序列化
return Json(newInfo,JsonRequestBehavior.AllowGet);
}
#endregion
这里在Model里的NewInfo就不作解释了,然后看看GetMmodel(id);
第七步:BLL层的功能
///
/// 通过web层传来的id,通过使用dal层的方法,返回结果
///
///
///
第八步:DAL层功能
///
/// 获取一条记录
///
///
///
这里的第几步只是用作代码理解用,编写的时候,在写界面层的时候,就想到要获取一个数据,然后到DAL层编写一个获取一条信息的方法,然后在BLL调用DAL里的方法,将数据返回到显示层,最后编写Controler里的内容,获取数据,返回数据。突然在想,这么多层,如何正确的区分什么功能代码正确的写到对应的地方呢,BLL层如果省去了貌似也可以,为什么非要加一个BLL层在中间碍事呢?回头再看看三层架构的优势:三层架构的简单理解
6.5 添加删除功能
添加删除的功能的方法与上述的方法是一样的,就不再重述了,贴上核心代码:
web层:
$(".delete").click(function () {
deleteInfo($(this).attr("ids"), $(this));
});
//删除新闻
function deleteInfo(id, control) {
$.messager.confirm('提示', '确定删除该记录么?', function (r) {
if (r) {
//发送异步请求
$.post("/AdminNewList/DeleteNewInfo", {"id":id},function(data){
if(data == "ok"){
$(control).parent().parent().remove();
$.messager.alert("提示:","删除成功","info");
}else{
$.messager.alert("提示:","删除失败","info");
}
});
#region 删除信息
public ActionResult DeleteNewInfo()
{
int id = int.Parse(Request["id"]);
if (NewInfoService.DeleteInfo(id))
{
return Content("ok");
}
else
{
return Content("Error");
}
}
#endregion
BLL层:
public bool DeleteInfo(int id)
{
return NewInfoDal.DeleteInfo(id) > 0;
}
DAL层:
///
/// 删除一条记录
///
///
///
6.6 添加添加功能
注意:这里给的文件上传插件貌似并不能在这里使用,但是文本的上传却可以使用,个人认为很有可能是使用.framework版本比教程低的缘故,这里无法实现局部上传也无法实现获取图片地址,个人能力有限,无法对该插件进行适应性的操作,暂且将图片的路径设置成一个固定值,也不实现真正图片上传功能。在这里先主要学习一下在三层里面插入数据。不过插件自带的富文本编辑器里带图片上传是可以实现的。所以具体的什么原因还不是很清楚。
第一步:DAL层
///
/// 添加一条记录
///
///
///
第二步:BLL层
public bool AddInfo(NewInfo newInfo)
{
return NewInfoDal.AddInfo(newInfo) > 0;
}
第三步:显示层,这里由于文件上传无法使用,controler就没起到作用,直接用的mvc下的ajax异步提交。那个插件的用处就是可以为内容文字添加一些样式。在此也就忽略不记。
核心代码:
@using (Ajax.BeginForm("AddNewInfo", "AdminNewList", new AjaxOptions() { HttpMethod = "post", OnSuccess = "afterAdd" }, new {id="form1" }))
{
新闻名称 作者 上传图片
新闻内容
}
通过此段代码来输入数据。
技巧:如何通过点击确定,关闭该窗口的。
首先,在Index.cshtml下加入函数:
//添加完成以后调用该方法关闭添加窗口
function afterAdd() {
$('#divAdd').dialog('close');//jq-easyui方法
}
然后在ShowAddInfo.cshtml
//提交表单
function subForm() {
$("#form1").submit();
}
//调用父页面方法
function afterAdd() {
window.parent.afterAdd();
}
