上文主要简单地将activeMq搭建了起来,并且可以用web console去登录查看相关的后台功能。
本文将学习如何用java语言实现一个生产者客户端,主要参考了以下链接:
http://activemq.apache.org/jndi-support.html
代码已上传github,建议先下载下来实际运行一遍:
https://github.com/cctvckl/big-data-learning/tree/master/activemq-learning
一、ActiveMq支持的协议
ActiveMq作为消息中间件,支持多种连接协议,如:tcp、amqp、stomp、mqtt等。
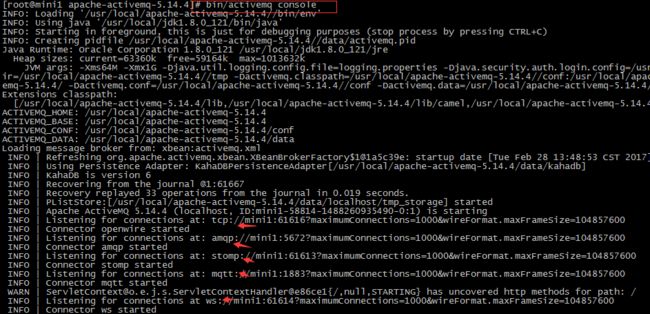
如果启动时以./activemq console方式启动,可以看到如下输出:
而下文将要讲解的java客户端程序,就是基于其中的tcp协议。
将tcp://host:port这个地址记录下来,下面需要用到。
二、大体思路
1、本地配置文件,配置要连接的ActiveMq服务器、包括连接协议和端口号,配置要发送消息的目标队列、目标topic等等。
2、程序读取上述配置文件,生成连接会话、生成消息生产者、发送消息、关闭连接。
三、具体步骤
1、配置文件样例:
java.naming.factory.initial = org.apache.activemq.jndi.ActiveMQInitialContextFactory

# Use the following property to configure the default connector
java.naming.provider.url = tcp://192.168.2.140:61616

# Use the following property to specify the JNDI name the connection factory
# should appear as.
connectionFactoryNames = ConnectionFactory, queueConnectionFactory, topicConnectionFactry

# Register some queues in JNDI using the form:
#   queue.[jndiName] = [physicalName]
queue.MyQueue = example.MyQueue

# Register some topics in JNDI using the form:
#   topic.[jndiName] = [physicalName]
topic.MyTopic = example.MyTopic
释义:上面的url项要与第一章节里面的那个地址匹配;
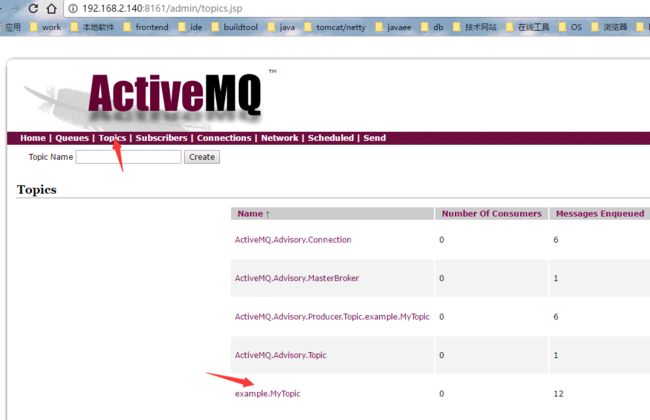
topic.MyTopic中的点号分割开的第二部分(此例为MyTopic)会被注册为JNDI名, 至于value(example.MyTopic)为topic名,在Web Console可以看到。
queue.MyQueue同理。
2、配置文件完毕,下面介绍业务代码:
package com.ckl.activemq; /** * The SimpleQueueSender class consists only of a main method, * which sends several messages to a queue. * * Run this program in conjunction with SimpleQueueReceiver. * Specify a queue name on the command line when you run the * program. By default, the program sends one message. Specify * a number after the queue name to send that number of messages. */ import org.slf4j.Logger; import org.slf4j.LoggerFactory; import javax.jms.*; import javax.naming.Context; import javax.naming.InitialContext; import javax.naming.NamingException; /** * A simple polymorphic JMS producer which can work with Queues or Topics which * uses JNDI to lookup the JMS connection factory and destination. */ public class SimpleProducer { private static final Logger LOG = LoggerFactory.getLogger(SimpleProducer.class); private SimpleProducer() {} /** * @param args the destination name to send to and optionally, the number of * messages to send */ public static void main(String[] args) { Context jndiContext = null; ConnectionFactory connectionFactory = null; Connection connection = null; Session session = null; Destination destination = null; MessageProducer producer = null; String destinationName = null; final int numMsgs;
//这边被我手动修改了,比较不喜欢每次运行时还要修改Run configuration,麻烦。 args = new String[2]; args[0] = "MyTopic"; args[1] = "3"; if ((args.length < 1) || (args.length > 2)) { LOG.info("Usage: java SimpleProducer[ ]"); System.exit(1); } destinationName = args[0]; LOG.info("Destination name is " + destinationName); if (args.length == 2) { numMsgs = (new Integer(args[1])).intValue(); } else { numMsgs = 1; } /* * Create a JNDI API InitialContext object */ try { jndiContext = new InitialContext(); } catch (NamingException e) { LOG.info("Could not create JNDI API context: " + e.toString()); System.exit(1); } /* * Look up connection factory and destination. */ try { connectionFactory = (ConnectionFactory)jndiContext.lookup("ConnectionFactory"); destination = (Destination)jndiContext.lookup(destinationName); } catch (NamingException e) { LOG.info("JNDI API lookup failed: " + e); System.exit(1); } /* * Create connection. Create session from connection; false means * session is not transacted. Create sender and text message. Send * messages, varying text slightly. Send end-of-messages message. * Finally, close the connection. */ try { connection = connectionFactory.createConnection(); session = connection.createSession(false, Session.AUTO_ACKNOWLEDGE); producer = session.createProducer(destination); TextMessage message = session.createTextMessage(); for (int i = 0; i < numMsgs; i++) { message.setText("This is message " + (i + 1)); LOG.info("Sending message: " + message.getText()); producer.send(message); } /* * Send a non-text control message indicating end of messages. */ producer.send(session.createMessage()); } catch (JMSException e) { LOG.info("Exception occurred: " + e); } finally {
//睡眠是我手动加的,主要为了观察效果 try { Thread.sleep(100000L); } catch (InterruptedException e) { e.printStackTrace(); } if (connection != null) { try { connection.close(); } catch (JMSException ignored) {} } } } }
代码不难理解:jndi读取配置文件,建立连接,发消息,关闭连接。
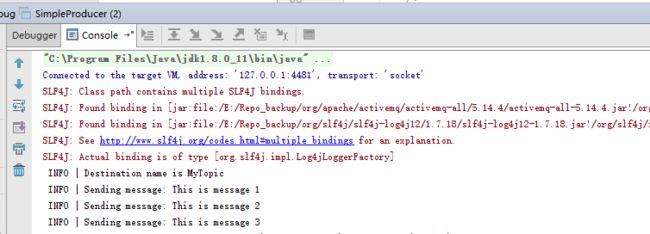
运行结果:
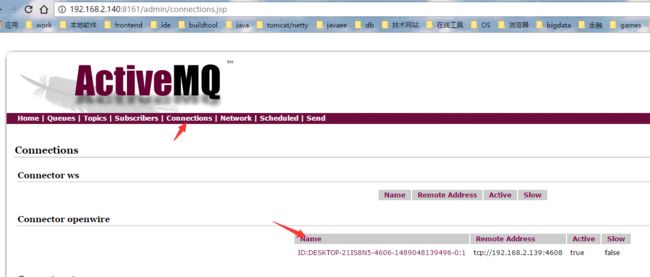
此时查看Web Console,
可以看到来自客户端的连接信息。
本例子就先到这里,详细还请参考贴的代码链接和官网文档。
欢迎留言交流。


