Linux---lnmp之mysql
###################################################
###################### mysql #######################
###################################################
主机环境: rhel6 selinux and iptables disabled
实验主机: Server1:172.25.27.1 作为MysqlDB服务器
一、Mysql
Mysql是一个关系型数据库管理系统。将数据保存在不同的表中,而不是将所有数据放在一个大仓库内,这样就增加了速度并提高了灵活性。Mysql软件采用了双授权政策,它分为社区版和商业版,由于其体积小、速度快、总体拥有成本低,尤其是开放源码这一特点,一般中小型网站的开发都选择Mysql作为网站数据库。
Linux作为操作系统,Nginx作为Web服务器,Mysql作为数据库,PHP作为服务器端脚本解释器。使用这四个软件就可以建立起一个稳定、免费的网站系统,被业界称为LNMP。
二、Mysql的安装与配置
在server1做如下操作:
1.安装
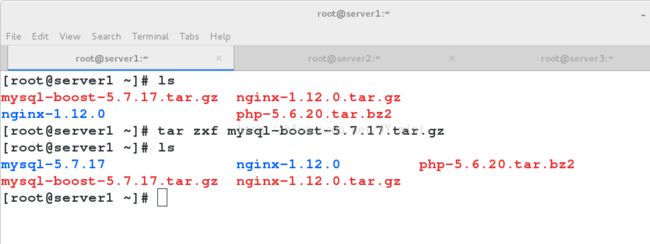
tar zxf mysql-boost-5.7.17.tar.gz
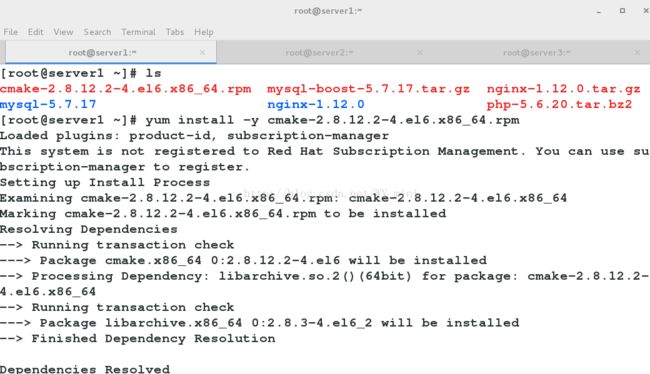
yum install -y cmake-2.8.12.2-4.el6.x86_64.rpm
2.编译configure文件
cd mysql-5.7.17/
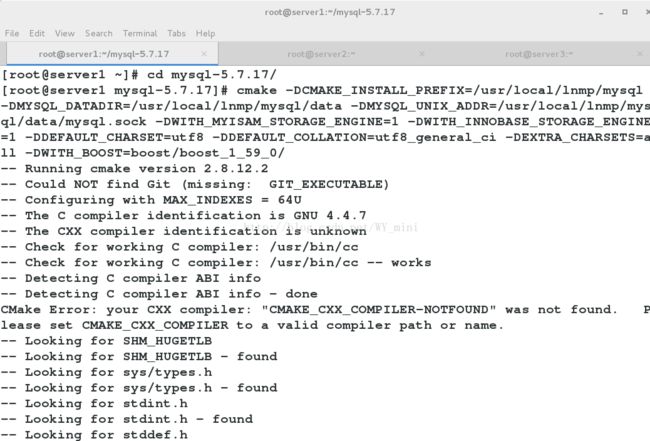
cmake -DCMAKE_INSTALL_PREFIX=/usr/local/lnmp/mysql -DMYSQL_DATADIR=/usr/local/lnmp/mysql/data -DMYSQL_UNIX_ADDR=/usr/local/lnmp/mysql/data/mysql.sock -DWITH_MYISAM_STORAGE_ENGINE=1 -DWITH_INNOBASE_STORAGE_ENGINE=1 -DDEFAULT_CHARSET=utf8 -DDEFAULT_COLLATION=utf8_general_ci -DEXTRA_CHARSETS=all -DWITH_BOOST=boost/boost_1_59_0/ # # 进行编译并制定目录与参数
####################################################
-DCMAKE_INSTALL_PREFIX=/usr/local/lnmp/mysql # 安装目录
-DMYSQL_DATADIR=/usr/local/lnmp/mysql/data # 数据库存放目录
-DMYSQL_UNIX_ADDR=/usr/local/lnmp/mysql/data/mysql.sock # Unix socket 文件路径
-DWITH_MYISAM_STORAGE_ENGINE=1 # 安装 myisam 存储引擎
-DWITH_INNOBASE_STORAGE_ENGINE=1 # 安装 innodb 存储引擎
-DDEFAULT_CHARSET=utf8 # 使用 utf8 字符
-DDEFAULT_COLLATION=utf8_general_ci # 校验字符
-DEXTRA_CHARSETS=all # 安装所有扩展字符集
###################################################
编译中的报错及解决:<每次解决报错后重新编译>
①CMake Error at /usr/share/cmake/Modules/CMakeCXXInformation.cmake:37 (get_filename_component):
get_filename_component called with incorrect number of arguments
Call Stack (most recent call first):
CMakeLists.txt:3 (PROJECT)
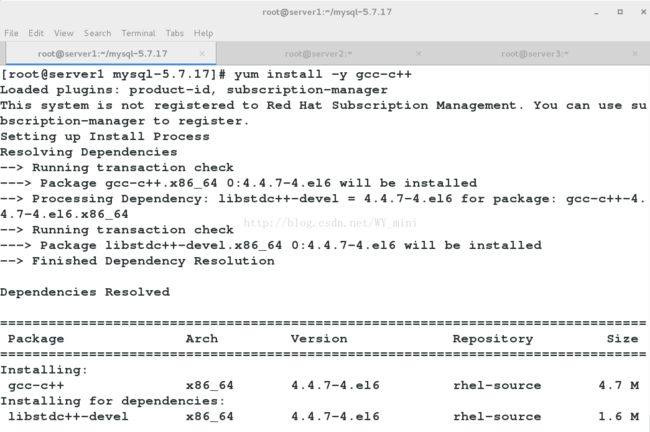
解决:yum install -y gcc-c++ # 解决软件包依赖性
②remove CMakeCache.txt and...
解决:rm -f CMakeCache.txt # 重新编译时,需要清除旧的对象文件和缓存信息,因为每次cmake都会有缓存
③CMake Error at cmake/readline.cmake:64 (MESSAGE):
Curses library not found. Please install appropriate package,
remove CMakeCache.txt and rerun cmake.On Debian/Ubuntu, package name is libncurses5-dev, on Redhat and derivates it is ncurses-devel.
解决:yum install -y ncurses-devel # 解决软件包依赖性
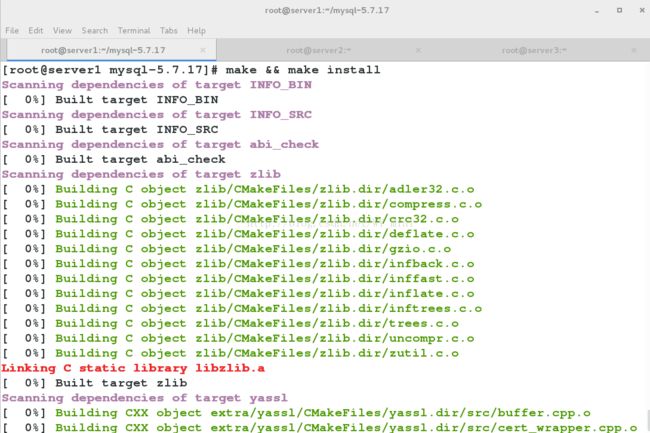
编译结果如下即为成功:
make && make install # cmake的过程,自带编译进度
3.配置
1)把mysql的可执行脚本放到环境变量PATH中
cd /usr/local/lnmp/mysql/bin/
vim ~/.bash_profile
PATH=$PATH:$HOME/bin:/usr/local/lnmp/mysql/bin
source ~/.bash_profile
2)data的数据库里面数据是空的,需要构建mysql数据库
①构建数据库需要一个用户
groupadd -g 27 mysql
useradd -u 27 -g 27 -s /sbin/nologin -M -d /usr/local/lnmp/mysql mysql
id mysql
vim /etc/passwd
23 mysql:x:27:27::/usr/local/lnmp/mysql/data:/sbin/nologin
②需要创建我们的自己版本的mysql的配置文件
cd /etc
cp my.cnf my.cnf.bak
cd /usr/local/lnmp/mysql/support-files/
cp my-default.cnf /etc/my.cnf # 根据你的主机内存复制 mysql 配置文件
cp: overwrite `/etc/my.cnf'? y
③创建mysql服务的控制文件
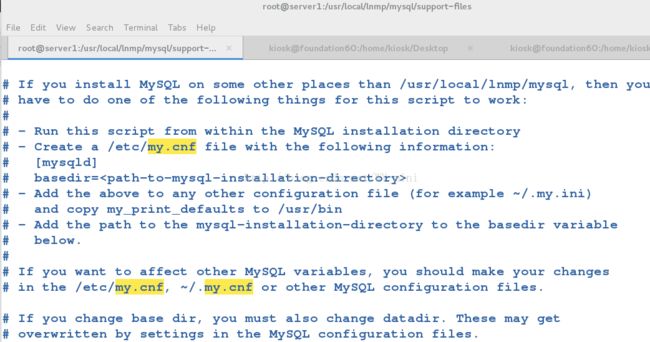
vim mysql.server # 可以看到为什么要创建上面的/etc/my.cnf
cp mysql.server /etc/init.d/mysqld
④创建具体数据库
cd /usr/local/lnmp/mysql/
chown mysql.mysql . -R # 在mysql用户初始化之前,将mysql目录改为mysql组,mysql用户
mysqld --initialize --user=mysql # 初始化,生成密码以及data
创建成功:
3)更改权限并开启数据库
chown root.root . -R
chown mysql data -R
/etc/init.d/mysqld start
mysql -pLfEjE.de+4Ni # 使用刚才生成的密钥登陆mysql,报错
ERROR 1820 (HY000): You must reset your password using ALTER USER statement before executing this statement. # 提示需重设密码
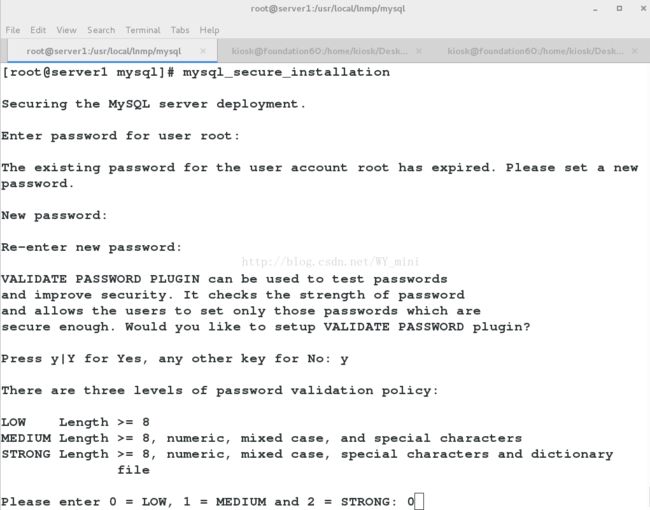
4)进行安全初始化,更改密码
mysql_secure_installation
Enter password for user root: # 此处输入之前生成的密钥
New password: # 设置新密钥
Re-enter new password: # 确认密钥
Press y|Y for Yes, any other key for No: y
LOW Length >= 8
MEDIUM Length >= 8, numeric, mixed case, and special characters
STRONG Length >= 8, numeric, mixed case, special characters and dictionary file
Please enter 0 = LOW, 1 = MEDIUM and 2 = STRONG: 0 # 选择密钥等级
Change the password for root ? ((Press y|Y for Yes, any other key for No) : y
New password:
Re-enter new password:
Do you wish to continue with the password provided?(Press y|Y for Yes, any other key for No) : y
Remove anonymous users? (Press y|Y for Yes, any other key for No) : y
Disallow root login remotely? (Press y|Y for Yes, any other key for No) : y
Remove test database and access to it? (Press y|Y for Yes, any other key for No) : y
Reload privilege tables now? (Press y|Y for Yes, any other key for No) : y
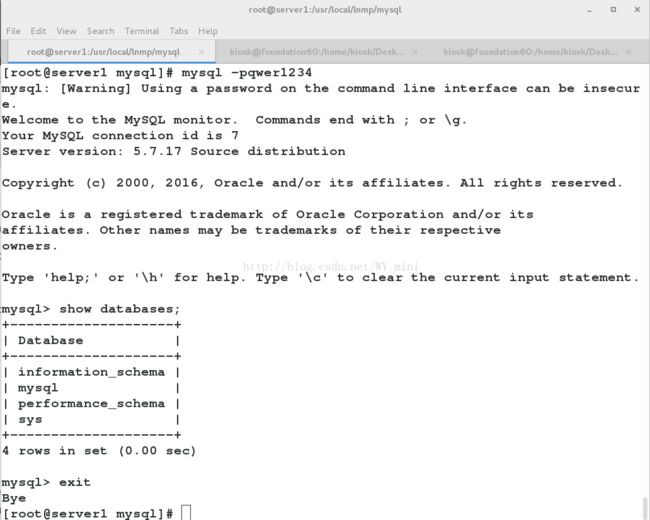
4.测试
mysql -pqwer1234
mysql> show databases;
+--------------------+
| Database |
+--------------------+
| information_schema |
| mysql |
| performance_schema |
| sys |
+--------------------+
4 rows in set (0.00 sec)
