接着昨天的内容继续学习
今天来认识一下 PennCNV
参考资料:https://github.com/WGLab/PennCNV/releases
从这里可以看到这个软件自2015年到现在更新了6个版本,最新版本是PennCNV v1.0.5更新于今年1月这个版本有哪些更新的信息呢:
- 20190109: A slightly updated PennCNV is provided in v1.0.5, to improve compatibility with recent version of GCC and Perl. If users still have problems in installation, please follow "last resort" guide and just install a new Perl 5.14.2 to run PennCNV.
- 20170606: Zoltan Kutalik shared an article on how to improve PENNCNV CNV calls here. They defined a new quality score (QS) estimating the probability of a CNV called by PennCNV to be confirmed by other software.
- 20161024: Prof. George Kirov shared a recently published paper reporting the use of PennCNV on Affy Axiom arrays here. Detailed procedure for CNV calling is given in the supplementary materials.
- 20160805: PennCNV has been dockerized by Roman Hillje at the University of Zurich, Switzerland. The docker image and related documentation are available at https://hub.docker.com/r/romanhaa/penncnv/.
我们可以看到,在前人的不懈努力下,这个软件也有了很多功能及安装兼容性上的提升,但是这里讲到这个软件估计不那么容易安装。这里的GCC和Perl我都不熟悉,只知道Perl是另一种计算机语言,编程相关的东西我都不懂,继续看看吧。
安装指令:如果使用Linux/Unix系统可以用如下指令安装:
#下载不同版本的软件
wget https://github.com/WGLab/PennCNV/archive/v1.0.4.tar.gz
wget https://github.com/WGLab/PennCNV/archive/v1.0.5.tar.gz
#解压缩后会有一些新的目录
tar xvfz v1.0.4.tar.gz
tar xvfz v1.0.5.tar.gz
切换到新的目录里面可以看到几个Perl programs (文件名为\*.pl格式的),同时有kext/, lib/, docs/ 和 example/这些下级目录,再切换到kext/目录,对Makefile进行更改,输入make,如果不报错就是安装成功了。
下面是系统的信息
site_name: PennCNV
site_url: http://penncnv.openbioinformatics.org/
repo_url: http://github.com/WangGenomicsLab/penncnv/
repo_url: http://github.com/WGLab/penncnv/
repo_name: GitHub
site_description: PennCNV software distribution site
site_author: Kai Wang, et al
site_favicon: favicon.ico
copyright: 2007-2017 PennCNV
copyright: 2007-2019 PennCNV
google_analytics: ['UA-7565671-1', 'www.openbioinformatics.org/penncnv']

docs_dir: docs
从这可以看到这个软件就是由这个叫Kai Wang的人的团队开发和维护的,还放在了github这个公共平台上,真是个好人。当然提供这个平台的也是个好人+1。
找到帮助文档先看看:
PennCNV software软件简介
PennCNV 是一个免费的软件工具,用于从 SNP 基因分型微阵列数据进行拷贝数变异 (CNV) 检测。目前,它可以处理来自Illumina和Affymetrix来源的数据。当然通过适当准备文件格式,它也可以处理其他类型的SNP arrays 和 oligonucleotide arrays.
参考引用文献:
- Wang K, Li M, Hadley D, Liu R, Glessner J, Grant S, Hakonarson H, Bucan M. PennCNV: an integrated hidden Markov model designed for high-resolution copy number variation detection in whole-genome SNP genotyping data Genome Research 17:1665-1674, 2007
- Diskin SJ, Li M, Hou C, Yang S, Glessner J, Hakonarson H, Bucan M, Maris JM, Wang K. Adjustment of genomic waves in signal intensities from whole-genome SNP genotyping platforms Nucleic Acids Research 36:e126, 2008
-
Wang K, Chen Z, Tadesse MG, Glessner J, Grant SFA, Hakonarson H, Bucan M, Li M. Modeling genetic inheritance of copy number variations Nucleic Acids Research 36:e138, 2008
因为不是太了解相关知识,看了一下这个实验室的工作发现他们都是用了好几种的语言来做分析工作的。
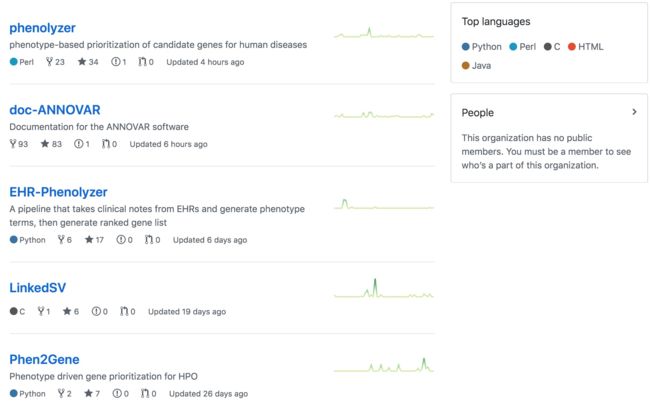 来自GitHub
看介绍的内容,前面2个工具是非常有利于目前的样本分析的。
感兴趣的软件:Phenolyzer软件
Phenolyzer软件,它实现了基于表型的人类疾病候选基因的优先次序。意思就是按照表型挑选相关的基因型。这个太赞了,非常适合医学科研工作者使用。
而且他发行的版本有网页版的和电脑版的,网页版估计就是那种傻瓜式的,人人都能用的把(嘘!)。
- web-sever at here.
- manual is available at here
他是怎么实现这些功能的呢:我也不是太明白,也不用太懂,反正就是在下面两个东东的基础上实现的。 - Bioperl
- Graph::Directed
安装步骤:
#从github克隆到自己电脑
git clone https://github.com/WGLab/phenolyzer
#切换到工作目录
cd phenolyzer
配置使用自己的本地数据库:
-addon [Gene-disease database file name, delimited by comma] -addon_weight [default:1] -addon_gg [Gene-gene database file name, delimited by comma] -addon_gg_weight [default:1]
Put your own addon databases into lib/compiled_database. For details of how to use your own Addon databases, please refer to FAQ
数据分析前的准备
下载注释数据进行CNV annotation (No need to do this for other functions)
perl bin/annotate.pl -downdb -buildver hg19 -webfrom annovar refGene lib/humandb
perl bin/annotate.pl -downdb -buildver hg18 -webfrom annovar refGene lib/humandb
软件使用参数相关指令
调用帮助文档
perl disease_annotation.pl --help
自定义例子:
优先考虑"阿尔茨海默"基因
perl disease_annotation.pl alzheimer -prediction -phenotype -logistic -out ex1
优先考虑"肌萎缩性侧索硬化症"基因:
disease_annotation.pl "Amyotrophic lateral sclerosis" -prediction -phenotype -logistic -out ex2
在"example_disease.txt"文件中使用疾病术语(不进行表型扩展):
perl disease_annotation.pl example_disease.txt -file -prediction -logistic -out ex3
在"example_phenotype.txt"文件中使用表型术语:
perl disease_annotation.pl example_phenotype.txt -file -prediction -phenotype -logistic -out ex4
在"example_hpo.txt"文件中使用 HPO 术语:
perl disease_annotation.pl example_hpo.txt -file -prediction -phenotype -logistic -out ex5 -addon DB_DISGENET_GENE_DISEASE_SCORE,DB_GAD_GENE_DISEASE_SCORE -addon_weight 0.25
使用cnv.bed:
perl disease_annotation.pl alzheimer -bedfile cnv.bed -p -ph -logistic -out ex6
使用Mentha gene-gene相互作用数据库:
perl disease_annotation.pl alzheimer -p -ph -logistic -out ex7 -addon_gg DB_MENTHA_GENE_GENE_INTERACTION -addon_gg_weight 0.05
生成与 Phenolyzer Web 服务器默认设置完全相同的结果
perl disease_annotation.pl alzheimer -p -ph -logistic -out ex8 -addon DB_DISGENET_GENE_DISEASE_SCORE,DB_GAD_GENE_DISEASE_SCORE -addon_weight 0.25
与 wANNOVAR 输出集成,确定输出最优化的变异类型:
perl calculate_score.pl
输出多种疾病(例如Alzheimer and brain):
perl disease_annotation.pl "alzheimer;brain" -p -ph -logistic -out ex9
并行化表型处理以加快计算速度(fork subprocesses)
perl disease_annotation.pl "alzheimer;brain" -p -ph -logistic -nproc 2
使用预先计算的HPO术语扩展和基因评分加快计算速度。这要求解压缩命令在系统中可用。阿尔茨海默氏症和大脑其他疾病类型将并行处理,HPO术语将从phenolyzer中包括的DB(数据库)中拉出。
perl disease_annotation.pl "alzheimer;brain;HP:0004322;HP:0002240" -p -ph -logistic -nproc 2 -use_precalc
具体参考:https://github.com/WGLab/phenolyzer
感兴趣的第二个软件:doc-ANNOVAR
这个工作不得了:ANNOVAR 是一个高效的软件工具,利用最新的信息从不同的基因组(包括人类基因组 hg18、hg19、hg38 以及小鼠、蠕虫、苍蝇、酵母和许多其他基因组)中检测出的基因变异进行功能性展示。
看上去似乎不用自己转换注释基因版本了!!!
参考文献:
- Wang K, Li M, Hakonarson H. ANNOVAR: Functional annotation of genetic variants from next-generation sequencing data Nucleic Acids Research, 38:e164, 2010
感兴趣的软件三:EHR-Phenolyzer
EHR-Phenolyzer 是一种python pipeline,可自动将原始临床笔记转换为有意义的候选因果基因。它可能会大大缩短疾病因果基因的识别和发现时间。
使用这个软件的先决条件需要如下配置:
- Python 2.7 or Python 3.6
- metamap16.BINARY.Linux (2016) (needed only if choosing MetaMap as NLP processor)
- NCBO Annotator API KEY (needed only if choosing NCBO annotator as NLP processor)
- phenolyzer
- linux environment
安装
- 安装python modules,需要Python virtual environment with pipenv.
pip install pipenv
注意:这个环境配置在Python 3.6, 如果没有就需要下载Python 3.6,下载地址 https://www.python.org/downloads/
- 还可以手动配置python modules
如果你安装pipenv很麻烦或者根本就不想用这它可以用:
pip install
The list of dependencies is specified in the packages section inside Pipfile.
- 安装MetaMap (needed only if choosing MetaMap as NLP)
- 先在UMLS Terminology Services 注册并获得appropriate license (https://uts.nlm.nih.gov//license.html)
- 下载"MetaMap 2016V2 Linux Version" https://metamap.nlm.nih.gov/MainDownload.shtml
- MetaMap 按手册安装(https://metamap.nlm.nih.gov/Installation.shtml)
4.导出MetaMap executable 二进制文件到 linux system PATH (export PATH="/path/to/public_mm/bin:$PATH")
- 获得 NCBO API Key (needed only if choosing NCBO annotator as NLP)
- 在BioPortal注册并获得一个账号(https://bioportal.bioontology.org/accounts/new)
- 登录 (https://bioportal.bioontology.org/login)
- 设置用户信息"Account Settings"在user panel
4.创建文件"ncbo.apikey.txt" 在 EHR-Phenozer lib/ 文件目录 ("see example ncbo.apikey.txt.example"), 复制 API Key 到这个文件的第一行。
- Get MedLEE XML output (needed only if choosing MedLEE as NLP)
- obtain an appropriate license to use MedLEE
- analyze clinical notes and generate XML output
- Install Phenolyzer
- download Phenolyzer through "git clone https://github.com/WGLab/phenolyzer"
- install dependencies: Bioperl, Bio::OntologyIO and Graph::Directed
- export phenolyzer executable file to your linux system PATH ( export PATH="/path/to/phenolyzer:$PATH")
- Install EHR-Phenolyzer
- git clone [email protected]:WGLab/EHR-Phenolyzer.git
- cd EHR-Phenolyzer
- python ehr_phenolyzer.py --help
测试文件:
python ehr_phenolyzer.py -i example/Kleyner_ANKRD11.txt -p kleyner -n "metamap" > ehr_phenolyzer.log
更多testing examples, please check and run the bash scripts under test/
用法:
usage: ehr_phenolyzer.py [-h] -i INPUT [-p PREFIX] [-n NLP] [-d OUTDIR] [-k]
                         [-m OMIM] [-x OBO]

Get ranked gene ids based on EHR medical notes

optional arguments:
  -h, --help            show this help message and exit
  -i INPUT, --input INPUT
                        medical note file in txt format (in case of using
                        medlee, the input is medlee xml format)
  -p PREFIX, --prefix PREFIX
                        the prefix for the output file
  -n NLP, --nlp NLP     type of NLP (metamap (default),medlee, NCBOannotator)
  -d OUTDIR, --outdir OUTDIR
                        the path to the output folder
  -k, --keeptmp         keep temporary files
  -m OMIM, --omim OMIM  path to the OMIM txt file
  -x OBO, --obo OBO     path to HPO obo file

One step from EHR records to ranked gene list.Before running, please install
Phenolyzer, and get the NLP tools ready.
关于输入文件格式:
OMIM data
在你注册了OMIM后可以获得源文件morbidmap.txt,进一步从源文件中提取基因名称,将别名基因名称和边缘基因名称分组到一行中,由","分隔。此文件可在文件夹"db/"中找到。
HPO obo format data
源文件下载自http://purl.obolibrary.org/obo/hp.obo. 此文件可在文件夹"db/"中找到。
medical notes file
医疗笔记文件应采用纯文本格式,示例注释文件可在文件夹"示例/"中找到。但是,如果使用 MedLEE 作为 NLP 引擎,则输入文件应由 MedLEE 处理。
今天的学习还有以外的收获,发现了好多好用的工具,但是可惜的是暂时还不会用,如果要使用还需要学习更多的计算机语言,种一棵树最好的时间是10年前,其次是现在,所以,还是好好学习吧,下一步同步学习Python。然后再回头好好复习一下Linux。