本教程将带大家一起学习使用react,首先我们会搭建开发环境(react+webpack),然后讲解react相关的知识,再讲到使用axios发起网络请求,使用React-Router4作为前端路由,webpack打包生成app,最后使用nginx部署。
开发环境搭建
mkdir myreactapp
cd myreactapp
npm init
一路回车初始化package.json
安装react react-dom
npm install react react-dom --save
安装webpack 打包工具
npm install webpack webpack-cli --save-dev
安装webpack-dev-server 调试服务器
npm install webpack-dev-server --save-dev
安装babel插件 将ES6代码转换成ES5
npm install babel-core babel-loader babel-preset-es2015 babel-preset-react --save-dev
创建app文件夹,开发的代码放在里面
创建build文件夹,打包后的文件放在里面
在app文件夹创建main.js,为app入口文件
import React from 'react';
import ReactDOM from 'react-dom';
ReactDOM.render(
hello,first react app
,
document.getElementById('app')
);
在build文件夹创建index.html
my first react app
创建webpack.config.js并写入内容
var path = require('path');
var webpack = require('webpack');
module.exports = {
    entry: ['webpack/hot/dev-server', path.resolve(__dirname, './app/main.js')],
    output: {
        path: path.resolve(__dirname, './build'),
        filename: 'bundle.js',
        publicPath: '/'
    },
    devServer: {
        inline: true,
        port: 3000
    },
    module: {
      rules: [
           {
               test: /\.js?$/,
               exclude: /(node_modules|bower_components)/,
               loader: 'babel-loader',
           }
        ],
    },
    plugins: [
        new webpack.HotModuleReplacementPlugin()
    ]
};
根目录创建.babelrc文件 这个文件是用来设置转码的规则和插件的
{
  "presets": ["es2015", "react"],
  "env": {
    "development": {

        }
  }
}
修改package.json scripts节点
添加"start": "webpack-dev-server --devtool eval --progress --colors --content-base build"
输入npm start,启动服务器,浏览器输入http://localhost:3000 ,验证是否出现hello,first react app
点击F12审查元素
确实是我们在main.js里面写的h1标签和文字,加载到了id为app的dom节点里面
接下来我们创建两个组件,分别是index和index_section,在app文件夹下创建components文件夹,当然如果项目大的话可以按页面存放,即再建一个文件夹index代表这是index页面的组件,建一个public文件夹放置公共组件,这里只新建index.js和index_section.js演示,
请注意,组件取名必须以大写字母开头。
import React from 'react'
import IndexSection from './index_section'
export default class Index extends React.Component{
constructor(props){
super(props);
}
render(){
return (
这是index.js
这是index_section.js
);
}
}
修改main.js
import React from 'react';
import ReactDOM from 'react-dom';
import Index from './components/index';
ReactDOM.render(
点击保存后,网页自动刷新
当然,你也可以把index_section.js写到index.js里面,注意,每个js文件都只能存在一个export default,所以新的index.js为
import React from 'react'
class IndexSection extends React.Component{
constructor(props){
super(props);
}
render(){
return (
这是index.js里面的index_section组件
);
}
}
export default class Index extends React.Component{
constructor(props){
super(props);
}
render(){
return (
这是index.js
props
react是单向是数据流,使用props实现父组件向子组件传值
props被用作初始化状态,当一个组件初始化之后,它的props是只读的,只有通过父组件重新渲染才可以把新的props传入组件中
上面的Index组件为父组件,IndexSection为子组件,我们向子组件传递一些字符串
在Index的render方法里面修改
render(){
return (
这是index.js
在IndexSection的render方法log一下它收到的值,使用console.log(this.props)输出,再在render方法的return里面输出一下它的这两个值
render(){
console.log(this.props);
return (
这是index.js里面的index_section组件
{this.props.name}
{this.props.age}
);
}
state
state里面保存组件自身的状态,在组件初始化的时候可以设定组件默认的state,在IndexSection的constructor方法里面设置它的默认state,并在render方法输出
constructor(props){
super(props);
this.state = {name:"IndexSection自身的state:name",age:"IndexSection自身的state:age"};
}
render(){
console.log(this.state);
return (
这是index.js里面的index_section组件
{this.state.name}
{this.state.age}
);
}
与props不同的是,组件的state是可以改变的,通过使用this.setState()方法来修改组件的state,传入的第一个参数可以是一个json对象:this.setState({name:"shane",sex:"male"}); ,这里可以传入初始state里面存在的属性,也可以传入一个不存在的属性。在生命周期那里我们会验证该方法。
第一个参数也可以是一个函数
setState((prevState, props) => {
return {"..." :" ...",...};
});
prevState为更新前的state,props为当前的props,return的为修改后的state
setState({a:1},()=>...)还可以接受第二个参数,为一个函数,在setState()调用完成后调用,相当于生命周期的componentDidUpdate
setState()方法通常是异步的,并且连续多次调用 setState 来更新同一个字段时,只有最后一次setState()才会生效。如果setState()后需要立即获取更新后的数据,可以使用setTimeout函数来延迟0秒或者componentDidUpdate方法来获取。
但是请注意,在一些方法里面不可以使用this.setState(),错误使用将会造成循环调用,造成浏览器卡死崩溃,将在生命周期里面讲到
生命周期
每一个组件都有若干个生命周期的方法(在进程中的你可以重写在特殊的时刻),方法中带Will前缀在某件事情发生之前被调用,带Did的前缀的在某件事发生之后被调用。
mounting
以下方法将被调用当一个实例组件被创建并插入到dom中的时候
constructor(props) //使用super(props) 后构造函数里面才可以使用this.props ,生命周期中只执行一次
componentWillMount() //组件即将挂载,生命周期中只执行一次
render() //渲染,生命周期中可执行多次
componentDidMount() //组件第一次挂载完成,生命周期中只执行一次
updating
属性或者状态的改变会触发更新,以下方法会在组件正进行重新渲染的过程中触发。
componentWillReceiveProps(nextprops ) //将收到新的props,nextprops为新的props,生命周期中可执行多次
shouldComponentUpdate(nextProps, nextState ) //比较新旧props和state返回true/false来控制是否更新,生命周期中可执行多次
componentWillUpdate(nextProps, nextState) //组件将更新,生命周期中可执行多次
render() //渲染,生命周期中可执行多次
componentDidUpdate(prevProps, prevState) //组件更新完成,生命周期中可执行多次
unmounting
该方法将在组件正被被移除dom的时候触发
componentWillUnmount() //组件将卸载,生命周期中只执行一次
error handing
2017-09-27 React 16 新加入
该方法将被调用当渲染过程,生命周期方法,或者任何子组件构造出错的时候
componentDidCatch(error,info) //捕捉组件的边界错误,生命周期中只执行一次
更改我们的index.js来验证部分生命周期
import React from 'react'
class IndexSection extends React.Component{
constructor(props){
super(props);
this.state = {name:"IndexSection自身的state:name",age:"IndexSection自身的state:age"};
}
componentWillMount() {
console.log("componentWillMount");
}
componentDidMount() {
console.log("componentDidMount");
}
componentWillReceiveProps(nextProps) {
console.log("componentWillReceiveProps,nextProps:"+nextProps.name);
}
shouldComponentUpdate() {
console.log("shouldComponentUpdate");
return true; // 返回true/false
}
componentWillUpdate() {
console.log("componentWillUpdate");
}
componentDidUpdate() {
console.log("componentDidUpdate");
}
componentWillUnmount() {
console.log("componentWillUnmount");
}
render(){
// console.log(this.state);
return (
这是index.js里面的index_section组件
{this.props.name}
{this.state.age}
);
}
}

在这些生命周期方法里面都可以使用this.state和this.props来获取组件的state和props,但是在shouldComponentUpdate和componentWillUpdate方法里面不能直接使用this.setState()方法来设置组件的state。
当调用setState时,实际上会执行enqueueSetState方法,并对partialState以及pending-StateQueue更新队列进行合并操作,最终通过enqueueUpdate执行state更新
而performUpdateIfNecessary方法会获取pendingElement, pendingStateQueue, pending-ForceUpdate,并调用receiveComponent和updateComponent方法进行组件更新
如果在shouldComponentUpdate或者componentWillUpdate方法中调用setState,此时this._pending-StateQueue != null,就会造成循环调用,使得浏览器内存占满后崩溃。
事件系统
对于一些控件我们需要对其绑定事件,最常用的是点击事件,在原生html里面我们对一个a标签写onclick标签来绑定事件,在react里面使用onClick来绑定,当然还有其他的事件比如input框的onFocus,onBlur,onChange事件等,然后使用event.target来获取事件对象的dom元素。下面的表格列出了部分事件
| 事件 | 事件名称 |
|---|---|
| 鼠标事件 | onClick,onContextMenu,onDoubleClick,onDrag,onDragEnd,onDragEnter |
| ... | onDragExit,onDragLeave,onDragOver,onDragStart,onDrop,onMouseDown, |
| ... | onMouseEnter,onMouseLeave,onMouseMove,onMouseOut,onMouseOver,onMouseUp |
| 键盘事件 | onKeyDown,onKeyPress,onKeyUp |
| 剪贴板事件 | onCopy,onCut,onPaste |
| 焦点事件 | onFocus,onBlur |
| 表单事件 | onChange,onInput,onSubmit |
| 触控事件 | onTouchCancel,onTouchEnd onTouchMove,onTouchStart |
| UI事件 | onScroll |
| 滚轮事件 | onWheel |
在index.js增加一个button,对其绑定点击事件;增加一个select,对其绑定onChange事件
增加一个input事件,对其绑定onBlur事件。首先需要在constructor里面给添加的事件绑定this对象,再实现事件,最后在需要它的dom节点上绑定事件,当然,其他的方法中也可以使用this.函数名()来调用事件,如this.handleSubmit(data);
export default class Index extends React.Component{
constructor(props){
super(props);
this.handleClick = this.handleClick.bind(this);
this.handleBlur = this.handleBlur.bind(this);
this.handleChange = this.handleChange.bind(this);
}
handleClick(e){
console.log(e.target);
console.dir(e.target);
console.log("------------");
}
handleBlur(e){
console.log(e.target);
console.dir(e.target);
console.log(e.target.value);
console.log("------------");
}
handleChange(e){
console.log(e.target);
console.dir(e.target);
console.log(e.target.value);
console.log("------------");
}
render(){
return (
这是index.js
测试input框的onblur事件
测试select的onchange事件
);
}
}

refs
refs是react中的一种属性,可以在render方法中的虚拟dom节点添加ref属性,refs的用途是获取实例,可返回真实dom节点,修改index.js的代码
export default class Index extends React.Component{
constructor(props){
super(props);
}
componentDidMount(){
console.log(this.refs.mybutton);
console.log(this.refs.mysection);
}
render(){
return (
这是index.js

可见,如果我们直接在html节点上添加ref属性,通过this.refs.ref名即可获得真实的dom节点;如果是在我们自己的组件上添加ref属性,通过this.refs.ref名获得的是虚拟dom节点,这样就可以调用组件里面的方法。修改index.js
import React from 'react'
class IndexSection extends React.Component{
constructor(props){
super(props);
this.state = {name:"IndexSection自身的state:name",age:"IndexSection自身的state:age"};
this.testlog = this.testlog.bind(this);
}
testlog(){
console.log("使用ref调用子组件的方法");
}
...
}
export default class Index extends React.Component{
constructor(props){
super(props);
}
componentDidMount(){
console.log(this.refs.mybutton);
this.refs.mysection.testlog();
}
...
}

父子通信
父->子
父组件传递props给子组件 这里就不测试了
子->父
父组件使用props传递回调函数给子组件
修改index.js
import React from 'react'
class IndexSection extends React.Component{
constructor(props){
super(props);
this.state = {name:"IndexSection自身的state:name",age:"IndexSection自身的state:age"};
}
componentDidMount(){
this.props.test("子组件挂载完成");
}
...
}
export default class Index extends React.Component{
constructor(props){
super(props);
this.mymethod = this.mymethod.bind(this);
}
mymethod(e){
console.log("子组件调用了父组件的方法,传递参数值:"+e);
}
  render(){
    return (

          这是index.js


    );
  }
}

此处注意constructor的绑定this对象和父组件给子组件设置回调函数props的花括号和子组件调用函数的this.props调用
子->子
父组件做通信桥梁使子组件能互相调用对方的回调函数
我们测试点击IndexSection中的button修改IndexSectionA中button的文字,在index.js创建IndexSectionA组件,并创建setButtonText方法,父组件写一个中间函数passtext,父组件给IndexSection组件传递中间函数passtext,给IndexSectionA设置ref属性,并在passtext里面调用IndexSectionA的setButtonText方法。
index.js代码如下
import React from 'react'
class IndexSection extends React.Component{
constructor(props){
super(props);
this.handleClick = this.handleClick.bind(this);
}
handleClick(){
this.props.settext("你的button文字被我修改了");
}
render(){
return (
);
}
}
class IndexSectionA extends React.Component{
constructor(props){
super(props);
this.state = {buttontext:"IndexSectionA的按钮文字"}
}
setButtonText(text){
this.setState({buttontext:text});
}
render(){
return (
);
}
}
export default class Index extends React.Component{
constructor(props){
super(props);
this.passmethod = this.passmethod.bind(this);
}
passmethod(e){
console.log("父组件充当通信桥梁,收到参数为:"+e);
this.refs.sectiona.setButtonText(e);
}
render(){
return (
这是index.js
);
}
}

网络请求
作为一个网页应用肯定需要请求网络数据,本教程使用axios请求网络,使用quertstring将对象序列化为字符串传输,首先使用npm安装axios和querystring
npm install axios querystring -save
在app目录下新建util文件夹,新建axios工具axios.js
import axios from 'axios'
import querystring from 'querystring';

export function axiosPost(url, params , callback ,errorcallback) {
  let config = {
   'headers':{'Content-Type': 'application/x-www-form-urlencoded'},
  }
    axios.post(url, querystring.stringify(params))
      .then(result=>callback(result))
      .catch(e => {console.log("Oops, error", e);if(errorcallback != null){errorcallback(e);}});
}

export function axiosGet(url, callback ,errorcallback){
  let data = {
    'headers':{'Content-Type': 'application/x-www-form-urlencoded'}
  }
  axios.get(url, data)
    .then(result=>callback(result))
    .catch(e => {console.log("Oops, error", e);if(errorcallback != null){errorcallback(e);}});
}
axios.js封装了两个函数,axiosGet和axiosPost,callback为请求成功回调,errorcallbak为请求失败回调(可不传)。
webpack-dev-server代理
在调试的时候我们有时需要使用网络接口,使用axios请求数据则会遇到跨域问题,这时可在webpack-dev-server配置代理,修改webpack.config.js,这里我们配置中国天气网接口的代理,顺便测试使用上面的axios工具,北京天气接口地址为:http://www.weather.com.cn/data/cityinfo/101010100.html 则找到webpack.config.js里面的devServer节点,添加proxy规则
proxy: {
    '/data/*': {
        target: 'http://www.weather.com.cn/',
        secure: false,
        changeOrigin: true
    }
}
第2行的"/data/*"代表 localhost:3000/data/ 的请求会代理到target配置的网址,保存后重启项目。在index.js引入axios工具,并在Index组件的componentDidMount函数下面测试使用axios请求北京天气
import {axiosGet} from '../util/axios'

componentDidMount(){
    axiosGet("/data/cityinfo/101010100.html",function(result){
      console.log(result);
    });
}
浏览器打开app首页,F12进入调试工具,查看输出的结果。
这里axios请求成功的回调带回result参数,里面的data为接口返回的结果,status为http请求状态码
网络请求一般在组件componentDidMount函数里面发起,获取后设置为组件的state
react-router4路由
对react-router4的详细讲解请看我的另一篇文章React-Router v4简单入门教程
我们之前都在学习react的基本使用,只在一个页面也就是index上面练习,但是我们的应用肯定不只是一个页面的,接下来我们使用react-router4作为前端路由编写真正的SPA应用,建议开始之前大概浏览一下上面提到的讲解文章。
首先安装react-router-dom
npm install react-router-dom -save
在app文件夹创建router文件夹,在里面新建router.js,编写路由配置
import React from 'react';
import {BrowserRouter,Route,Switch } from 'react-router-dom'

import Index from '../components/index.js'

export default class AppRouter extends React.Component {
    constructor(props) {
        super(props);
    }
    render() {
        return (


        )
    }
}
改造main.js,引入路由配置
import React from 'react';
import ReactDOM from 'react-dom';
import AppRouter from './router/router'; //路由配置
ReactDOM.render(
重启项目,浏览器刷新后,index是不是又出来了?
接下来编写一个新的页面,在components文件夹下新建subpage.js
import React from 'react'

export default class SubPage extends React.Component{
  constructor(props){
    super(props);
  }
  render(){
    return (

          这是subpage.js。为subpage页面

    );
  }
}
修改路由配置router.js
import React from 'react';
import {BrowserRouter,Route,Switch } from 'react-router-dom'

import Index from '../components/index.js'
import SubPage from '../components/subpage.js'

export default class AppRouter extends React.Component {
    constructor(props) {
        super(props);
    }
    render() {
        return (


        )
    }
}
刷新浏览器,在3000端口后面输入"/subpage",观察现象

出404错误?这是怎么回事?
我们的router配置确实是正确的,这时候就要考虑是否是webpack-dev-server的问题,果然,是因为webpack配置有问题。原文链接
果断修改webpak.config.js,在devServer中添加historyApiFallback: true
devServer: {
        inline: true,
        historyApiFallback: true,
        port: 3000
    },
重启项目再刷新浏览器

问题解决
我们想实现路径参数避免search(a.html?param=..)出现,比如 /article?id=100 -> /article/100
更改我们的路由配置router.js
import React from 'react';
import {BrowserRouter,Route,Switch } from 'react-router-dom'

import Index from '../components/index.js'
import SubPage from '../components/subpage.js'

const Article = () =>(


)

export default class AppRouter extends React.Component {
    constructor(props) {
        super(props);
    }
    render() {
        return (


        )
    }
}
修改subpage.js验证参数是否传到
render(){
    return (


            这是subpage.js。为article页面
            {this.props.match.params.id != null ? ",id为"+this.props.match.params.id:null}


    );
  }

这里BrowserRouter里面的
引入css文件
由于我们使用webpack打包,css资源最终也会被打包嵌入到生成的js中,这时需要css的loader去帮我们处理css文件,一般处理css需要style-loader和css-loader,如果你打算使用less或sass的话,你可能需要安装其他的loader来处理。首先我们安装这两个loader:npm install style-loader css-loader --save-dev,然后修改webpack.config.js,找到module节点下的rule节点,添加如下代码
{
    test: /\.css$/,
        use: [
            'style-loader',
            'css-loader',
        ],
}
test后面是一个正则表达式,代表匹配的文件为以.css结尾的文件使用style-loader和css-loader
之后我们在app目录下创建文件夹style,用于存放css文件,并新建main.css
h1{
  color:red;
  font-size: 30px;
  text-decoration: underline;
}
在index.js头部引入该css:import '../style/main.css',查看浏览器页面变化
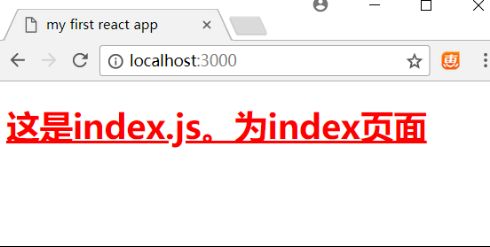
这里需要说明的是,当在使用class属性设置样式的时候,在react里面,标签不可以使用class来设置样式,而是应该使用className来代替,如
使用webpack打包
看到这里,如果你一直跟着敲代码到这里的话,你的app应该是有一个index页面,一个article页面,并且是引入了css样式的,你可以接着编写出其他的页面,也可以跟着我学习如何进行打包。之前的代码都是以dev模式运行在webpack-dev-server上,调试信息都会输出在浏览器的控制台,并且代码没有压缩,整个js很大,我们需要对app进行打包。
首先在根目录创建webpack.config.dist.js,可是我们已经有webpack.config.js了,为什么还需要创建一个呢?我们可以在webpack.config.dist.js里面配置发布版本的配置,而原来的webpack.config.js为调试版本的配置,所以不妨把webpack.config.js改名为webpack.config.dev.js,这样还需要修改package.json文件下的scripts节点,添加start和build指令
"start": "webpack-dev-server --devtool eval --progress --colors --content-base build --config ./webpack.config.dev.js"
"build": "webpack -p --config ./webpack.config.dev.js"
新建webpack.config.dev.js
var path = require('path');
var webpack = require('webpack');
module.exports = {
    entry: [path.resolve(__dirname, './app/main.js')],
    output: {
        path: path.resolve(__dirname, './build'),
        filename: 'bundle.js',
        publicPath:'/'
    },
    module: {
      rules: [
           {
               test: /\.js?$/,
               exclude: /(node_modules|bower_components)/,
               loader: 'babel-loader',
           },
            {
                test: /\.css$/,
                use: [
                    'style-loader',
                    'css-loader',
                ],
            }
        ],
    },
    plugins: [
          //移除打包后的警告
          new webpack.DefinePlugin({
              "process.env": {
                  NODE_ENV: JSON.stringify("production")
              }
          }),
          new webpack.optimize.ModuleConcatenationPlugin(),
    ]
};
保存之后,在终端输入npm run build,打包好的js文件就放在build文件夹下了,现在生成的js从原来的600多kb压缩为了170多kb,当然还可以压缩的更小,比如提取公共模块和按需加载。
nginx上部署
生成好后,我们就可以将build文件夹的index.html和bundle.js部署到服务器上了,这里我在centos虚拟机部署,这里部署的app当做静态资源文件,我们先在centos虚拟机安装nginx,由于是centos7 64位,先下载rpm包
wget http://nginx.org/packages/centos/7/x86_64/RPMS/nginx-1.12.2-1.el7_4.ngx.x86_64.rpm
然后安装nginxsudo yum install nginx-1.12.2-1.el7_4.ngx.x86_64.rpm
启动nginx服务 sudo service nginx start
打开浏览器输入localhost,welcome to nginx!
之后配置nginx.conf,nginx配置文件夹在/etc/nginx下面,修改nginx.conf
user  root;
worker_processes  1;

error_log  /var/log/nginx/error.log warn;
pid        /var/run/nginx.pid;

events {
    worker_connections  1024;
}

http {
    include       /etc/nginx/mime.types;
    default_type  application/octet-stream;

    log_format  main  '$remote_addr - $remote_user [$time_local] "$request" '
                      '$status $body_bytes_sent "$http_referer" '
                      '"$http_user_agent" "$http_x_forwarded_for"';
    access_log  /var/log/nginx/access.log  main;
    sendfile        on;
    #tcp_nopush     on;
    keepalive_timeout  65;
    #gzip  on;
    server {
        listen       80;
        server_name  localhost;

        location / {
            try_files $uri $uri/ /index.html;
            root   /home/shane/develope/static;
            index  index.html index.htm;
        }
    }
}
然后把build文件夹里面的index.html和bundle.js拷贝到虚拟机目录的对应位置,即nginx配置的 location下的root对应的目录,之后重启nginx或reload,重启吧...sudo service nginx restart
重要的一步。。。如果你也是centos7的话请先关闭SELinux,否则nginx没有权限读取文件,直接sudo setenforce 0暂时关闭SELinux,然后访问localhost:80 查看是否出现页面

参考资料
- react官方文档
- npm install 时--save-dev和--save的区别 - 学习会让你青春永驻 - 博客园
- webpack4.0.1安装问题和webpack.config.js的配置变化 - CSDN博客
- React.Component 生命周期 - 爬虫一只 - 博客园
- 玩转 React(五)- 组件的内部状态和生命周期
- setState详解 - CSDN博客
- 事件系统 - React 中文版 - 极客学院Wiki
- react-router browserHistory刷新页面404问题解决 – 熊建刚的博客