Qt实用技巧:在Qt Gui程序中嵌入qml界面(可动态覆盖整个窗口)
若该文为原创文章,未经允许不得转载
原博主博客地址:http://blog.csdn.net/qq21497936
原博主博客导航:https://blog.csdn.net/qq21497936/article/details/102478062
本文章博客地址:http://blog.csdn.net/qq21497936/article/details/78486552
各位读者,知识无穷而人力有穷,要么改需求,要么找专业人士,要么自己研究
红胖子(红模仿)的博文大全:开发技术集合(包含Qt实用技术、树莓派、三维、OpenCV、OpenGL、ffmpeg、OSG、单片机、软硬结合等等)持续更新中…(点击传送门)
Qt开发专栏:实用技巧(点击传送门)
前话
使用qml做界面比使用qtgui强大很多,当然内存使用增大,效率降低是无法避免的,各有取舍,一般在电脑上跑的使用qml也基本无压力吧,当然具体情况具体分析。
需求
跨入qml,需要做一系列动画,考虑将qml与qwidget结合起来,所以首先要做的是:
1.如何将qml嵌入qwidget中;
2.如何将动态更改qml窗口的大小;
原理
将qml嵌入式到qwidget中,qt4与qt5方法有很大区别,本人使用的qt5.2;
通过创建窗口容器的方法QWidget::createWindowContainer()将qml嵌入式qwidget,传递值使用setContextProperty()方法;
入坑
1.设置qml交互属性的时候,设置一次交互属性值,才会更新一次,所以要主动重新设置属性一次,在resizeEvent()中,每次改变都设置
2.在设置根Rectangle的时候,经过测试发现width和height可决定QuickWidget的宽度和高度,实际操作过程中width和height变大时,实际效果未变大,未变大的原因是因为Rectangle的width和height超过了QQuickWidget的width和height,即超出了QucikWidget的显示范围,所以显示不出;
3.QuickWidget若没有qml的元素部分,默认背景是白色的;
特性
qml的根窗口的0,0永远是其qwdiget的右上角;
qml中的子控件的坐标永远是相对其父的右上角的坐标;
qml根Rectangle,若不设置高度和宽度,那么第一次默认显示为全窗口,当动态调节主窗口(嵌入式qml的窗口)时,qml的窗口大小不会更改,需要手动;
代码
第一部分:./qml/start.qml代码
import QtQuick 2.0

Rectangle {
    x: 0; // 缺省为0
    y: 0; // 缺省为0
    width: quickWidgetWidth;   // width是宽度
    height: quickWidgetHeight; // height是高度
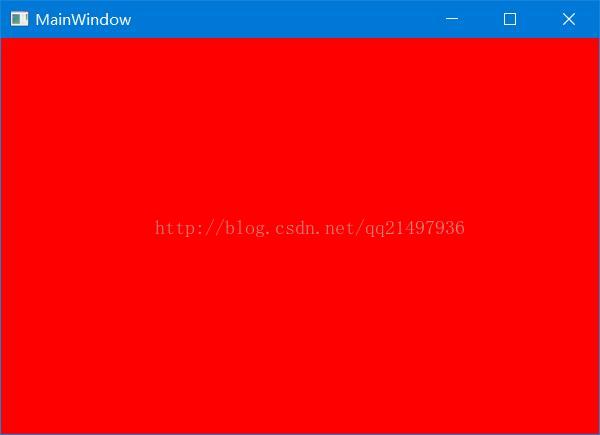
    color: "red";
}
第二部分:将qml嵌入qwidget代码(包含改变窗口大小时,qml大小适配)
void MainWindow::initQmlWidget()
{
    qDebug() << __FILE__ << __LINE__ << rect() << geometry();
    // 初始化quick窗口
    _pQuickView = new QQuickView();
    _pQuickView->setSource(QUrl("./qml/start.qml"));
    _pQuickWidget = QWidget::createWindowContainer(_pQuickView, this);
    // 用于与qml交互
    _pQmlContext = _pQuickView->rootContext();
    // 显示qml
    _pQuickWidget->show();
}

void MainWindow::resizeEvent(QResizeEvent *e)
{
    // 设置 QQuickWidget 窗口大小
    _pQuickWidget->setGeometry(rect());
    // 设置 将qml中的rectangle属性值,使rectangle铺满QQuickWidget,而QQucikWidget设置为铺满主窗口
    _pQmlContext->setContextProperty("quickWidgetWidth", rect().width());
    _pQmlContext->setContextProperty("quickWidgetHeight", rect().height());
}
效果
拓展1
可以将qml的qwidget窗口所在的父窗口设置为,无边框,代码如下
    // 设置无边框
    setWindowFlags(windowFlags() | Qt::FramelessWindowHint);
拓展1效果
拓展2
在一个qml中,根对象只有一个,那么如何显示多个rectange呢,使用Item对象作为根对象,无法改变背景颜色;
import QtQuick 2.0

Item
{
    Rectangle {
        x: 0;
        y: 0;
        width: 200;   // 根据主窗口宽度改变
        height: 200; // 根据主窗口高度改变
        color: 'yellow';
        Text {
            anchors.centerIn: parent;
            text: 'hello world!';
        }
    }

    Rectangle {
        x:300
        y:300
        width: 200;
        height: 200;
        color: "red";
    }
}
拓展2效果
拓展3
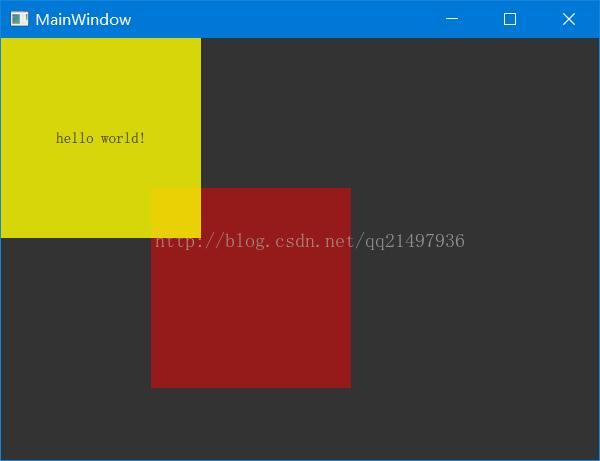
实现背景,实现透明
import QtQuick 2.0

Item
{
    Rectangle {

        width: quickWidgetWidth;
        height: quickWidgetHeight;
        color: "black";
        Rectangle {
            x: 0;
            y: 0;
            width: 200;
            height: 200;
            color: 'yellow';
            Text {
                anchors.centerIn: parent;
                text: 'hello world!';
            }
            z: 1; // 堆叠顺序,越大越在上面
        }

        Rectangle {
            x:150
            y:150
            width: 200;
            height: 200;
            color: "red";
            opacity: 0.6 // 透明度,会叠加在父类上
            z: 0; // 堆叠顺序,越大越在上面
        }
        opacity: 0.8; // 透明度
    }
}
拓展3效果
原博主博客地址:http://blog.csdn.net/qq21497936
原博主博客导航:http://blog.csdn.net/qq21497936/article/details/102478062
本文章博客地址:http://blog.csdn.net/qq21497936/article/details/78486552


