iOS开发——UI环(圆)形进度条按进度进行绘制
文章目录
- 一、 写在前面
- 二、 CABasicAnimation的使用
- 2.1 基本介绍
- 2.2 实例化
- 2.3 设定动画
- 2.3.1 使用方法functionWithName
- 2.4 防止动画结束后回到初始状态
- 2.4.1 fillMode属性的理解
- 2.5 其他的一些设置属性
- 2.6 使用总结
- 三、 实现简单的进度条功能
- 3.1 实现思路
- 3.2 实现步骤
- 3.2.1 自定义一个UIView的子类
- 3.2.2 重写成员属性progress的setter
- 3.2.3 核心部分:重写- (void)drawRect:(CGRect)rect
- 四、 滑动条UISlider的使用方法
- 4.1 创建滑动条
- 4.2 设定滑动条属性
- 4.3 拖动滑动条时的响应方法
- 五、圆形进度条、带渐变(带demo)
- 5.1 画圆:CAShapeLayer与UIBezierPath配合使用
- 5.2 添加颜色渐变层CAGradientLayer
- 5.3 设置遮罩层
- 5.3.1 未设置遮罩层时
- 5.3.2 设置遮罩层后
- 5.3.3 下面进入正题,设置底层渐变layer,即:grain的遮盖层(主要)
- 5.4 设置遮罩layer:_progressLayer 的动画
- 六、 主要代码
- 6.1 cycleViewProgress.h
- 6.2 cycleViewProgress.m
- 6.3 demo
- 七、 自我总结
一、 写在前面
根据需求,需要实现一个圆形的进度条,根据当前程序进行的进度来实现进度条的状态。文章最后会提供demo。
二、 CABasicAnimation的使用
2.1 基本介绍
CABasicAnimation提供了最基础的动画属性设置,是简单的keyframe动画性能。CABasicAnimation可以看做是一种CAKeyframeAnimation的简单动画,因为它只有头尾的关键帧(keyframe)。
我们可以创建一个CABasicAnimaiton的对象通过keyPath的方式。CABasicAnimation提供了fromValue、toValue、byValue的设置(插值)。它们三个属性定义了一个动画的轨迹,并且最少两个值不能为空。
当设置了CABasicAnimation的起点与终点值后,中间的值都是通过插值方式计算出来的,插值计算是通过timingFunction来指定,timingFunction默认为空,使用liner(匀速运动)。例如,当我们设置了一个position的动画,设置了开始值PointA与结束值PointB,它们的运动先计算PointA与PointB的中间运动值PointCenter,而PointCenter是由timingFunction来指定值的,并且动画默认是直线匀速运动的。
2.2 实例化
使用方法animationWithKeyPath:对 CABasicAnimation进行实例化,并指定Layer的属性作为关键路径进行注册。
CABasicAnimation *pathAnimation=[CABasicAnimation animationWithKeyPath:@"strokeEnd"];
2.3 设定动画
| 属性 | 说明 |
|---|---|
| duration | 动画的时长 |
| repeatCount | 重复的次数。不停重复设置为 HUGE_VALF |
| repeatDuration | 设置动画的时间。在该时间内动画一直执行,不计次数。 |
| beginTime | 指定动画开始的时间。从开始延迟几秒的话,设置为【CACurrentMediaTime() + 秒数】 的方式 |
| timingFunction | 设置动画的速度变化 |
| autoreverses | 动画结束时是否执行逆动画 |
| fromValue | 所改变属性的起始值 |
| toValue | 所改变属性的结束时的值 |
| byValue | 所改变属性相同起始值的改变量 |
例如:
    pathAnimation.duration = 1;
    pathAnimation.timingFunction = [CAMediaTimingFunction functionWithName:kCAMediaTimingFunctionLinear];
    // 开始位置
    pathAnimation.fromValue = [NSNumber numberWithFloat:start];
    // 过程中的位置,即到什么位置结束
    pathAnimation.toValue = [NSNumber numberWithFloat:pro];
    // 插入值
    //pathAnimation.byValue = [NSNumber numberWithFloat:0.5];
2.3.1 使用方法functionWithName
kCAMediaTimingFunctionLinear 在整个动画时间内动画都是以一个相同的速度来改变。也就是匀速运动。
kCAMediaTimingFunctionEaseIn 动画开始时会较慢,之后动画会加速。
kCAMediaTimingFunctionEaseOut 动画在开始时会较快,之后动画速度减慢。
kCAMediaTimingFunctionEaseInEaseOut 动画在开始和结束时速度较慢,中间时间段内速度较快。
2.4 防止动画结束后回到初始状态
只需设置removedOnCompletion、fillMode两个属性就可以了。
transformAnima.removedOnCompletion = NO;
transformAnima.fillMode = kCAFillModeForwards;
2.4.1 fillMode属性的理解
该属性定义了你的动画在开始和结束时的动作。默认值是 kCAFillModeRemoved。
取值的解释:
kCAFillModeRemoved 动画将在设置的 beginTime 开始执行(如没有设置beginTime属性,则动画立即执行),动画执行完成后将会layer的改变恢复原状。
kCAFillModeForwards 动画即使之后layer的状态将保持在动画的最后一帧,而removedOnCompletion的默认属性值是 YES,所以为了使动画结束之后layer保持结束状态,应将removedOnCompletion设置为NO。
kCAFillModeBackwards 设置为该值,将会立即执行动画的第一帧,不论是否设置了 beginTime属性。观察发现,设置该值,刚开始视图不见,还不知道应用在哪里。
kCAFillModeBoth 该值是 kCAFillModeForwards 和 kCAFillModeBackwards的组合状态
解释:为什么动画结束后返回原状态?
首先我们需要搞明白一点的是,layer动画运行的过程是怎样的?其实在我们给一个视图添加layer动画时,真正移动并不是我们的视图本身,而是 presentation layer 的一个缓存。动画开始时 presentation layer开始移动,原始layer隐藏,动画结束时,presentation layer从屏幕上移除,原始layer显示。这就解释了为什么我们的视图在动画结束后又回到了原来的状态,因为它根本就没动过。
这个同样也可以解释为什么在动画移动过程中,我们为何不能对其进行任何操作。
所以在我们完成layer动画之后,最好将我们的layer属性设置为我们最终状态的属性,然后将presentation layer 移除掉。
2.5 其他的一些设置属性
repeatCount 设置动画的执行次数
autoreverses 默认值为 NO,将其设置为 YES
speed 改变动画的速度 可以直接设置动画上的speed属性,这样只有这个动画速度。
animation.speed = 2;
或者在layer上设置speed属性,这样在该视图上的所有动画都提速,该视图上的所有子视图上的动画也会提速。
speed两点需注意的:
(1) 如果设置动画时间为4s,speed设置为2,则动画只需2s即可执行完。
(2)如果同时设置了动画的speed和layer 的speed,则实际的speed为两者相乘。
2.6 使用总结
- 在动画执行完成之后,最好还是将动画移除掉。也就是尽量不要设置removedOnCompletion属性为NO
- fillMode尽量取默认值就好了,不要去设置它的值。只有在极个别的情况下我们会修改它的值,以后会说到,这里先占个坑。
- 解决有时视图会闪动一下的问题,我们可以将layer的属性值设置为我们的动画最后要达到的值,然后再给我们的视图添加layer动画。
三、 实现简单的进度条功能
3.1 实现思路
1、要实现绘图,通常需要自定义一个UIView的子类,重写父类的- (void)drawRect:(CGRect)rect方法,在该方法中实现绘图操作
2、效果图所示的效果其实是绘制一个圆弧,动态的改变终点的位置,最终达到一个封闭的圆。
3.2 实现步骤
3.2.1 自定义一个UIView的子类
//提供一个成员属性,接收进度值
@property (nonatomic, assign) CGFloat progress;
3.2.2 重写成员属性progress的setter
//每次改变成员属性progress的值,就会调用它的setter
- (void)setProgress:(CGFloat)progress
{
  //调用其他的自定函数操作,比如进度条的动画绘制

  // 仅用于效果
   _progress = progress;
  //当下载进度改变时,手动调用重绘方法
  [self setNeedsDisplay];
}
3.2.3 核心部分:重写- (void)drawRect:(CGRect)rect
- (void)drawRect:(CGRect)rect
{
  //设置圆弧的半径
  CGFloat radius = rect.size.width * 0.5;
  //设置圆弧的圆心
  CGPoint center = CGPointMake(radius, radius);
  //设置圆弧的开始的角度(弧度制)
  CGFloat startAngle = - M_PI_2;
  //设置圆弧的终止角度
  CGFloat endAngle = - M_PI_2 + 2 * M_PI * self.progress;
  //使用UIBezierPath类绘制圆弧
  UIBezierPath *path = [UIBezierPath bezierPathWithArcCenter:center radius:radius - 5 startAngle:startAngle endAngle:endAngle clockwise:YES];
  //将绘制的圆弧渲染到图层上(即显示出来)
  [path stroke];
}
四、 滑动条UISlider的使用方法
4.1 创建滑动条
// 滑动条slider
UISlider *slider = [[UISlider alloc] initWithFrame:CGRectMake((SCREENWIDTH - 150) / 2, 200, 150, 20)];
[self.view addSubview:slider];
4.2 设定滑动条属性
    // 滑动条slider
    UISlider *slider = [[UISlider alloc] initWithFrame:CGRectMake((SCREENWIDTH - 150) / 2, 200, 150, 20)];
    slider.minimumValue = 9;// 设置最小值
    slider.maximumValue = 11;// 设置最大值
    slider.value = (slider.minimumValue + slider.maximumValue) / 2;// 设置初始值
    slider.continuous = YES;// 设置可连续变化
//    slider.minimumTrackTintColor = [UIColor greenColor]; //滑轮左边颜色,如果设置了左边的图片就不会显示
//    slider.maximumTrackTintColor = [UIColor redColor]; //滑轮右边颜色,如果设置了右边的图片就不会显示
//    slider.thumbTintColor = [UIColor redColor];//设置了滑轮的颜色,如果设置了滑轮的样式图片就不会显示
    [slider addTarget:self action:@selector(sliderValueChanged:) forControlEvents:UIControlEventValueChanged];// 针对值变化添加响应方法
    [self.view addSubview:slider];
如上所示,在代码中,我们设置了最大值、最小值、当前值。也可以改变滑动条左边、右边一集滑块本身的颜色,不过我们这里采用默认的设置,更改方法代码中也写了。
slider.continuous = YES; 设为YES后,我们才能在拖动滑块的过程中持续获取其值变更事件,如果是NO,则只有在滑动停止时才会获取变更事件。
4.3 拖动滑动条时的响应方法
// slider变动时改变label值
- (void)sliderValueChanged:(id)sender {
    UISlider *slider = (UISlider *)sender;
    // label需要自己创建
    self.valueLabel.text = [NSString stringWithFormat:@"%.1f", slider.value];
}
五、圆形进度条、带渐变(带demo)
5.1 画圆:CAShapeLayer与UIBezierPath配合使用
CAShapeLayer 是 CALayer 的子类,她比 CALayer 更灵活,可以画出各种图形,最简单就是和UIBezierPath配合使用。
		// 计算圆心位置
        CGPoint arcCenter = CGPointMake(frame.size.width/2, frame.size.width/2);
        // 计算半径时候需要结合上线宽才行,这个问题困扰了一会
        CGFloat radius = (frame.size.width - PROGRESS_LINE_WIDTH) / 2;
        // 圆形路径
        UIBezierPath *path = [UIBezierPath bezierPathWithArcCenter:arcCenter
                                                            radius:radius
                                                        startAngle:M_PI_2
                                                          endAngle:M_PI*2+M_PI_2
                                                         clockwise:YES];

        //CAShapeLayer
        CAShapeLayer *shapLayer = [CAShapeLayer layer];
        shapLayer.path = path.CGPath;
        shapLayer.fillColor = [UIColor clearColor].CGColor;//图形填充色
        UIColor *grayColor =  [UIColor colorWithRed:155/255.0 green:155/255.0 blue:155/255.0 alpha:0.8];
        shapLayer.strokeColor =  grayColor.CGColor;//边线颜色
        shapLayer.lineWidth = PROGRESS_LINE_WIDTH;
        [self.layer addSublayer:shapLayer];
        // 想看渐变效果的话可以把上面的这句话给注释掉
5.2 添加颜色渐变层CAGradientLayer
CAGradientLayer是CALayer的子类,用来做渐变色的,用法请参考:
https://www.cnblogs.com/YouXianMing/p/3793913.html?utm_source=tuicool
这篇帖子中介绍的很详细,就不做介绍了。
        // 若渐变图层两个 渐变:RYUIColorWithRGB(140, 94, 0)   >>  RYUIColorWithRGB(229, 168, 46)   >>    RYUIColorWithRGB(140, 94, 0)
        CALayer * grain = [CALayer layer];
        [self.layer addSublayer:grain];
        //采用一个渐变底层,若用两个,注意底层的大小问题,一定要平分
        CAGradientLayer * gradientLayer = [CAGradientLayer layer];
        gradientLayer.frame = CGRectMake(0, 0, frame.size.width, frame.size.height);
        // 颜色分配
        [gradientLayer setColors:[NSArray arrayWithObjects:
                                   (id)[UIColorWithRGBStart CGColor],
                                   (id)[UIColorWithRGBEnd CGColor], nil]];

        [gradientLayer setLocations:@[@0.3,@1]];// 颜色分割线
        [gradientLayer setStartPoint:CGPointMake(0, 0)];// 起始点
        [gradientLayer setEndPoint:CGPointMake(1, 1)];// 结束点
        [grain addSublayer:gradientLayer];
5.3 设置遮罩层
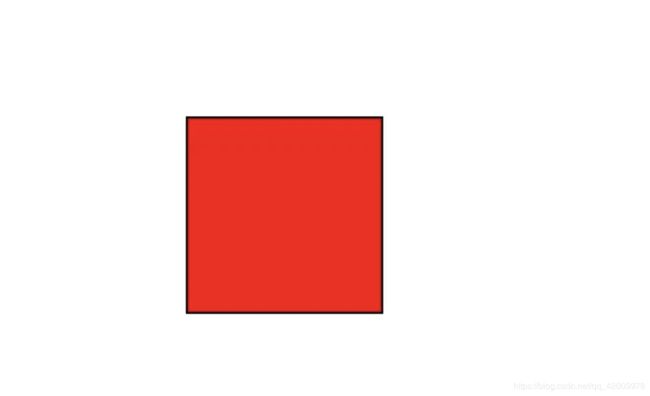
layer的遮罩层介绍: 设置遮罩层:CALayer的mask属性,设置遮罩层后,layer.mask = maskLayer;maskLayer透明的地方layer不显示,maskLayer不透明的地方layer显示。
5.3.1 未设置遮罩层时
    UIView *bgView = [[UIView alloc]initWithFrame:CGRectMake(100, 100, 100, 100)];
    [self.view addSubview:bgView];
    bgView.layer.borderColor = [UIColor blackColor].CGColor;
    bgView.layer.borderWidth = 1;
    //底层被遮罩的layer
    CAGradientLayer *gradientLayer = [CAGradientLayer layer];
    [bgView.layer addSublayer:gradientLayer];
    gradientLayer.frame = CGRectMake(0, 0, 100, 100);
    gradientLayer.backgroundColor = [UIColor redColor].CGColor;
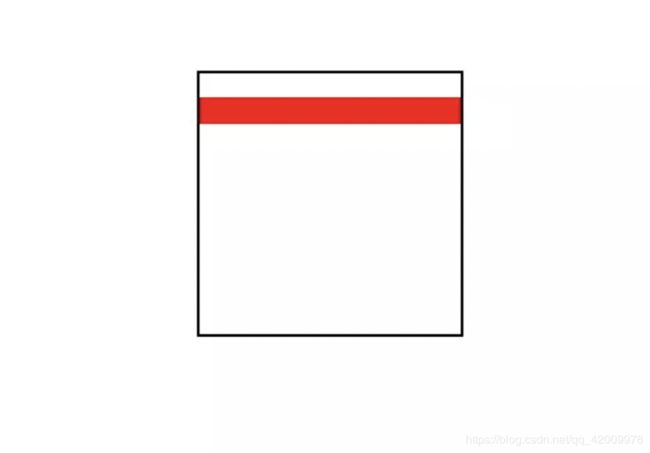
5.3.2 设置遮罩层后
//遮罩层
    CALayer *maskLayer = [CALayer layer];
    maskLayer.frame = CGRectMake(0, 10, 100, 10);
    gradientLayer.mask = maskLayer;
效果图:(由于未设置遮罩层颜色,故底层红色layer不显示)

遮罩层设置颜色后:
遮罩层有颜色的地方显示下面的layer,透明的地方反而不显示
maskLayer.backgroundColor = [UIColor blackColor].CGColor;
5.3.3 下面进入正题,设置底层渐变layer,即:grain的遮盖层(主要)
 		//进度layer 即:遮盖layer
        _progressLayer = [CAShapeLayer layer];
        [self.layer addSublayer:_progressLayer];
        _progressLayer.path = path.CGPath;
        _progressLayer.strokeColor = [UIColor blueColor].CGColor;
        _progressLayer.fillColor = [[UIColor clearColor] CGColor];
        _progressLayer.lineWidth = PROGRESS_LINE_WIDTH;
        _progressLayer.strokeEnd = 0.f;
        _progressLayer.strokeStart = 0.0f;
        _firstTime = true;
        grain.mask = _progressLayer;//设置遮盖层
5.4 设置遮罩layer:_progressLayer 的动画
结合前面的第二、三、四看。
- (void)setProgress:(float)progress {
//    [self startAninationWithStart:self.start withPro:progress];
    [self endAninationWithValue:progress];
}

// 此方法,实现的是规定开始与结束位置,实现一次性的绘制
- (void)startAninationWithStart:(CGFloat)start withPro:(CGFloat)pro
{
    CABasicAnimation *pathAnimation=[CABasicAnimation animationWithKeyPath:@"strokeEnd"];
    pathAnimation.duration = 1;
    pathAnimation.timingFunction = [CAMediaTimingFunction functionWithName:kCAMediaTimingFunctionLinear];
    // 开始位置
    pathAnimation.fromValue = [NSNumber numberWithFloat:start];
    // 过程中的位置,即到什么位置结束
    pathAnimation.toValue = [NSNumber numberWithFloat:pro];
    // 插入值
    //pathAnimation.byValue = [NSNumber numberWithFloat:0.5];
    pathAnimation.autoreverses=NO;
    pathAnimation.fillMode = kCAFillModeForwards;
    pathAnimation.removedOnCompletion = NO;
    pathAnimation.repeatCount = 1;
    [_progressLayer addAnimation:pathAnimation forKey:@"strokeEndAnimation"];
}

// 此方法实现绘制过程中,实时定制绘制的终点
-(void)endAninationWithValue:(CGFloat)end
{
    CABasicAnimation *pathAnimation=[CABasicAnimation animationWithKeyPath:@"strokeEnd"];
    pathAnimation.duration = 1;
    pathAnimation.timingFunction = [CAMediaTimingFunction functionWithName:kCAMediaTimingFunctionLinear];
    if (_firstTime){
        pathAnimation.fromValue = [NSNumber numberWithFloat:0];
    } else {
        pathAnimation.fromValue = [NSNumber numberWithFloat:_lastProgress];
    }
    // 插入值
//    pathAnimation.byValue = [NSNumber numberWithFloat:end];
    // 终点值
    pathAnimation.toValue = [NSNumber numberWithFloat:end];

    pathAnimation.autoreverses=NO;
    pathAnimation.fillMode = kCAFillModeForwards;
    pathAnimation.removedOnCompletion = NO;
    pathAnimation.repeatCount = 1;
    _lastProgress = end;
    _firstTime = false;
    [_progressLayer addAnimation:pathAnimation forKey:@"strokeEndAnimation"];
}
六、 主要代码
6.1 cycleViewProgress.h
//
// cycleViewProgress.h
// CycleProgressBar
//
// Created by 孙明喆 on 2020/1/17.
// Copyright © 2019 孙明喆. All rights reserved.
//
#import 6.2 cycleViewProgress.m
//
//  cycleViewProgress.m
//  CycleProgressBar
//
//  Created by 孙明喆 on 2020/1/17.
//  Copyright © 2019 孙明喆. All rights reserved.
//

#import "cycleViewProgress.h"

#define RYUIColorWithRGB(r,g,b) [UIColor colorWithRed:r/255.0 green:g/255.0 blue:b/255.0 alpha:1]

@interface cycleViewProgress()

@property(nonatomic,strong)CAShapeLayer * progressLayer;
@property(nonatomic,assign)float lastProgress;
@property(nonatomic,assign)BOOL firstTime;

@end

@implementation cycleViewProgress

-(instancetype)initWithFrame:(CGRect)frame
{
    if (self=[super initWithFrame:frame])
    {
        CGPoint arcCenter = CGPointMake(frame.size.width/2, frame.size.width/2);
        // 计算半径时候需要结合上线宽才行,这个问题困扰了一会
        CGFloat radius = (frame.size.width - PROGRESS_LINE_WIDTH) / 2;
        // 圆形路径
        UIBezierPath *path = [UIBezierPath bezierPathWithArcCenter:arcCenter
                                                            radius:radius
                                                        startAngle:M_PI_2
                                                          endAngle:M_PI*2+M_PI_2
                                                         clockwise:YES];

        //CAShapeLayer
        CAShapeLayer *shapLayer = [CAShapeLayer layer];
        shapLayer.path = path.CGPath;
        shapLayer.fillColor = [UIColor clearColor].CGColor;//图形填充色
        UIColor *grayColor =  [UIColor colorWithRed:155/255.0 green:155/255.0 blue:155/255.0 alpha:0.8];
        shapLayer.strokeColor =  grayColor.CGColor;//边线颜色
        shapLayer.lineWidth = PROGRESS_LINE_WIDTH;
        [self.layer addSublayer:shapLayer];

        //渐变图层 渐变:RYUIColorWithRGB(140, 94, 0)   >>  RYUIColorWithRGB(229, 168, 46)   >>    RYUIColorWithRGB(140, 94, 0)
        CALayer * grain = [CALayer layer];
        [self.layer addSublayer:grain];
        //采用一个渐变底层
        CAGradientLayer * gradientLayer = [CAGradientLayer layer];
        gradientLayer.frame = CGRectMake(0, 0, frame.size.width, frame.size.height);
        // 颜色分配
//        [gradientLayer setColors:[NSArray arrayWithObjects:
//                                   (id)[RYUIColorWithRGB(46, 201, 144) CGColor],
//                                   (id)[RYUIColorWithRGB(21, 203, 210) CGColor], nil]];
        // 颜色分配
        [gradientLayer setColors:[NSArray arrayWithObjects:
                                   (id)[UIColorWithRGBStart CGColor],
                                   (id)[UIColorWithRGBEnd CGColor], nil]];

        [gradientLayer setLocations:@[@0.3,@1]];// 颜色分割线
        [gradientLayer setStartPoint:CGPointMake(0, 0)];// 起始点
        [gradientLayer setEndPoint:CGPointMake(1, 1)];// 结束点
        [grain addSublayer:gradientLayer];
        //进度layer
        _progressLayer = [CAShapeLayer layer];
        [self.layer addSublayer:_progressLayer];
        _progressLayer.path = path.CGPath;
        _progressLayer.strokeColor = [UIColor blueColor].CGColor;
        _progressLayer.fillColor = [[UIColor clearColor] CGColor];
        _progressLayer.lineWidth = PROGRESS_LINE_WIDTH;
        _progressLayer.strokeEnd = 0.f;
        _progressLayer.strokeStart = 0.0f;
        _firstTime = true;
        grain.mask = _progressLayer;//设置遮盖层
    }
    return self;
}
- (void)setProgress:(float)progress {
    [self endAninationWithValue:progress];
}
// 此方法实现绘制过程中,实时定制绘制的终点
-(void)endAninationWithValue:(CGFloat)end
{
    CABasicAnimation *pathAnimation=[CABasicAnimation animationWithKeyPath:@"strokeEnd"];
    pathAnimation.duration = 1;
    pathAnimation.timingFunction = [CAMediaTimingFunction functionWithName:kCAMediaTimingFunctionLinear];
    if (_firstTime){
        pathAnimation.fromValue = [NSNumber numberWithFloat:0];
    } else {
        pathAnimation.fromValue = [NSNumber numberWithFloat:_lastProgress];
    }
    // 插入值
//    pathAnimation.byValue = [NSNumber numberWithFloat:end];
    // 终点值
    pathAnimation.toValue = [NSNumber numberWithFloat:end];

    pathAnimation.autoreverses=NO;
    pathAnimation.fillMode = kCAFillModeForwards;
    pathAnimation.removedOnCompletion = NO;
    pathAnimation.repeatCount = 1;
    _lastProgress = end;
    _firstTime = false;
    [_progressLayer addAnimation:pathAnimation forKey:@"strokeEndAnimation"];
}

@end
6.3 demo
MyGithub
七、 自我总结
基本上总体上来学习了一下绘制的过程,对View的一些属性和用法有更深入的了解了,这篇文章本来打算在1月结束前完成的,但是由于太多事情给耽搁了,过完年后也没怎么停下来,年前将文章的大体框架整理了出来,今天才完成这篇文章,上篇到目前为止,也是框架整理好了。
总要走出自己的舒适圈,我不认为自己有拖延症,但是自制力确实大不如前,2020年,是时候从头再改变自己一次了,fighting!

