「iOS学习」——Masonry学习
iOS学习
- 前言
- Masonry的属性
- Masonry的使用
-
- 基础API
- Auto Boxing
- 修饰语
- 倍数
- 中心点
- 设置边距
- 优先级
- 使用
- 总结
前言
暑假我们学习了使用CocoaPods引入第三方库,实现使用SVG图片。而Masonry作为一个轻量级的布局架构,在使用中可以节省很多时间。故进行简单学习。
Masonry的属性
UI设计是iOS开发的必须一环,直接影响了app的观感和使用体验。我们通常使用frame框架直接确定控件的位置,并通过不断的“微调”使其美观。但这种方法在控件多的时候显得非常复杂,特别是修改时无从下手。此时可以采用AutoLayou来简化我们的布局。但是传统的AutoLayout布局代码量大,通过使用Masonry简化我们的AutoLayout布局。
//基本属性:
@property (nonatomic, strong, readonly) MASConstraint *left;
@property (nonatomic, strong, readonly) MASConstraint *top;
@property (nonatomic, strong, readonly) MASConstraint *right;
@property (nonatomic, strong, readonly) MASConstraint *bottom;
@property (nonatomic, strong, readonly) MASConstraint *leading;
@property (nonatomic, strong, readonly) MASConstraint *trailing;
@property (nonatomic, strong, readonly) MASConstraint *width;
@property (nonatomic, strong, readonly) MASConstraint *height;
@property (nonatomic, strong, readonly) MASConstraint *centerX;
@property (nonatomic, strong, readonly) MASConstraint *centerY;
@property (nonatomic, strong, readonly) MASConstraint *baseline;
属性可以大致分成以下几个部分的内容:
- 尺寸:width、height、size。
- 边界:left、leading、right、trailing、top、bottom、edges。
- 中心点:center、centerX、centerY。
- 偏移量:offset、insets、sizeOffset、centerOffset。
- priority()约束优先级(0~1000),multipler乘因数,dividedBy除因数。
其中,leading为前导边界,通常与用户界面的语言方向相关。在从左到右的语言环境中,leading 等同于左边界;在从右到左的语言环境中,leading 等同于右边界。同理trailing为后继边界,与leading相反。
给出图片便于理解:

Masonry的使用
基础API
//创建约束。
- (NSArray *)mas_makeConstraints:(void(NS_NOESCAPE ^)(MASConstraintMaker *make))block;
//更新某个约束,其他约束不变。
- (NSArray *)mas_updateConstraints:(void(NS_NOESCAPE ^)(MASConstraintMaker *make))block;
//移除所有约束,添加新的约束。
- (NSArray *)mas_remakeConstraints:(void(NS_NOESCAPE ^)(MASConstraintMaker *make))block;

equalTo()
//方法用于创建一个等于指定值的约束。
//示例:make.left.equalTo(superview).offset(20) 表示视图的左边缘等于父视图的左边缘加上 20 个点。
mas_equalTo()
width()
//方法用于创建一个与指定宽度相等的约束。
//make.width.equalTo(200) 表示视图的宽度等于 200 个点。
mas_width()
其中
equalTo:仅支持基本类型
mas_equalTo:支持类型转换,支持复杂类型。是对equalTo的封装。
Auto Boxing
上面例如equalTo或者width这样的,有时候需要涉及到使用mas_前缀,这在开发中需要注意作区分。
如果在当前类引入#import "Masonry.h"之前,用下面两种宏定义声明一下,就不需要区分mas_前缀。
// 定义这个常量,就可以不用在开发过程中使用mas_前缀。
#define MAS_SHORTHAND
// 定义这个常量,就可以让Masonry帮我们自动将基本数据类型(如int、float)自动装箱为对象类型(如NSNumber)。即不需要加@
#define MAS_SHORTHAND_GLOBALS
修饰语
Masonry为了让代码使用和阅读更容易理解,Masonry还添加了and和with两个方法,这两个方法内部只是将self返回,没有任何实际作用,就是为了方便阅读
以下为示例:
make.top.and.bottom.equalTo(self.view).with.offset(padding);
内部实现
- (MASConstraint *)with {
    return self;
}
倍数
在Masonry中可以使用multipledBy来设置一个视图某个参数是另一个视图某个参数的多少倍
[view1 makeConstraints:^(MASConstraintMaker *make) {
    //设置view1的size为父视图的一半
    make.size.equalTo(self.view1).multipliedBy(0.5);
}];
中心点
我们通过设置center属性可以实现控件添加到中心点。
[view1 makeConstraints:^(MASConstraintMaker *make) {
    //中心点和视图的中心对齐
    make.center.equalTo(self.view);
    }];
设置边距
设置四周的边距,如果已经设置了宽度和高度,则边距只有左和上生效
[view makeConstraints:^(MASConstraintMaker *make) {
  //insets不用区分正负,可以四个边距一起设置
  make.edges.equalTo(self.view).insets(UIEdgeInsetsMake(20, 20, 20, 20));

  make.top.equalTo(self.view.mas_top).with.offset(20);
  make.left.equalTo(self.view.mas_left).with.offset(20);
  make.right.equalTo(self.view.mas_right).with.offset(-20);
  make.bottom.equalTo(self.view.mas_bottom).with.offset(-20);
  }];
优先级
priority可以指定一个具体的优先级值,范围在0 ~ 1000,值越大优先级越高。priorityHigh高优先级,优先级值为750。priorityMedium介于高优先级和低优先级之间,优先级值在250 ~ 750之间。priorityLow低优先级,优先级值为250。
优先级写在最后
make.top.equalTo(self.view).with.priority(999);
make.bottom.equalTo(self.view).priorityMedium();
make.left.equalTo(self.view).priorityLow();
make.right.equalTo(self.view).priorityHigh();
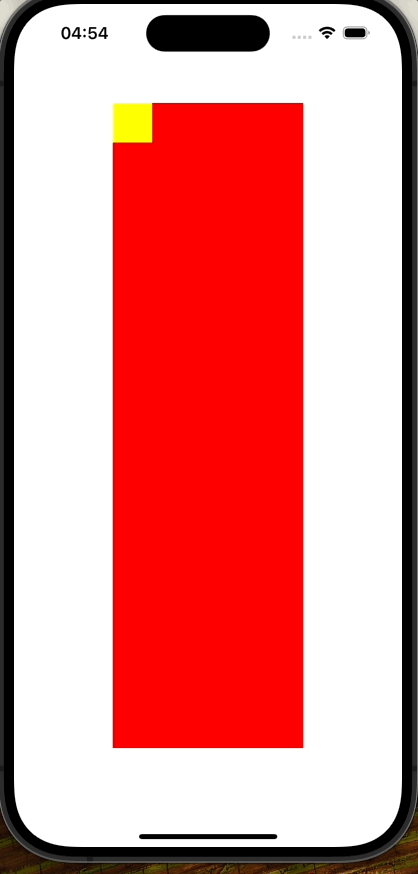
使用
注意:需要先讲子视图加入父视图后,才可以使用。否则会导致崩溃。
- (void)viewDidLoad {
    [super viewDidLoad];
    self.bigView = [[UIView alloc] init];
    UIView* smallView = [[UIView alloc] init];
    smallView.backgroundColor = [UIColor yellowColor];
    _bigView.backgroundColor = UIColor.redColor;
    [self.view addSubview:_bigView];

    [_bigView makeConstraints:^(MASConstraintMaker *make) {
        make.top.equalTo(self.view.mas_top).with.offset(100);
        make.left.equalTo(self.view.mas_left).with.offset(100);
        make.bottom.equalTo(self.view.mas_bottom).with.offset(-100);
        make.right.equalTo(self.view.mas_right).with.offset(-100);
    }];

    UITapGestureRecognizer* tap = [[UITapGestureRecognizer alloc] initWithTarget:self action:@selector(press:)];
    tap.numberOfTapsRequired = 1;
    tap.numberOfTouchesRequired = 1;
    [_bigView addGestureRecognizer:tap];

    [_bigView addSubview:smallView];

    [smallView makeConstraints:^(MASConstraintMaker *make) {
        make.height.width.equalTo(40);
    }];


    // Do any additional setup after loading the view.
}

-(void)press:(UIGestureRecognizer*)tap {
    if (_flag) {
        [_bigView updateConstraints:^(MASConstraintMaker *make) {
            make.top.equalTo(self.view.mas_top).with.offset(10);
            make.left.equalTo(self.view.mas_left).with.offset(10);
            make.bottom.equalTo(self.view.mas_bottom).with.offset(-10);
            make.right.equalTo(self.view.mas_right).with.offset(-10);
        }];
        _flag = NO;
    } else {
        [_bigView updateConstraints:^(MASConstraintMaker *make) {
            make.top.equalTo(self.view.mas_top).with.offset(100);
            make.left.equalTo(self.view.mas_left).with.offset(100);
            make.bottom.equalTo(self.view.mas_bottom).with.offset(-100);
            make.right.equalTo(self.view.mas_right).with.offset(-100);
        }];
        _flag = YES;
    }
}
总结
需要注意:
1.在使用Masonry添加约束之前,需要先使用addSubview:方法添加为子视图才行,否则会导致崩溃。
2.如果没有进行装箱,需要注意区分mas_equalTo和equalTo的区别:
equalTo:仅支持基本类型
mas_equalTo:支持类型转换,支持复杂类型。是对equalTo的封装。
使用Masonry进行框架布局是非常快速便捷的,对其熟练的运用需要不断的练习。